

Welcome back, everyone! In this blog post, we’re diving into the second part of our CircuitPython series, where we will set up an API server on the ESP32. Our focus is on controlling LEDs via HTTP requests. This post will cover everything from hardware connections to the code you need to get your ESP32 up and running.
Table of Contents
- Getting Started with ESP32
- Setting Up CircuitPython
- Connecting to Wi-Fi
- Starting the API Server
- Controlling the LED
- Feedback Mechanisms with the LED
- Testing the API Server
- Conclusion and Next Steps
- FAQ
- Links to Products
Getting Started with ESP32
We’ll be using the ESP32-C6, a tiny yet powerful microcontroller with built-in Wi-Fi capabilities. Its compact size makes it a great choice for IoT projects. To kick things off, let’s take a look at how we’ll connect the LED to the ESP32.
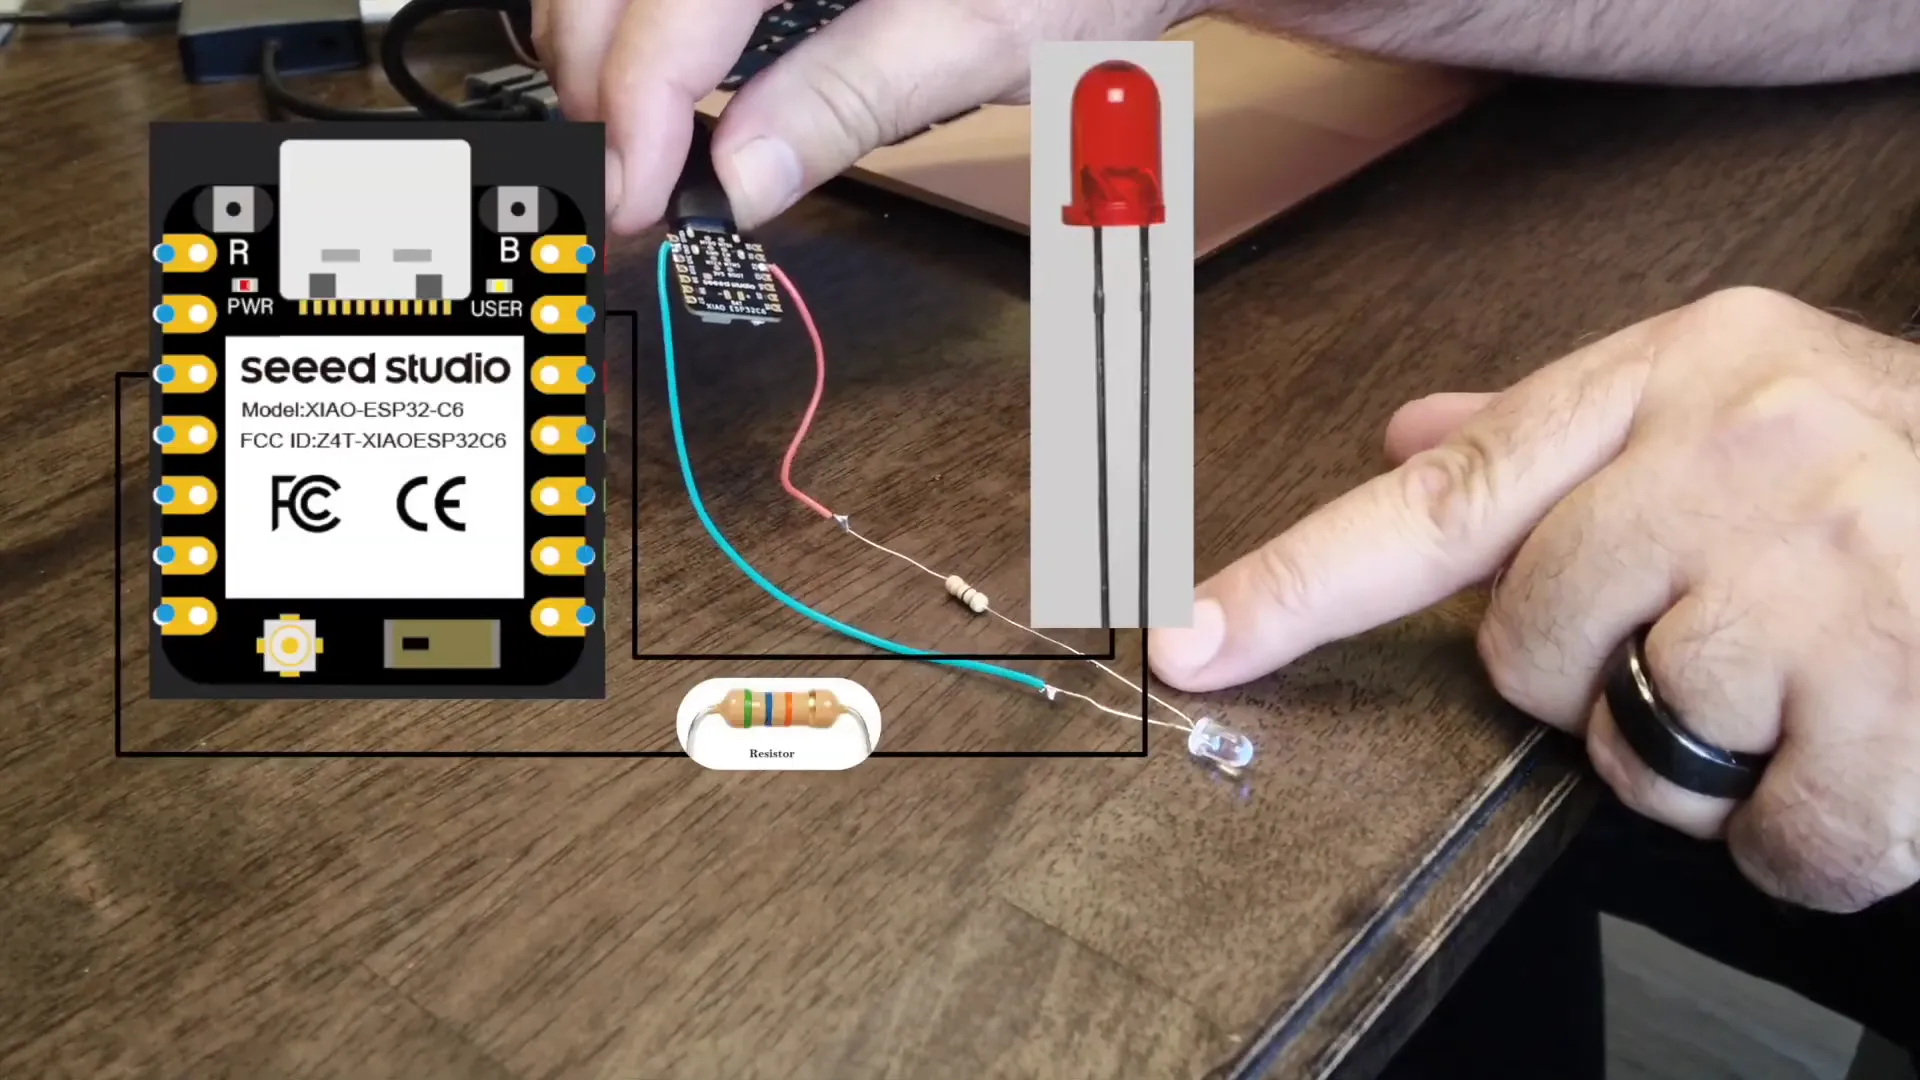
Wiring the LED
To wire the LED, connect the long leg (anode) through a 330-ohm resistor to pin D2 on the ESP32. The short leg (cathode) should go to ground. This simple setup will allow us to control the LED with our API server.
Setting Up CircuitPython
Now that we have our hardware set up, let’s jump into CircuitPython. First, we'll need to modify our program slightly to include the necessary libraries for networking and digital I/O.
Code Overview
In our code, we will define our network credentials and set up the server. Here’s a brief overview:
- We’ll create a
settings.tomlfile to store the Wi-Fi SSID, password, and port. - We’ll establish a connection to the Wi-Fi network.
- We’ll start the server on port 80 (though, for production, consider using port 443 with SSL).
- Finally, we’ll define endpoints to turn the LED on and off.
Connecting to Wi-Fi
Once we have the credentials set up, we’ll attempt to connect to our Wi-Fi network. It’s crucial to use a separate IoT network for security reasons, so consider setting up a guest network specifically for your IoT devices.

Starting the API Server
After successfully connecting to Wi-Fi, we start our API server. Here’s the essential part of the code:
In Settings.tmol file:

SID_VS="YOUR SID"
PAS_VS="YOUR PASSWORD"
PORT=80

/////////////

import socketpool
import wifi
import board
import os
import digitalio

# Connect to WiFi
network_name = os.getenv("SID_VS")
network_password = os.getenv("PAS_VS")

print("Connecting to WiFi...")
wifi.radio.connect(network_name, network_password)
device_ip = wifi.radio.ipv4_address
print("Connected to WiFi with IP:", device_ip)

# Set up LED
led = digitalio.DigitalInOut(board.D2)
led.direction = digitalio.Direction.OUTPUT


# Prepare socket
pool = socketpool.SocketPool(wifi.radio)
server_socket = pool.socket(pool.AF_INET, pool.SOCK_STREAM)
server_socket.bind((str(device_ip), os.getenv("PORT")))  # Bind to device IP
server_socket.listen(1)

print("Listening for connections on port 80")

def receive_request(connection):
    buffer = bytearray(1024)
    request = ""
    while True:
        try:
            num_bytes = connection.recv_into(buffer)
            if num_bytes == 0:
                break
            request += buffer[:num_bytes].decode('utf-8')
        except OSError as e:
            break
    return request

def respond(connection, response):
    response_text = (
        "HTTP/1.1 200 OK\r\n"
        "Content-Type: text/html\r\n"
        "Connection: close\r\n"
        "\r\n" + response
    )
    connection.send(response_text.encode('utf-8'))
    connection.close()

while True:
    print("Waiting for a connection...")
    connection, address = server_socket.accept()
    print(f"Connection from {address}")

    try:
        # Read the request using recv_into
        request = receive_request(connection)
        print("Request:", request)


        if "GET /led/on" in request:
            led.value = True
            print("LED turned on")
            respond(connection, "
LED is now ON
") elif "GET /led/off" in request: led.value = False print("LED turned off") respond(connection, "
LED is now OFF
") else: respond(connection, "
Welcome! Use /led/on or /led/off
") finally: connection.close()
This code establishes a socket pool and starts listening for incoming connections. When a request is received, it will check the endpoint and control the LED accordingly.
Controlling the LED
Now, let’s look at how to control the LED using HTTP requests. We’ll define two endpoints:
/LED/on- This will turn the LED on./LED/off- This will turn the LED off.
When the server receives a request at these endpoints, it will change the LED’s state and respond with a confirmation message.
Feedback Mechanisms with the LED
One enhancement we can make is using the LED to provide feedback on the Wi-Fi connection status. Instead of just turning the LED on and off, we can flash it to indicate whether the connection was successful or not.
Implementing LED Feedback
I’ve added a function to flash the LED a specific number of times based on the connection status:
import socketpool
import wifi
import board
import digitalio
import time  # Import the time module to use time.sleep()

# Connect to WiFi
network_name = os.getenv("SID_VS")
network_password = os.getenv("PAS_VS")

# Set up LED
led = digitalio.DigitalInOut(board.IO2)
led.direction = digitalio.Direction.OUTPUT

def flash_led(times, interval):
    """Function to flash the LED a given number of times with a specified interval."""
    for _ in range(times):
        led.value = True
        time.sleep(interval)
        led.value = False
        time.sleep(interval)

print("Connecting to WiFi...")

try:
    wifi.radio.connect(network_name, network_password)
    device_ip = wifi.radio.ipv4_address
    print("Connected to WiFi with IP:", device_ip)
    # Flash LED 3 times, once per second, for successful connection
    flash_led(3, 1)
except Exception as e:
    print("Failed to connect to WiFi:", e)
    # Flash LED 5 times, 0.2 second intervals, for failed connection
    flash_led(5, 0.2)

# Prepare socket only if WiFi connection is successful
if wifi.radio.ipv4_address:
    pool = socketpool.SocketPool(wifi.radio)
    server_socket = pool.socket(pool.AF_INET, pool.SOCK_STREAM)
    server_socket.bind((str(device_ip), os.getenv("PORT")))  # Bind to device IP
    server_socket.listen(1)

    print("Listening for connections on port 80")

    def receive_request(connection):
        buffer = bytearray(1024)
        request = ""
        while True:
            try:
                num_bytes = connection.recv_into(buffer)
                if num_bytes == 0:
                    break
                request += buffer[:num_bytes].decode('utf-8')
            except OSError as e:
                break
        return request

    def respond(connection, response):
        response_text = (
            "HTTP/1.1 200 OK\r\n"
            "Content-Type: text/html\r\n"
            "Connection: close\r\n"
            "\r\n" + response
        )
        connection.send(response_text.encode('utf-8'))
        connection.close()

    while True:
        print("Waiting for a connection...")
        connection, address = server_socket.accept()
        print(f"Connection from {address}")

        try:
            # Read the request using recv_into
            request = receive_request(connection)
            print("Request:", request)

            if "GET /led/on" in request:
                led.value = True
                print("LED turned on")
                respond(connection, "
LED is now ON
") elif "GET /led/off" in request: led.value = False print("LED turned off") respond(connection, "
LED is now OFF
") else: respond(connection, "
Welcome! Use /led/on or /led/off
") finally: connection.close()
If the board connects to Wi-Fi, it will flash the LED three times slowly; if it fails, it will flash five times quickly. This provides immediate feedback on the connection status.
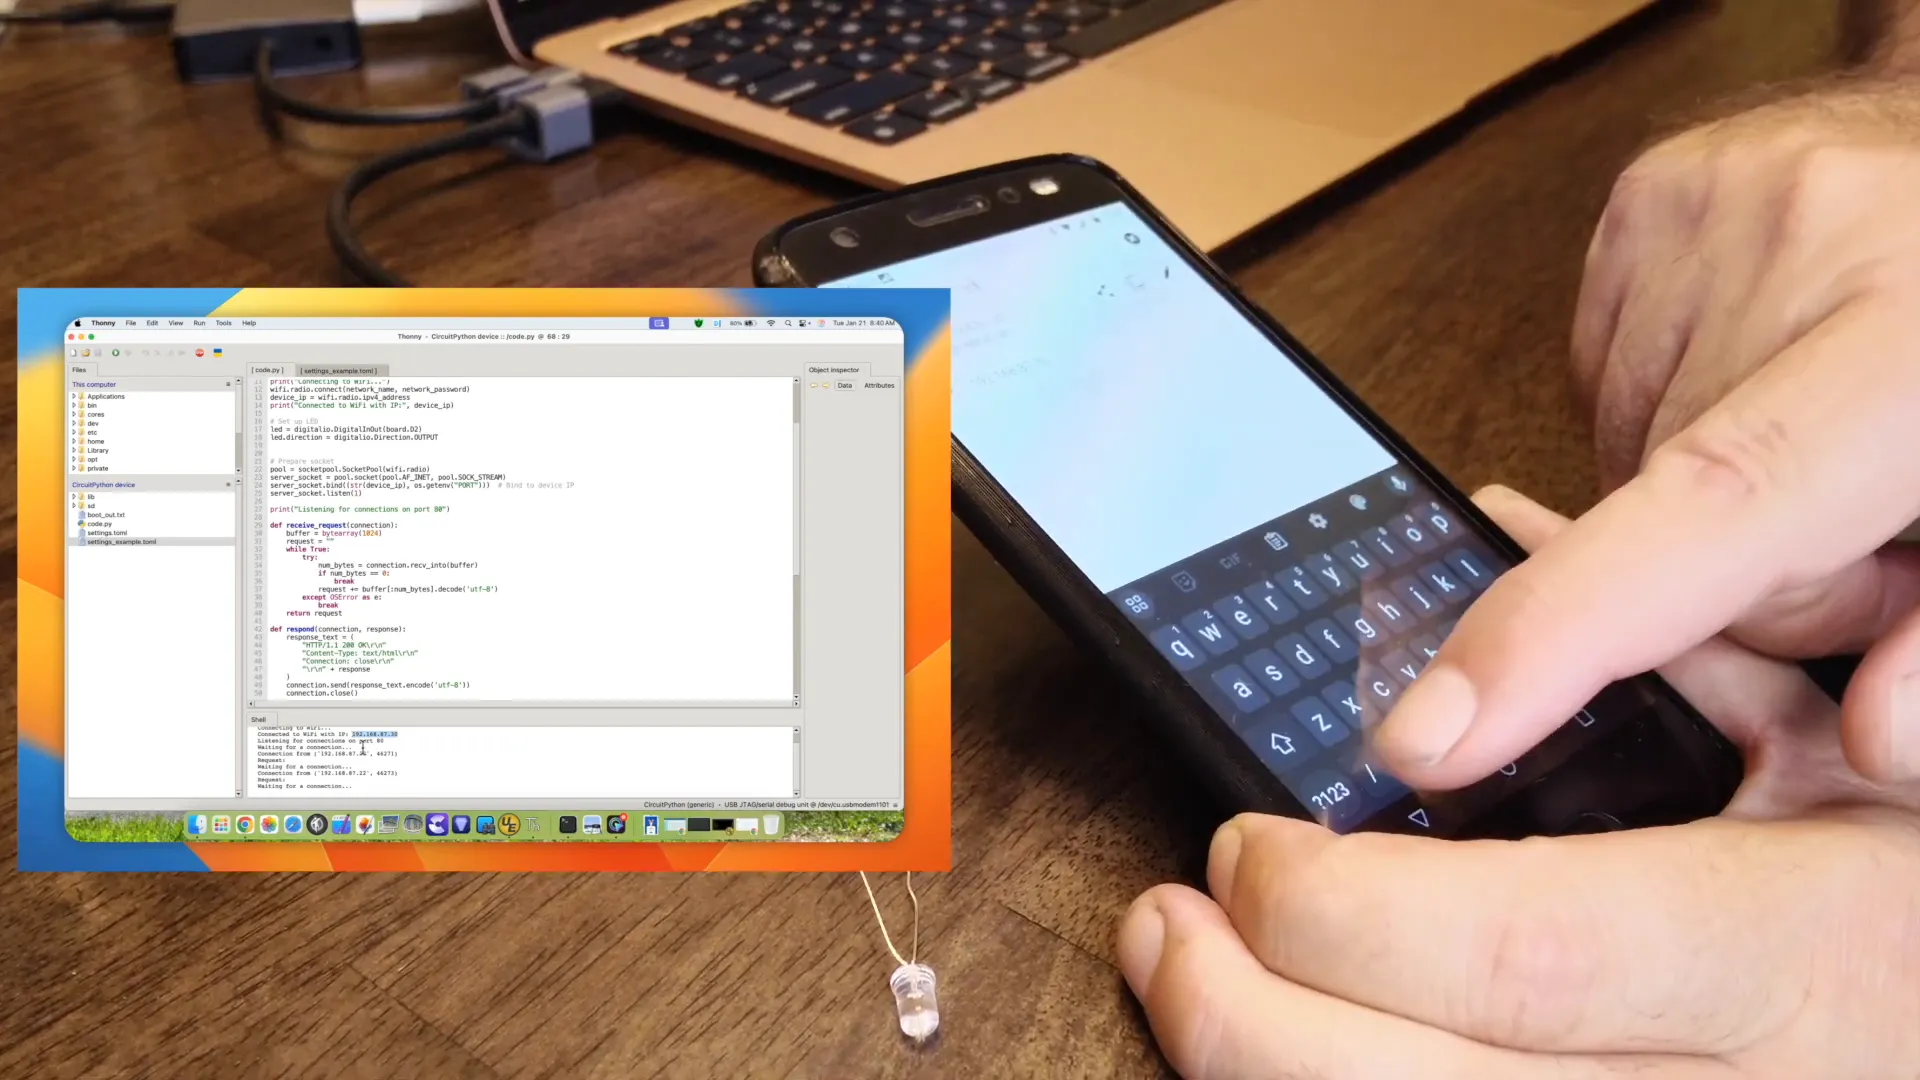
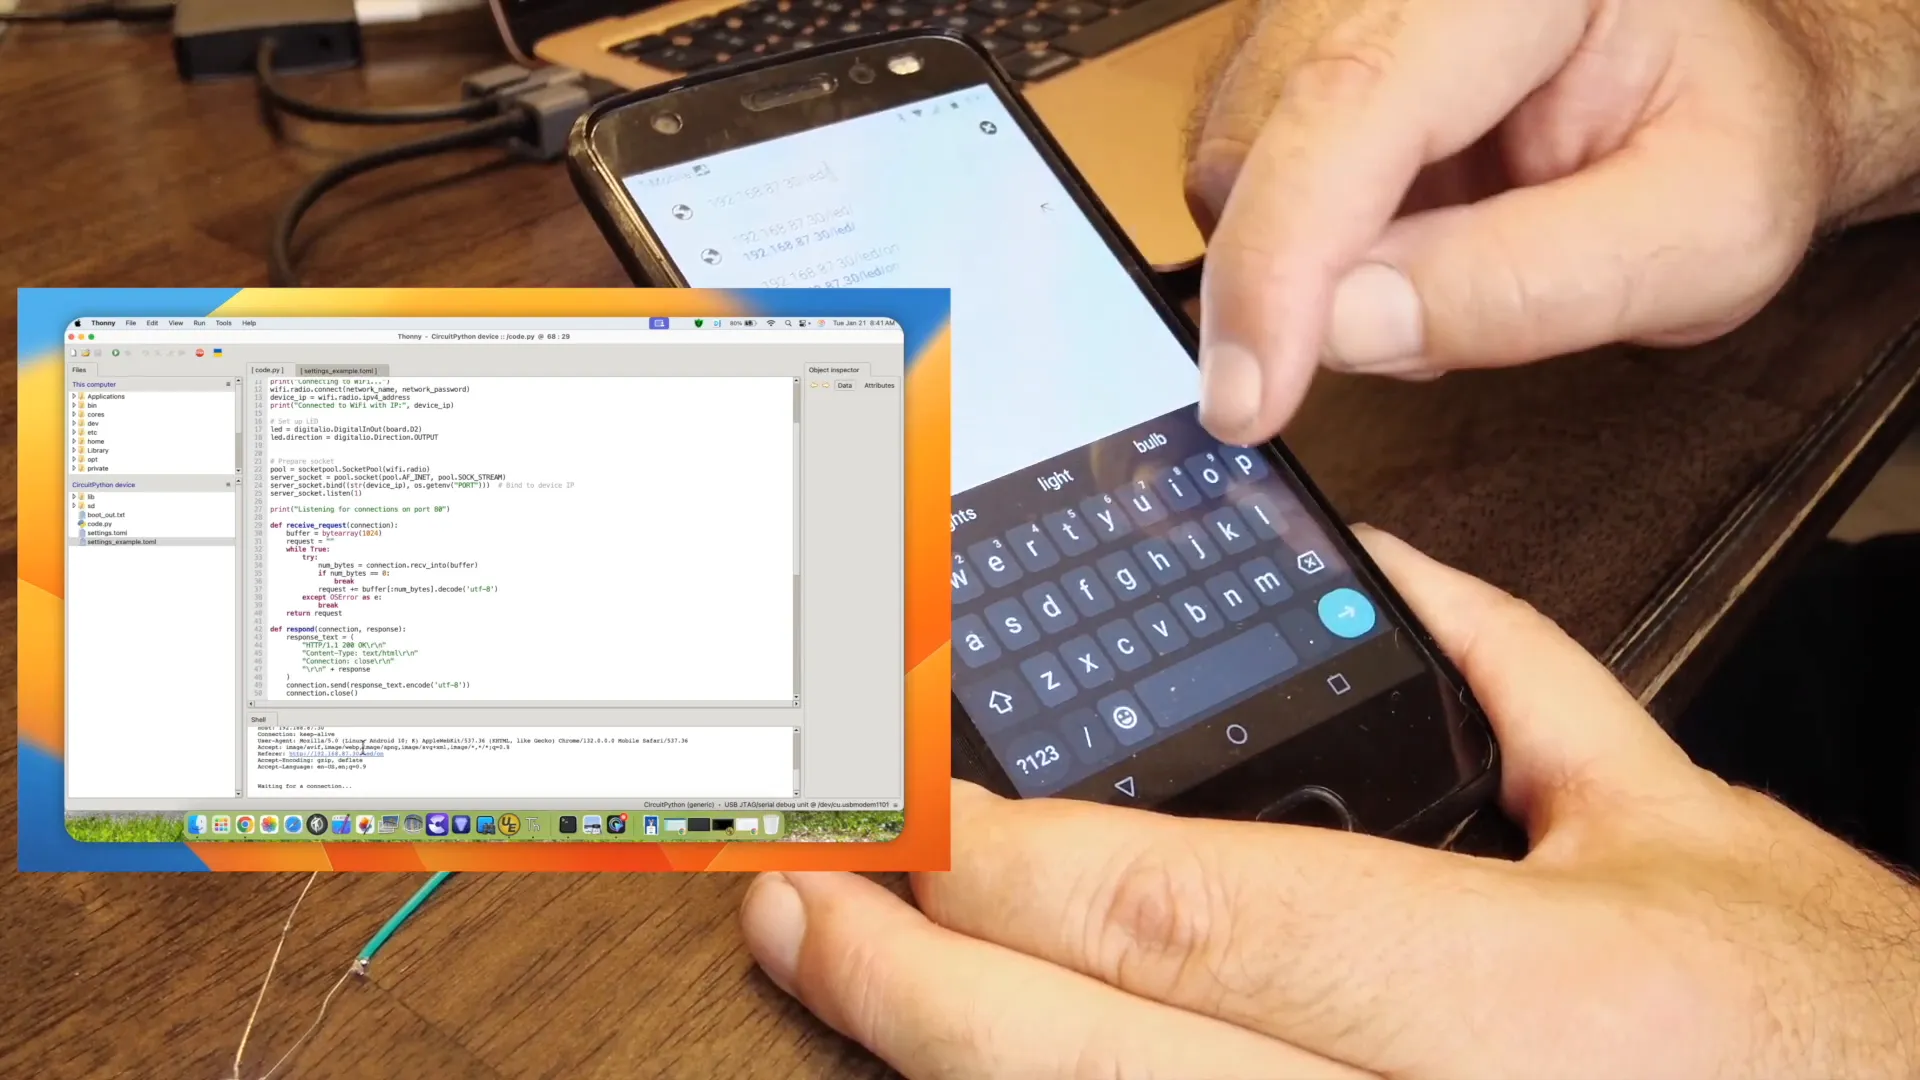
Testing the API Server
With everything in place, it’s time to test our API server. You can use your smartphone or a web browser to send requests to the server.
When you access http://_YOUR IP_/, the LED should turn on, and you should see a response indicating that the LED is now on. Similarly, accessing http:/ will turn the LED off.
Conclusion and Next Steps
This setup provides a solid foundation for controlling devices via HTTP requests using the ESP32 and CircuitPython. In our next video, we’ll explore how to integrate this setup with Meshtastic, allowing for expanded communication capabilities.
Thank you for following along! Stay tuned for more exciting projects and tutorials in the world of IoT!
FAQ
What is CircuitPython?
CircuitPython is an education-focused derivative of MicroPython designed to make it easier to get started with programming and electronics.
Can I use other microcontrollers for this project?
Yes, while this guide uses the ESP32, you can adapt the code for other microcontrollers that support CircuitPython.
How do I secure my API server?
For production, it’s essential to use SSL and authentication tokens to secure your API endpoints.
What are the advantages of using a separate IoT network?
Using a separate network for IoT devices improves security by isolating them from your main network, reducing the risk of unauthorized access.