
Getting Started with the ESP32: Flashing LEDs and Programming Basics
Published by Vivian van Zyl in ESP32 Microcontrollers the 01/15/2025 at 09:26 pm

In this blog, we will explore the ESP32 C6, a versatile microcontroller that enables exciting projects like LED flashing through programming in CircuitPython. We’ll guide you through setting it up with your PC, installing necessary software, and running your first LED program.
Table of Contents
Introduction to ESP32 C6
The ESP32 C6 is a powerful microcontroller that integrates Wi-Fi and Bluetooth connectivity, making it an excellent choice for IoT projects. Its versatility allows developers to create various applications ranging from simple LED blinking to complex AI-driven systems.
This microcontroller stands out due to its low power consumption and extensive feature set, making it suitable for battery-operated devices. With the ESP32 C6, you have the capability to connect multiple devices seamlessly within a network.
Overview of Microcontrollers
Microcontrollers are compact integrated circuits designed to govern a specific operation in an embedded system. They consist of a processor, memory, and input/output peripherals on a single chip. The ESP32 C6 is one such microcontroller that excels in both performance and functionality.
Microcontrollers are widely used in various applications, including automation, robotics, and consumer electronics. The ESP32 C6, with its dual-core processor, can handle multiple tasks simultaneously, making it a preferred choice for developers.
- Processor: The ESP32 C6 features a powerful dual-core processor, enabling efficient multitasking.
- Connectivity: Built-in Wi-Fi and Bluetooth capabilities allow for easy integration into IoT ecosystems.
- Low Power Consumption: Ideal for battery-powered applications, enhancing the longevity of devices.
- Rich Development Environment: Supports various programming languages, including CircuitPython, making it accessible for beginners and experts alike.
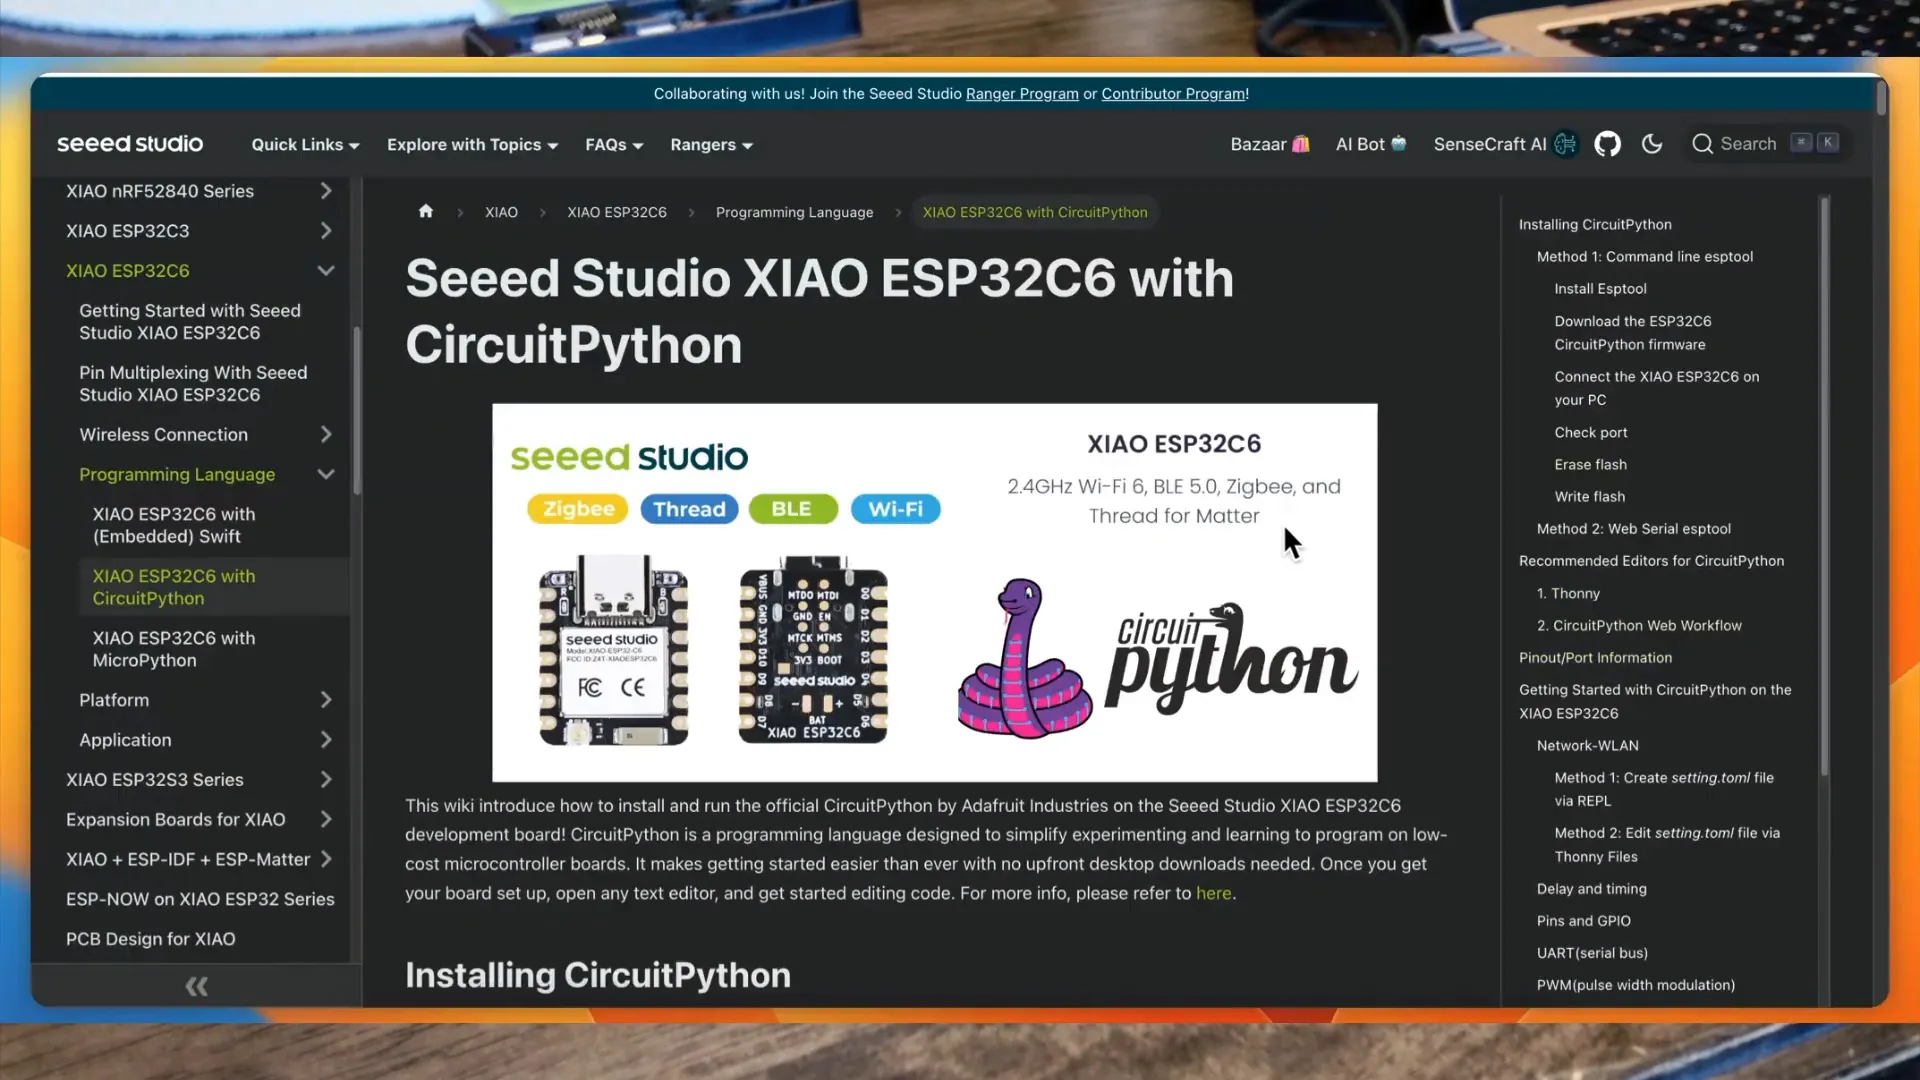
Installing CircuitPython on ESP32 C6
To begin programming the ESP32 C6, you need to install CircuitPython. This user-friendly programming environment simplifies the coding process, making it accessible to all skill levels.
First, download the CircuitPython firmware for the ESP32 C6 from the official website. Once downloaded, connect your ESP32 C6 board to your computer via USB.
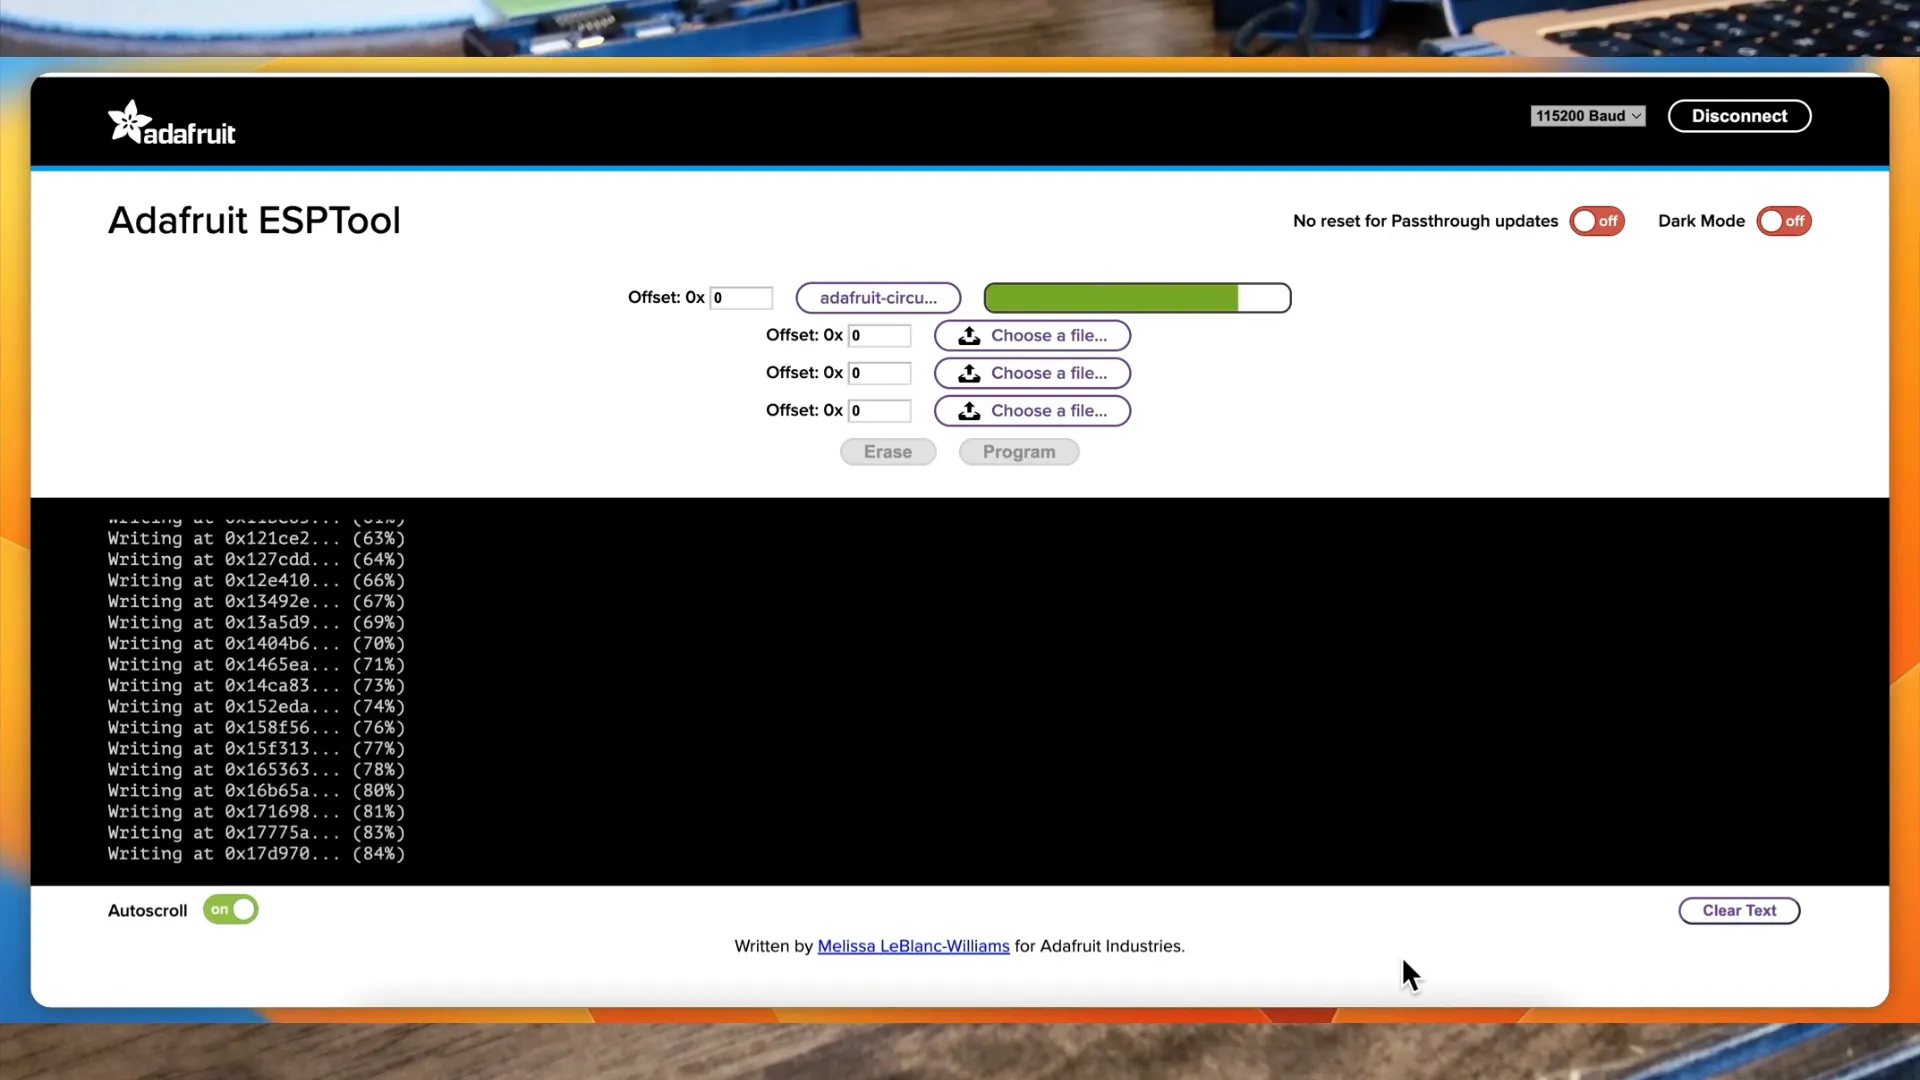
Next, use the Adafruit ESP tool to flash the firmware onto the microcontroller. This tool streamlines the installation process and ensures everything is set up correctly.
After successfully flashing the firmware, you will see the CircuitPython file system appear on your computer, indicating the installation was successful.
Thonny IDE Installation
Thonny is an integrated development environment (IDE) that simplifies coding in Python and CircuitPython. To get started, download and install Thonny from its official website. The installation process is straightforward and compatible with Windows, Mac, and Linux.
After installation, configure Thonny to recognize the ESP32 C6. In Thonny, go to the 'Tools' menu, select 'Options,' and then choose 'Interpreter.' Here, select 'CircuitPython' and let Thonny automatically detect the port.
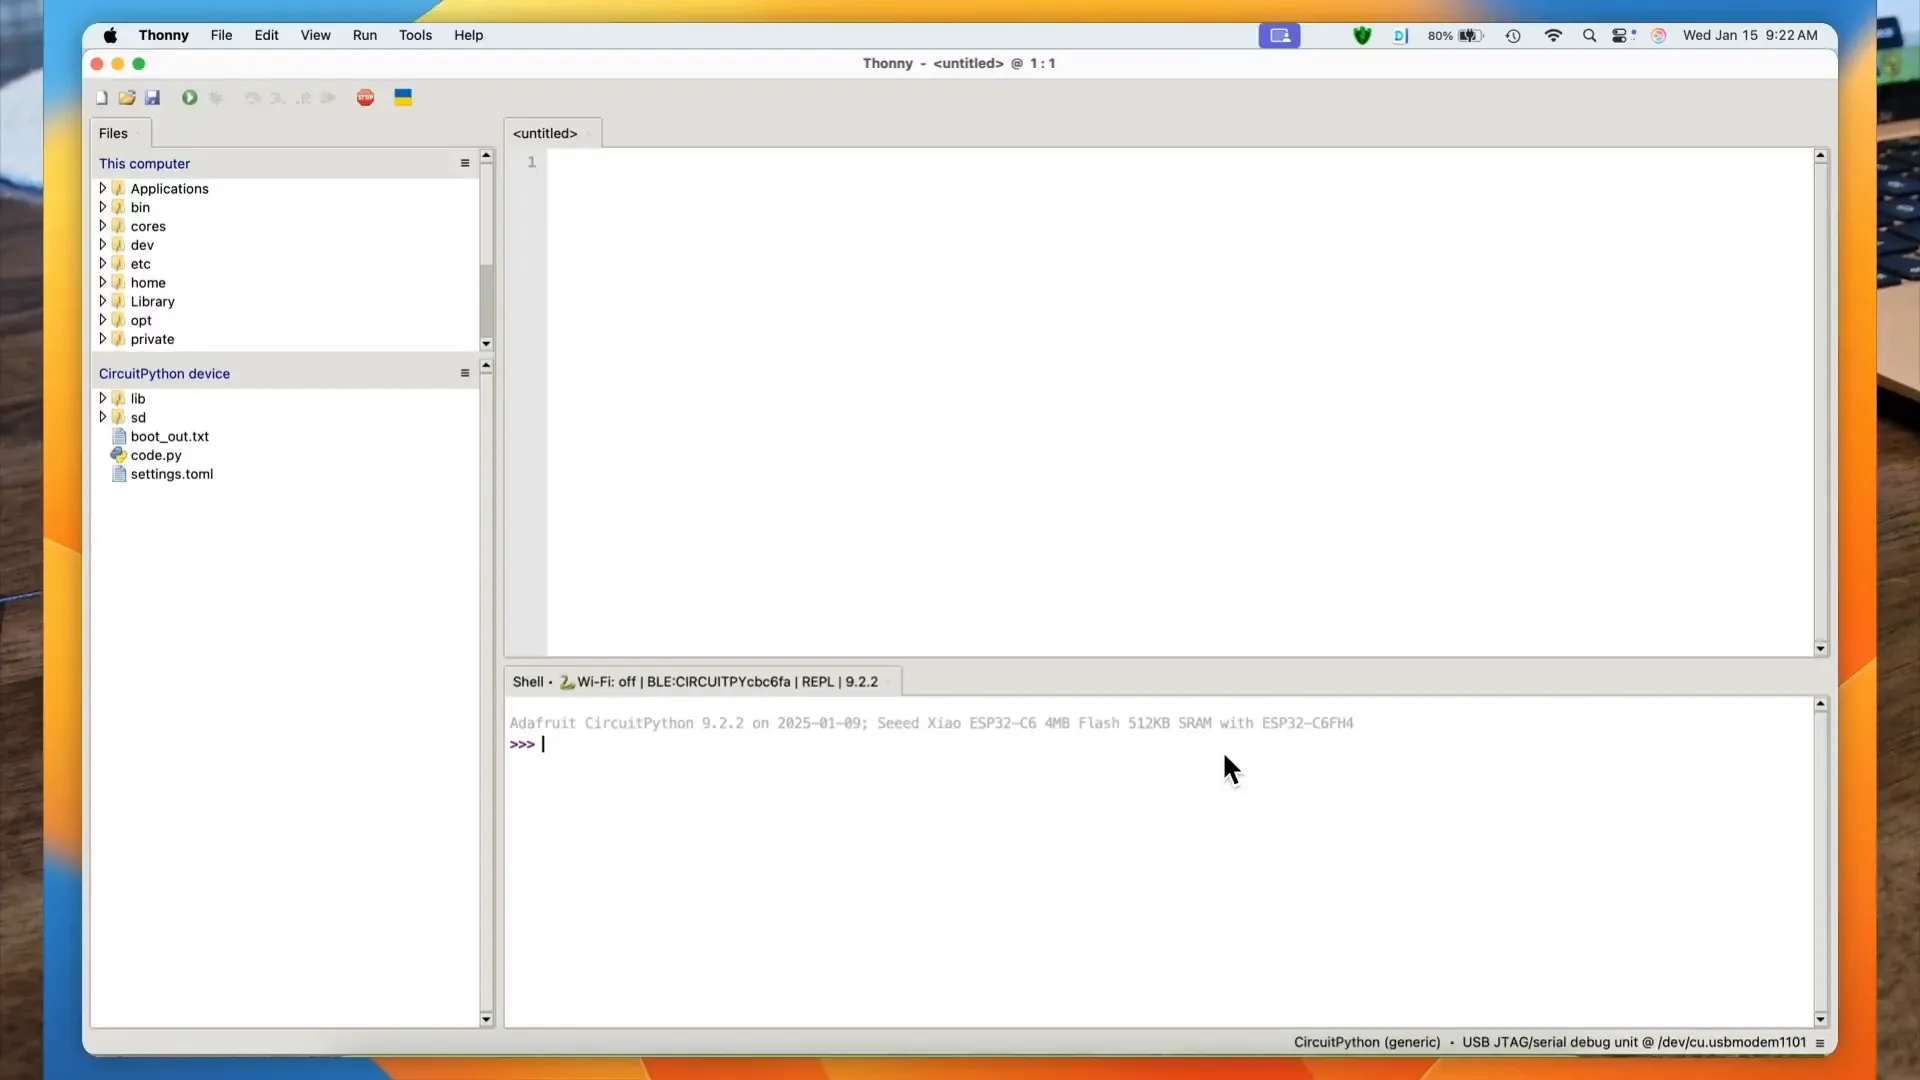
Once configured, Thonny will allow you to write and upload code directly to the ESP32 C6, making development a breeze.
Writing Your First LED Flashing Program
Flashing an LED is a classic beginner project that demonstrates the capabilities of the ESP32 C6. Start by connecting an LED to the board, ensuring the longer leg connects to a GPIO pin (for example, D2) through a resistor.
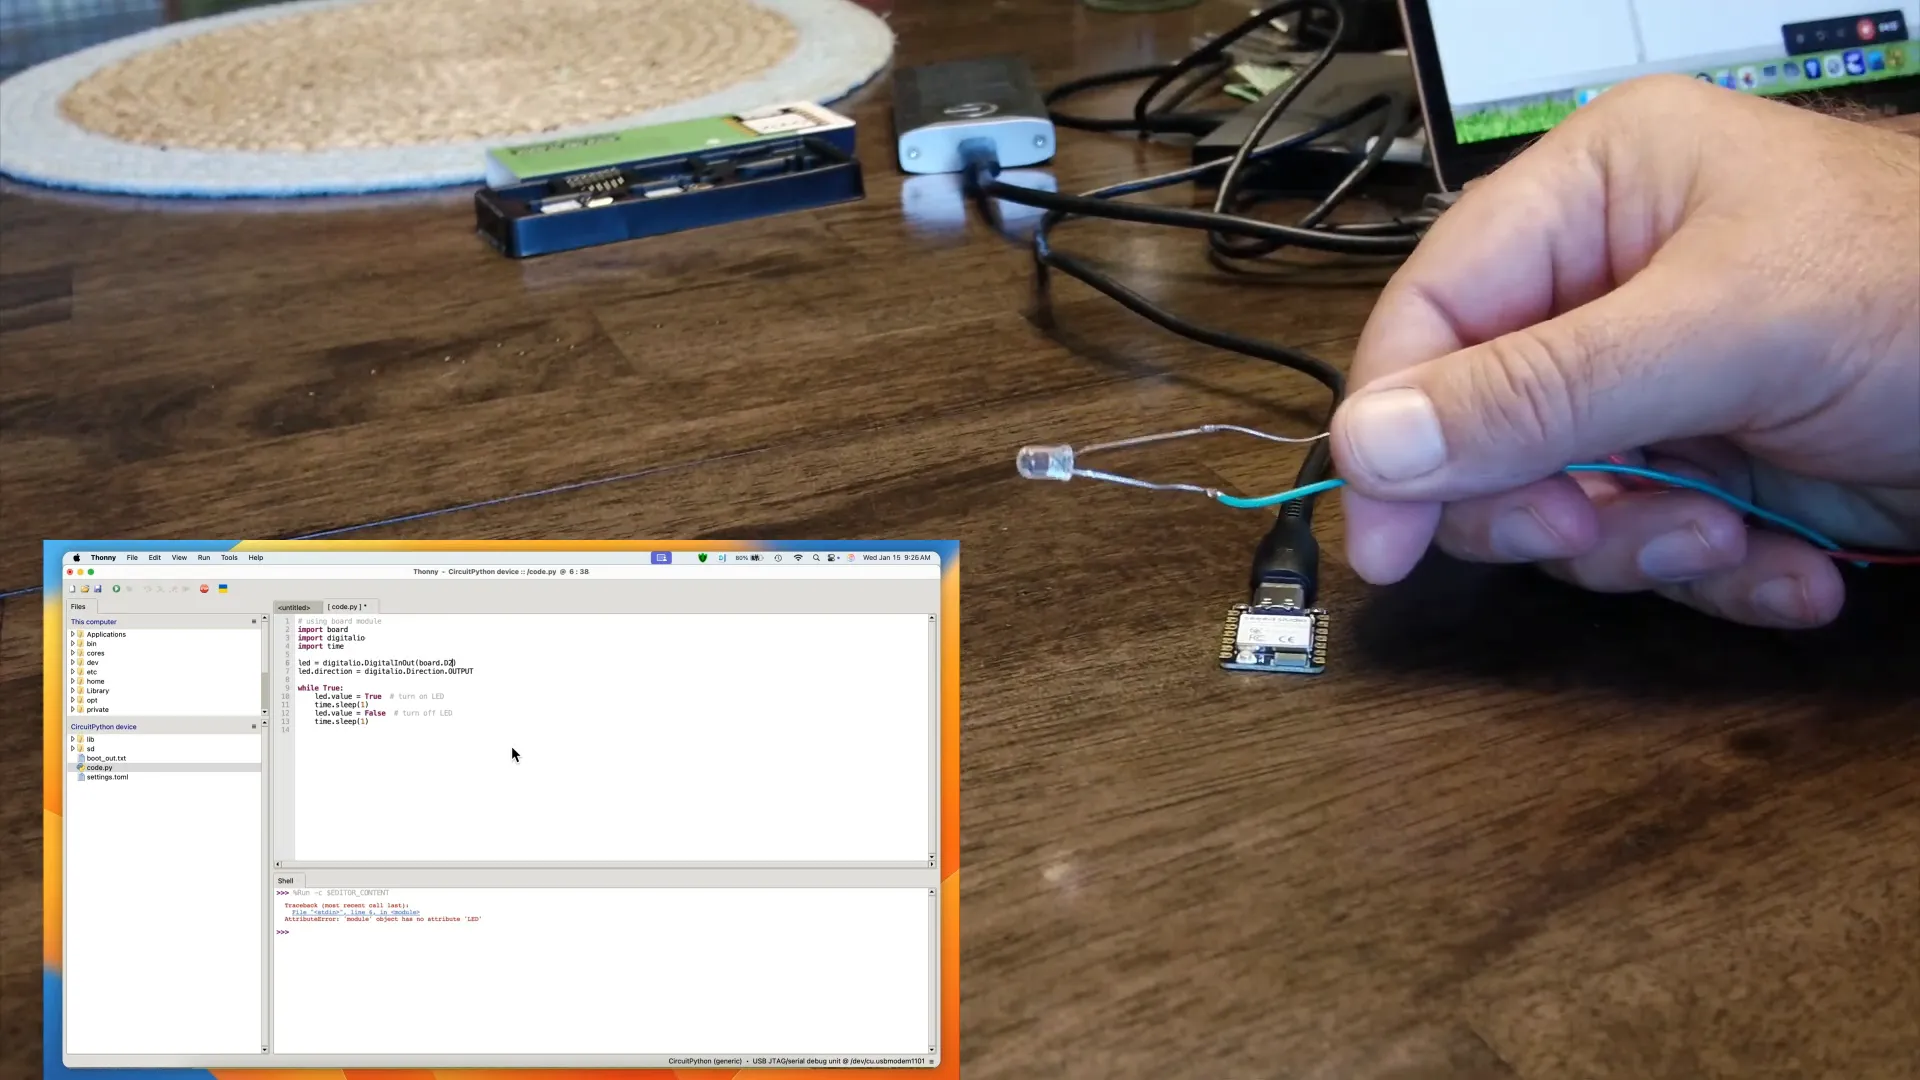
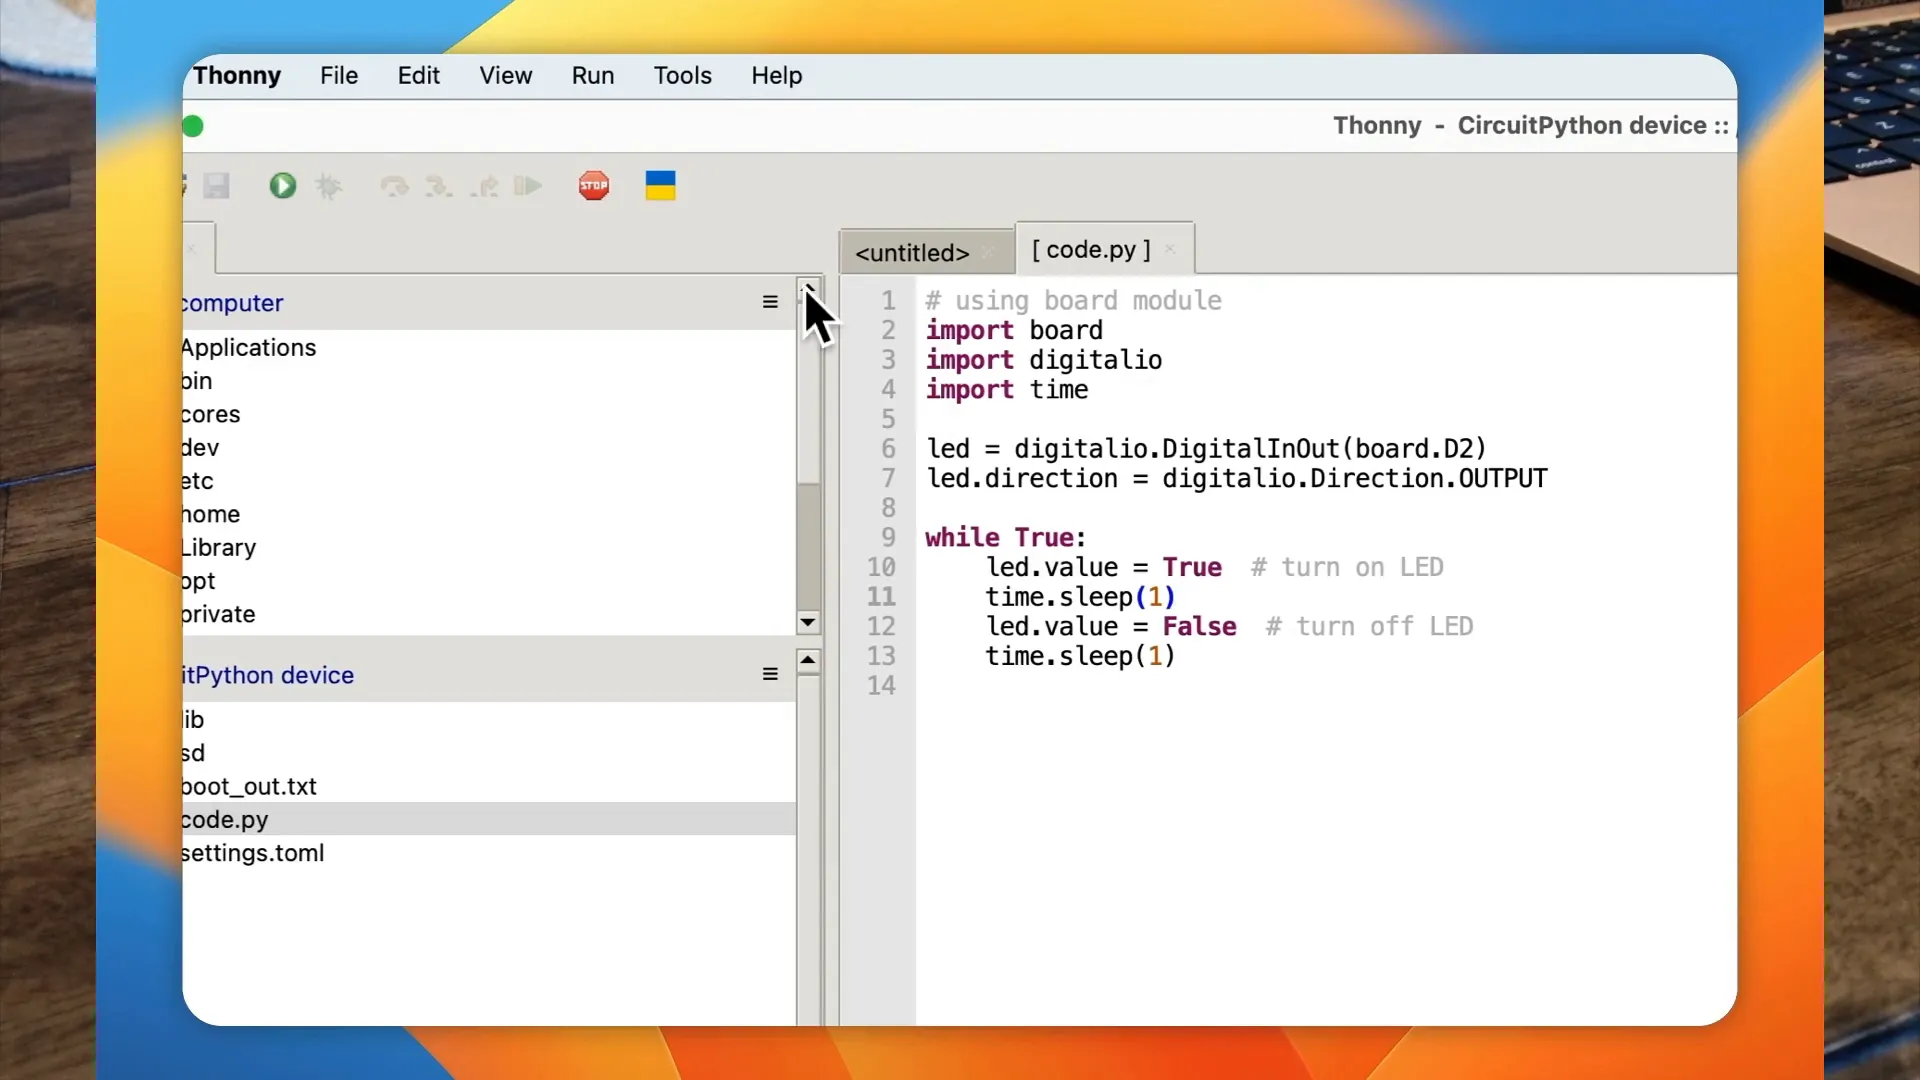
In Thonny, write a simple program to control the LED. The code will import the necessary libraries, define the pin, and create a loop to turn the LED on and off at intervals.
import time
import board
import digitalio

led = digitalio.DigitalInOut(board.D2)
led.direction = digitalio.Direction.OUTPUT

while True:
    led.value = True
    time.sleep(1)
    led.value = False
    time.sleep(1)
After writing the code, save it as code.py on the ESP32 C6. Upon resetting the board, the LED should start flashing, indicating that your program is running successfully.
Troubleshooting Common Issues
While working with the ESP32 C6 and CircuitPython, you may encounter some common issues. Here are a few troubleshooting tips to help you overcome them:
- Connection Issues: Ensure that the USB cable is functioning properly and that the board is recognized by your computer.
- Code Not Running: Double-check that your code is saved as code.py in the root directory of the CircuitPython file system.
- LED Not Flashing: Verify the LED connections and ensure that the correct GPIO pin is used in your code.
- Thonny Not Detecting Board: Make sure the correct interpreter is selected, and try restarting Thonny and reconnecting the board.
By following these steps, you can resolve many common issues and continue developing exciting projects with the ESP32 C6.
Understanding the ESP32 Features
The ESP32 C6 is packed with features that make it a standout choice for both hobbyists and professionals. Its dual-core processor allows for efficient multitasking, while integrated Wi-Fi and Bluetooth make connectivity seamless.
Here are some key features that are noteworthy:
- Wi-Fi and Bluetooth: The ESP32 supports both Wi-Fi and Bluetooth, enabling a wide range of applications from simple data transmission to complex IoT systems.
- Low Power Modes: It offers various low power modes, making it ideal for battery-operated devices that require energy efficiency.
- Rich Peripheral Support: With support for various peripherals such as ADC, PWM, I2C, and SPI, the ESP32 can be easily integrated into different projects.
- Secure Connections: The ESP32 supports secure sockets layer (SSL) and transport layer security (TLS), ensuring that data transmission is encrypted and secure.
Using the Adafruit ESP Tool
The Adafruit ESP tool is a versatile application that simplifies the process of flashing firmware onto the ESP32. This tool is user-friendly and supports both Mac and Windows operating systems.
To use the Adafruit ESP tool: (or use the online version here.. )
- Download the latest version from the Adafruit website.
- Connect your ESP32 to your computer using a USB cable.
- Launch the tool and select the correct serial port for your device.
- Choose the firmware file you downloaded earlier and click 'Program.'
Once the programming is complete, the tool will verify the installation, confirming that CircuitPython is successfully flashed onto the ESP32.
Connecting the Hardware
Connecting the ESP32 to your hardware components is a crucial step. Let's focus on connecting an LED, which is a common first project.
To connect an LED to your ESP32, follow these steps:
- Identify the GPIO pin you wish to use. For this example, we will use D2.
- Connect the longer leg (anode) of the LED to the chosen GPIO pin (D2) through a 330 Ohm resistor.
- Connect the shorter leg (cathode) of the LED to the ground (GND) pin on the ESP32.
Ensure all connections are secure to avoid any issues during testing. Once connected, your hardware setup is ready for programming.
Testing the LED Flashing Code
With the hardware connected, it’s time to test your LED flashing code. This program will turn the LED on and off at specified intervals, demonstrating the functionality of the ESP32.
Here’s a simple code snippet to get you started:
import time
import board
import digitalio

led = digitalio.DigitalInOut(board.D2)
led.direction = digitalio.Direction.OUTPUT

while True:
    led.value = True
    time.sleep(1)  # LED ON
    led.value = False
    time.sleep(1)  # LED OFF
Save this code as code.py in your CircuitPython file system. When you reset the ESP32, the LED should start flashing as programmed.
Next Steps: Building an API Server
Now that you have a basic understanding of the ESP32 and have tested a simple LED program, the next exciting step is to build an API server. This will allow your ESP32 to communicate with other devices over the network.
To create an API server on the ESP32, you will need to use libraries that support HTTP requests. Here’s a basic outline of what you’ll do:
- Install the required libraries that support network functionality.
- Set up a basic web server using the built-in HTTP server capabilities of the ESP32.
- Define endpoints to handle requests and send responses.
This project opens up a world of possibilities for remote control and data monitoring. The API server can be expanded to include different functionalities based on your project needs.
FAQ about ESP32 Programming
As you dive deeper into programming the ESP32, you may have some questions. Here are some frequently asked questions that can help clarify common concerns:
- What programming languages can I use with the ESP32? The ESP32 supports several programming languages, including C, C++, and Python (via CircuitPython).
- Can I use multiple GPIO pins for different components? Yes, the ESP32 allows you to use multiple GPIO pins simultaneously for various components like sensors and motors.
- How do I reset the ESP32? You can reset the ESP32 by pressing the reset button on the board or by unplugging and replugging the USB cable.
- What should I do if my code doesn’t work? Double-check your connections, ensure your code is correctly written and saved as code.py, and review any error messages in the Thonny IDE.