
Heltec Wireless Tracker V2 Guide: GPS, MeshCore, and Meshtastic
Published by Vivian van Zyl in Meshcore the 05/19/2026 at 11:53 pm
The Heltec Wireless Tracker V2 is one of those little devices that immediately makes sense the moment you pick it up. It is compact, it has the ESP32-S3, it includes built-in GPS, and it feels like it was made to be a proper portable mesh tracker instead of a general-purpose node.
That is also why I like it. For Meshtastic and MeshCore, this is not really what I would call a great solar node. The ESP32-S3 is not where I would go for ultra-low-power solar deployments. But for a tracker you can throw into a case, carry with you, and actually use on the move, this thing looks very promising.
I wanted to test the important bits properly:
- Can it be flashed cleanly on Windows?
- Does Meshtastic work well on it?
- Does MeshCore work well on it?
- And most importantly, does the built-in GPS actually work?
Table of Contents
- The hardware: small, tidy, and built for tracking
- Why this is better as a tracker than a solar node
- Windows driver issue: what to do if your PC does not see the Heltec device
- Flashing Meshtastic on the Heltec Wireless Tracker V2
- Initial Meshtastic setup over Bluetooth
- Meshtastic node discovery and what “unknown nodes” means
- Testing the built-in GPS in Meshtastic
- Flashing MeshCore on the Heltec Wireless Tracker V2
- MeshCore setup and pairing
- How MeshCore behaves differently from Meshtastic
- Testing channels and messaging in MeshCore
- Does GPS work in MeshCore too?
- What I liked most about the Heltec Wireless Tracker V2
- Final thoughts
- FAQ
The hardware: small, tidy, and built for tracking
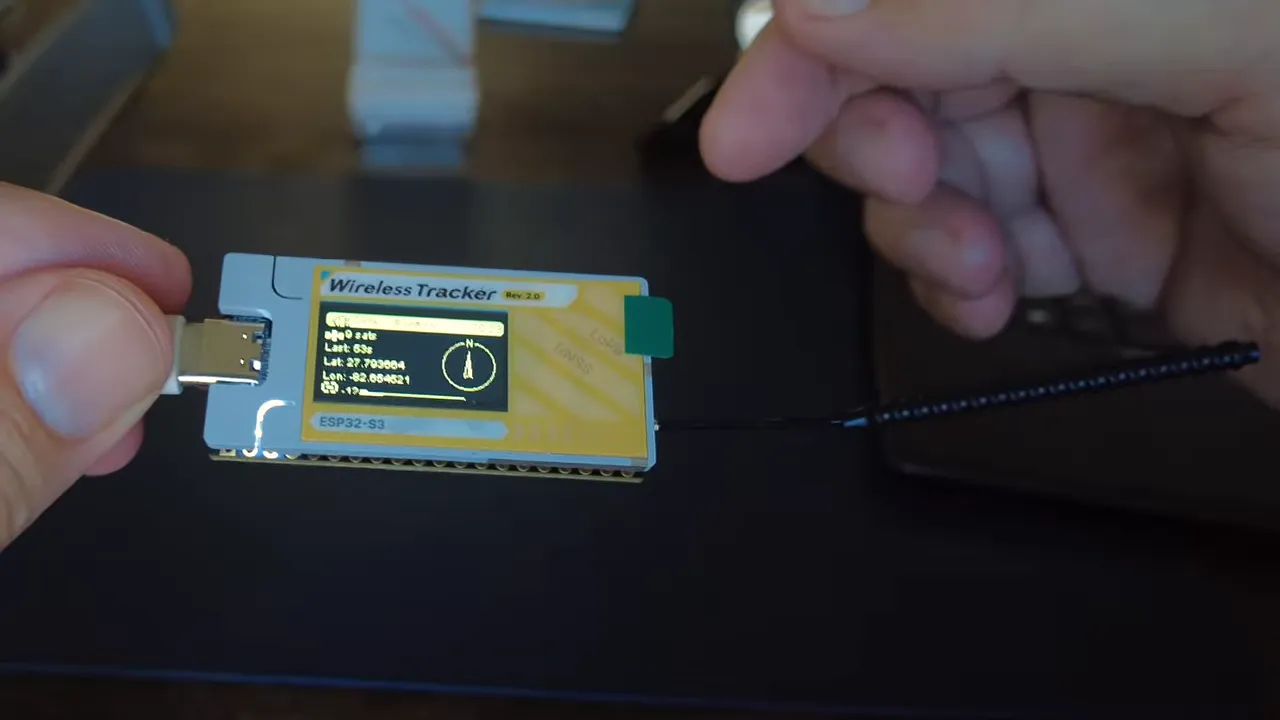
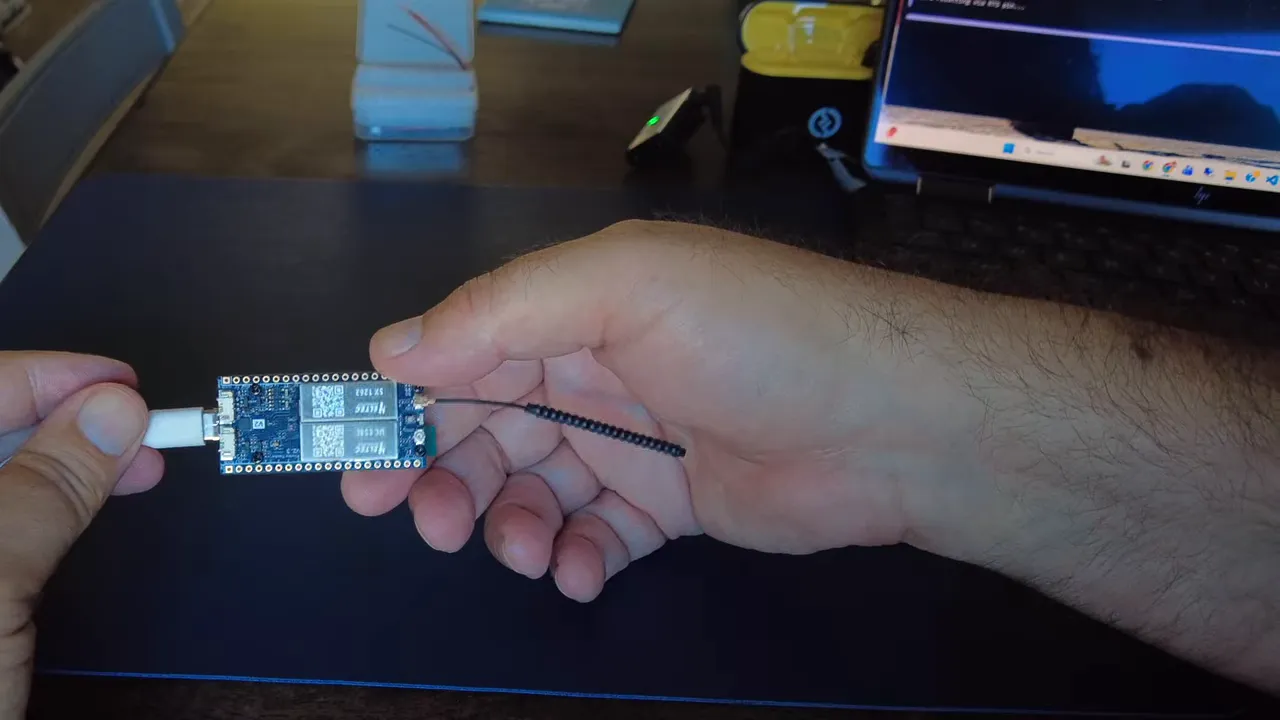
Out of the box, the Heltec Wireless Tracker V2 is a nice compact little unit. It includes:
- ESP32-S3 processor
- Built-in GPS/GNSS
- LoRa antenna connection
- External GPS antenna connection
- Power and solar connectors
- A small onboard display
It also ships with the usual tiny LoRa antenna in the box. I used that just to get started, but realistically I would swap it for something better later.
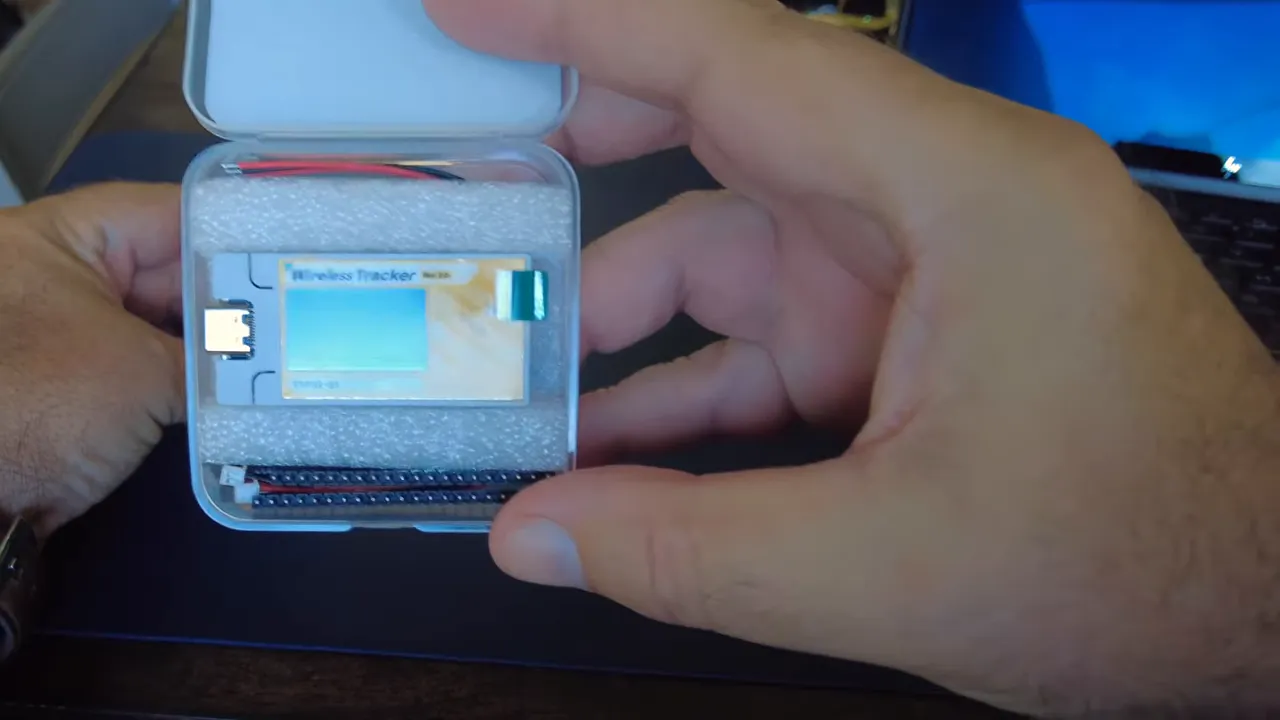
On the board, one side is marked for LoRa and the other for GNSS. That makes setup straightforward. Clip the LoRa antenna on, connect a known-good USB cable, and you are ready to start flashing firmware.
One practical note here: use a USB cable that you know supports data. A lot of flashing issues end up being cable issues.
Why this is better as a tracker than a solar node
This is worth repeating because it matters when choosing hardware. The Tracker V2 uses an ESP32-S3, which is great for capability, but not ideal for super low power always-on solar use. If your goal is a permanently deployed solar repeater or remote node, there are better choices for that job.
But if your goal is a portable tracking node with built-in GPS in a very small package, this starts looking like a really strong option.
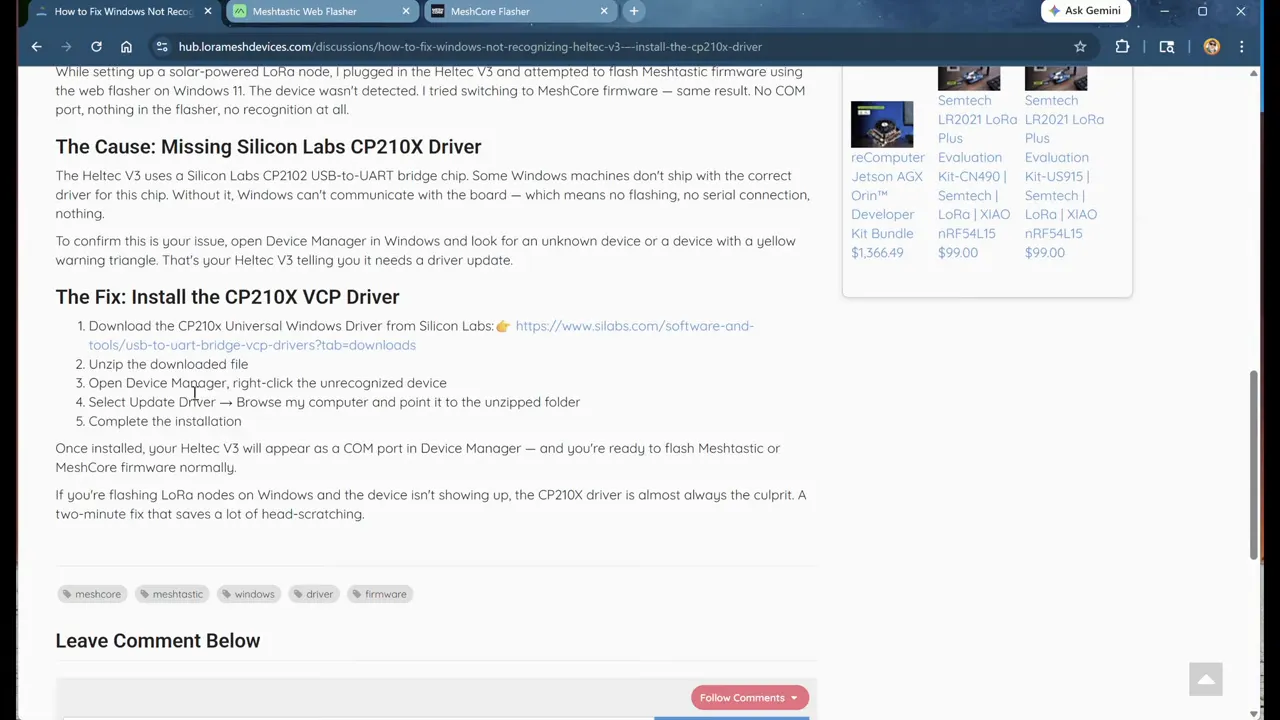
Windows driver issue: what to do if your PC does not see the Heltec device
I normally do this kind of flashing from a Mac, but this time I used Windows. Right away, I ran into one of the classic Windows problems: the machine did not recognize the device properly at first.
If that happens, the fix is usually to install the correct Silicon Labs driver. I put together a write-up for that on the LoraMeshDevices Hub, because this comes up often enough that it is worth checking first.
The basic idea is simple:
- Plug the device in.
- If Windows does not recognize it, install the Silicon Labs universal Windows driver.
- Reconnect the device and try again.
If your Heltec is invisible to the flasher, do not fight the firmware tools first. Fix the driver layer first.
Flashing Meshtastic on the Heltec Wireless Tracker V2
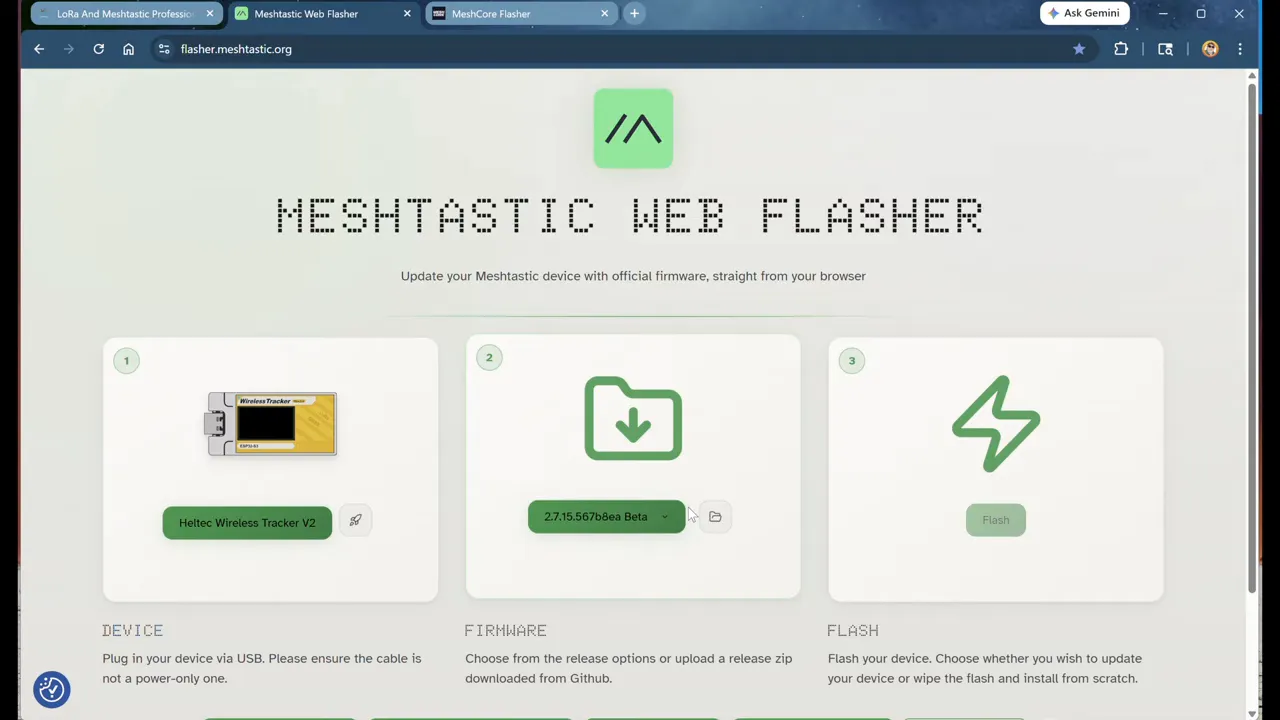
For Meshtastic, I used the web flasher at flasher.meshtastic.org. The process is mostly straightforward, but there are a couple of gotchas.
Select the correct device
In the flasher, choose:
- Heltec
- Wireless Tracker V2
One wrinkle here is that because this hardware is still relatively new, the appropriate firmware may only be available in the alpha channel rather than the normal stable or beta selections. That was the case when I tested it.
So if the flash button is not available, check the firmware channel. Switching to alpha made the correct firmware selectable.
Do a full erase
I recommend doing a full flash erase to wipe the factory firmware. The device comes with factory test firmware loaded, and I prefer starting clean.
The sequence I used was:
- Select the Tracker V2 in the flasher
- Choose the latest alpha build
- Enable full erase
- Click erase and flash
- Select the correct serial/JTAG device when the browser prompts for it
Avoid the auto-detect trap
This is one of those little annoyances that wastes time. The browser auto-detect option has never been particularly reliable for me. It can leave the serial port open or confuse the process.
If flashing fails after trying auto-detect, refresh the page, manually select the device again, and start over. That solved it here.
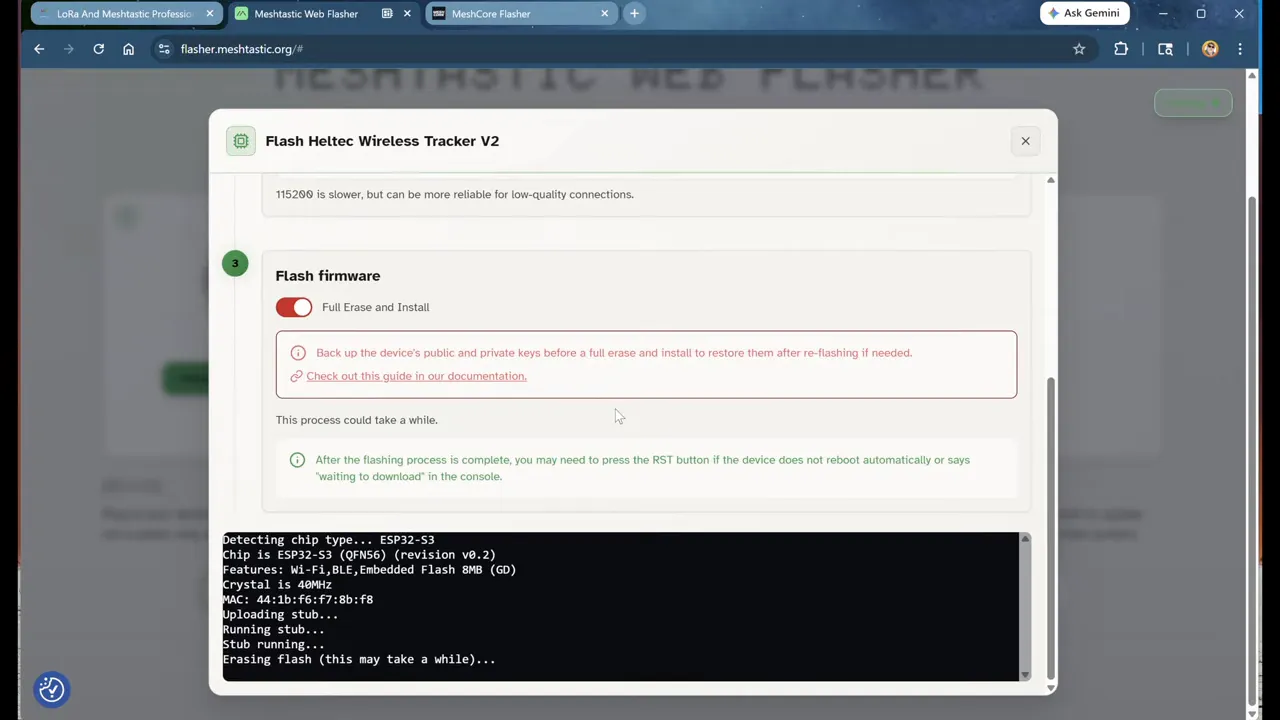
Once the flasher reaches the message about hard resetting via RTS pin, the firmware is loaded and the device should reboot into Meshtastic.
Initial Meshtastic setup over Bluetooth
After flashing, the Tracker V2 boots into Meshtastic and can be configured either using the onboard buttons or through the Meshtastic mobile app. The buttons do work, but the screen is tiny, so I prefer the app.
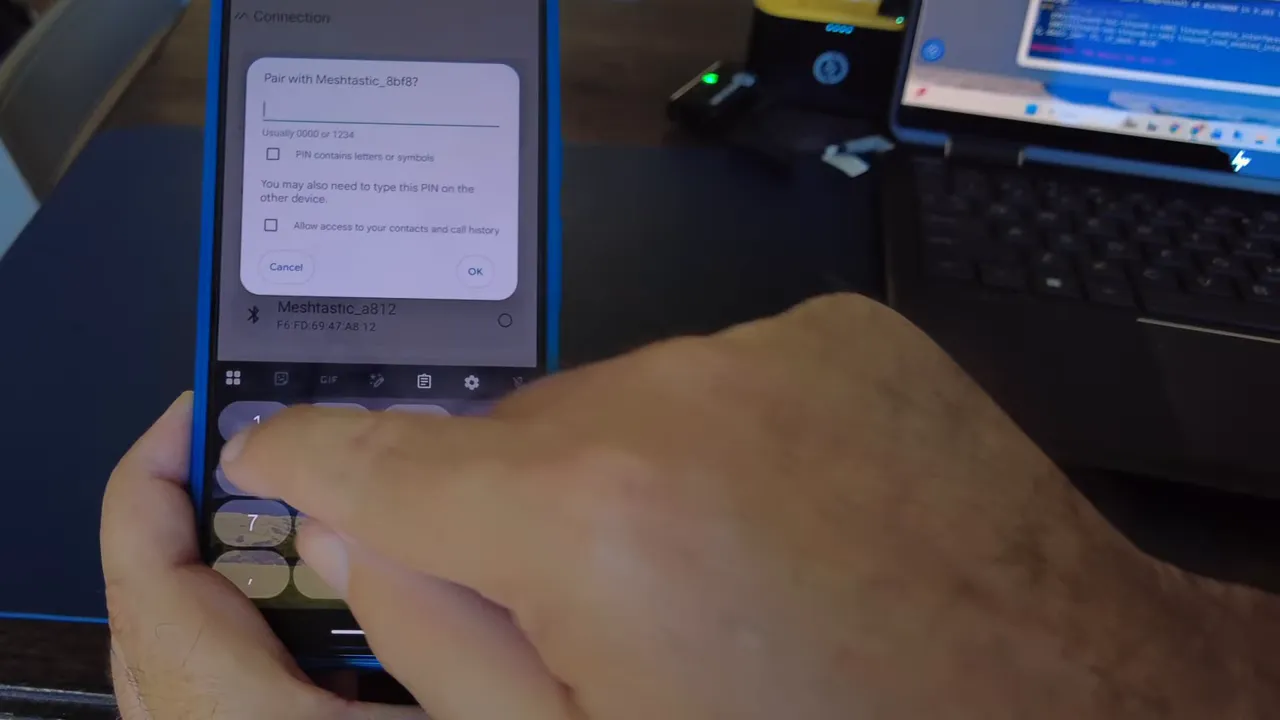
Using Bluetooth pairing was easy enough:
- Open the Meshtastic app
- Scan for nearby devices
- Select the Tracker V2
- Enter the Bluetooth pairing code shown on the device display
Once connected, I went straight into configuration.
Set your LoRa region
In the app, go into LoRa settings and select the correct region. In my case, that was United States.
I left the rest of the radio configuration alone and kept the preset at LongFast, which is what we use here. That may be different depending on where you are.
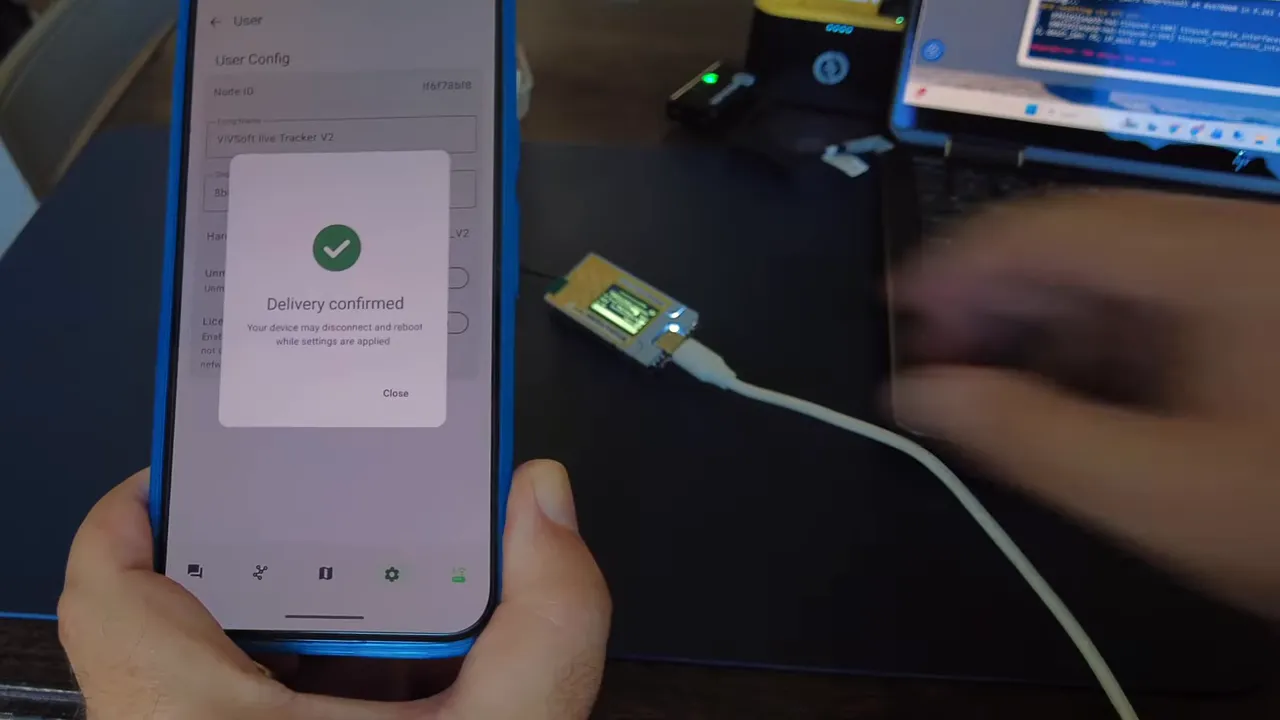
After saving, the device reboots. That is normal.
Rename the node
I also renamed the node so it would show up more cleanly in the network. I set the user name to something recognizable and left the short name simple.
Again, saving causes another reboot.
Meshtastic node discovery and what “unknown nodes” means
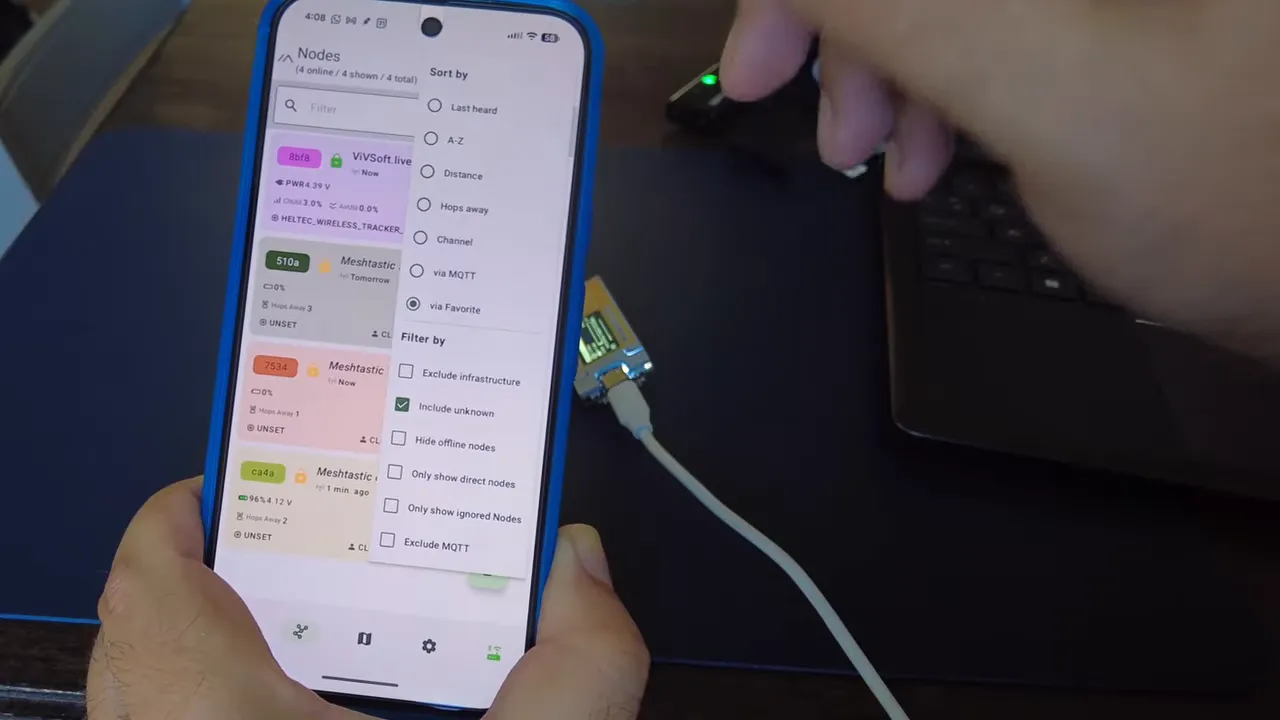
When the Tracker V2 first came online, it had already heard other nodes nearby, but their names had not been resolved yet. In the app this can look confusing, especially if you are expecting a full list right away.
If you enable show unknown devices, you can see nodes the device has already heard but has not fully identified yet. As the app and node continue working in the background, those unknown entries gradually resolve into named nodes.
So if it looks like your tracker is alone at first, give it a few minutes. It may simply still be resolving the network around it.
Testing the built-in GPS in Meshtastic
The built-in GPS is one of the main reasons this device is interesting, so I wanted to verify whether it was truly working and not just listed on paper.
Inside the Meshtastic device configuration, I checked the Position settings. The app showed GPS mode as enabled, which was a good sign that the hardware had been detected correctly.
At first, though, there was no position fix.
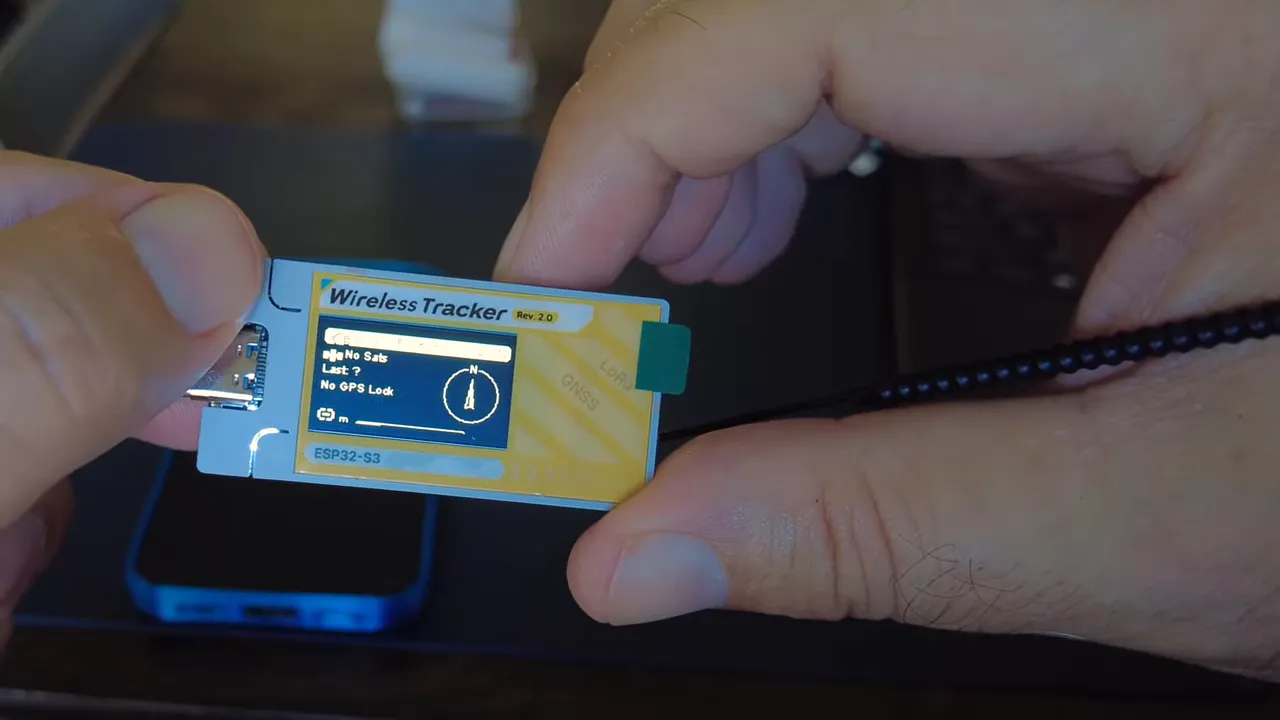
That is normal for a fresh GPS start, especially indoors. On the device itself, the GPS screen showed:
- No satellites
- No GPS lock
- No sats
I moved the device closer to a window, then eventually took it outside for a few minutes. After roughly five minutes, it started locking onto satellites.
Once it had line of sight to the sky, the GPS came to life properly. It initially showed up to 22 satellites, and once back indoors it was still holding onto around 9. That is actually very solid for a small integrated tracker.
With GPS working, the device updated time correctly and location became available inside the Meshtastic app.
Location privacy settings in Meshtastic
Meshtastic gives you control over how precisely your location is shared. In channel settings, you can choose to share your precise position or blur it with a privacy radius. In my setup, I could use the slider to announce a location within a given radius, rather than an exact point.
That is a nice feature if you want tracking functionality without broadcasting your exact position to everyone on the mesh.
Radio performance check
I also tested a traceroute to a nearby node. The Tracker V2 handled that fine, and one nice detail here is that this newer hardware can run at 28 dB, compared to 22 dB on the earlier Tracker V1. So you are getting a little more punch from the radio side as well.
At this point, Meshtastic on the Heltec Wireless Tracker V2 was working well:
- Flashed successfully
- Bluetooth paired successfully
- Region configured correctly
- Node discovery working
- GPS working
- Traceroute working
Flashing MeshCore on the Heltec Wireless Tracker V2
Next I wanted to test MeshCore, because a tracker like this is even more interesting when it works cleanly across both ecosystems.
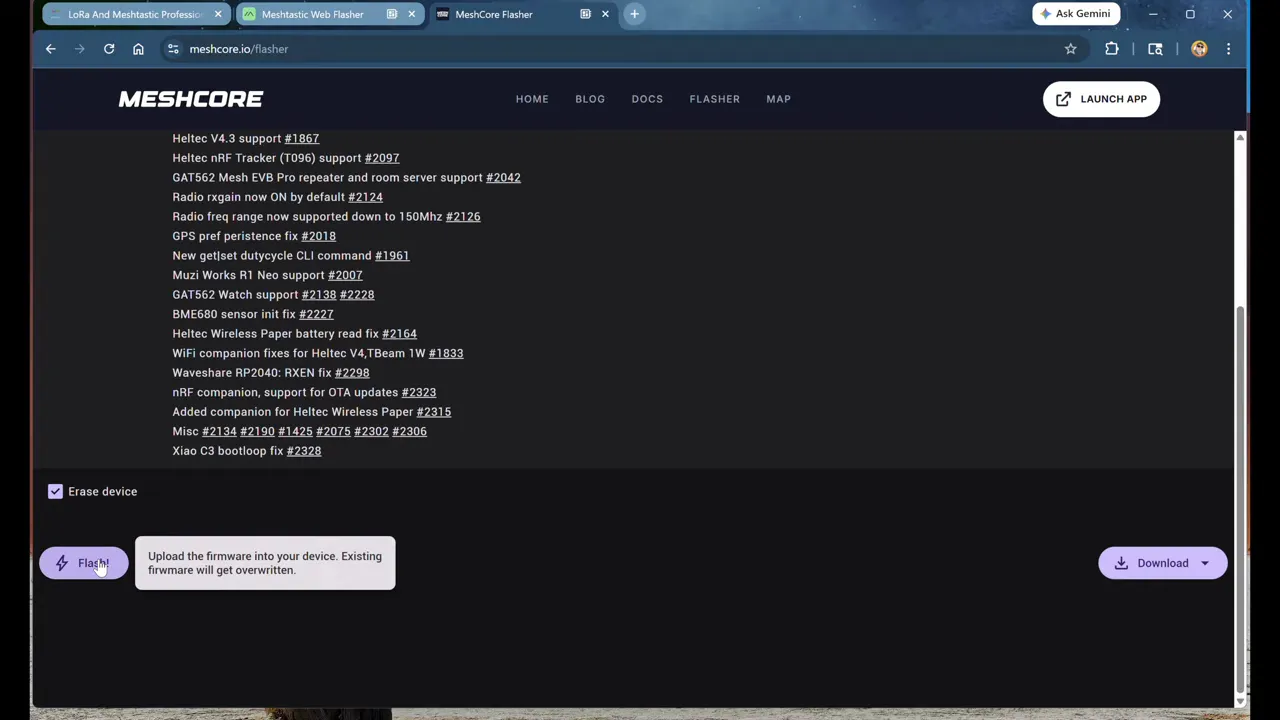
For that, I used the MeshCore flasher at meshcore.io/flasher.
Select the right MeshCore firmware target
In the supported devices list, choose the Heltec Tracker V2. Then pick the mode you want.
For most people using this with a phone, the right option is Companion via Bluetooth. That is the one I selected.
I also chose to erase the device before flashing so there would not be any leftovers from the Meshtastic installation.

If MeshCore will not flash, use bootloader mode
This is the big troubleshooting point for MeshCore on this device.
If Meshtastic is already loaded, the flasher may not immediately take over. In my case, the device showed up with the existing firmware identity and refused to flash cleanly.
The fix was to manually put the Tracker V2 into flashing mode:
- Press and hold the boot button
- Press the reset button
- Release reset
- Release boot
- Retry the flash process
Once that worked, the device appeared again as the proper JTAG/flash device, and the MeshCore flashing process continued normally.
After flashing completed and the device was reset, it booted into MeshCore. The first boot took a little longer, which is something I have seen on other MeshCore nodes as well.
MeshCore setup and pairing
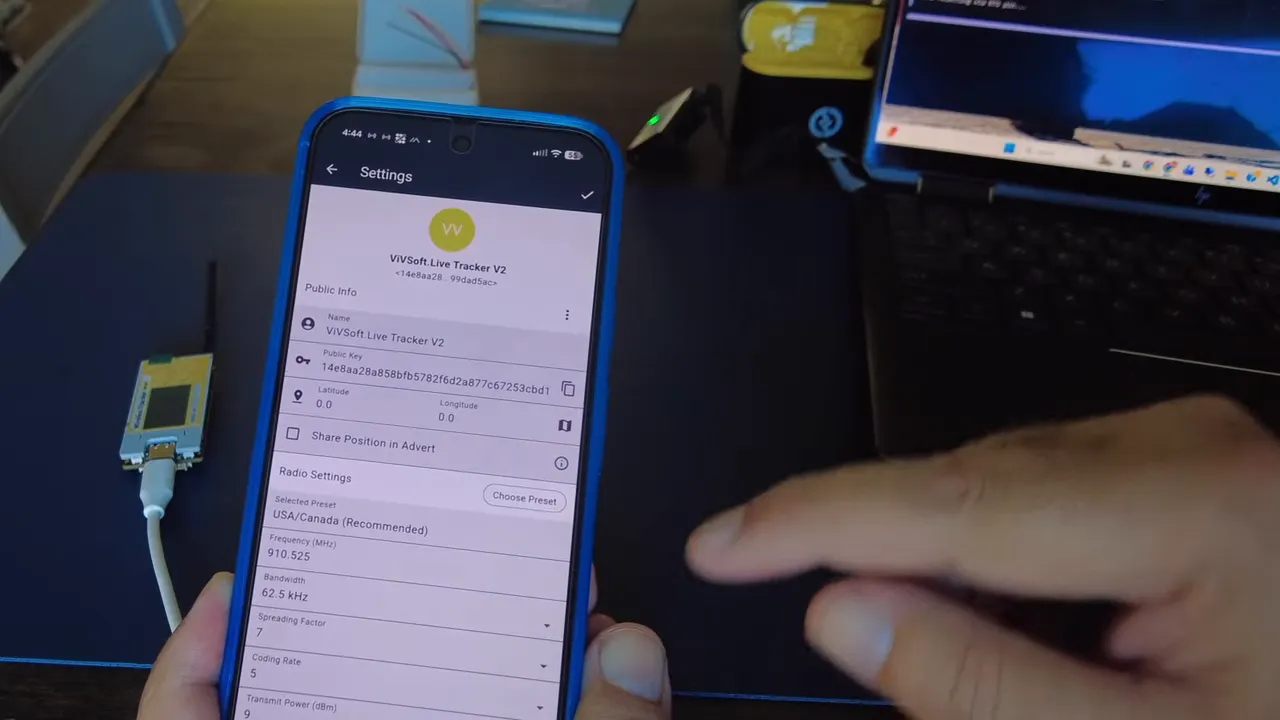
After the firmware loaded, the device came up with MeshCore version 0.15 and used the color display properly, which was a nice touch.

I then opened the MeshCore app and paired over Bluetooth. One practical Android troubleshooting tip: if pairing acts weird or does not reconnect properly, completely kill the app and start it again. That solved one hiccup for me during setup.
After pairing, I configured:
- Device name
- Preset region as USA/Canada
- Everything else left mostly at defaults
How MeshCore behaves differently from Meshtastic
This part matters because MeshCore is not just “Meshtastic with different menus.” The discovery model is different.
In MeshCore, if you do not want to be discovered, you do not have to be discovered. Devices do not automatically reveal themselves the same way. Repeaters may only announce themselves occasionally, even as infrequently as every 12 hours.
So instead of passively expecting the app to fill up with nodes, you actively do a couple of things:
- Send an advert to tell others you are there
- Discover repeaters from the tools menu

When I ran repeater discovery, the app found several repeaters in the area and added them. Those are infrastructure nodes for message routing, not necessarily people I can chat with directly.
Testing channels and messaging in MeshCore
To test real traffic, I used two methods.
1. Public channel messaging
I sent a simple “Hello” on the public channel. The message was repeated by nearby infrastructure, which confirmed that the device was transmitting correctly.
2. A custom testing channel
I also added a channel called testing. MeshCore makes this pretty easy, and it even provides a QR code so someone else can quickly join the same channel.
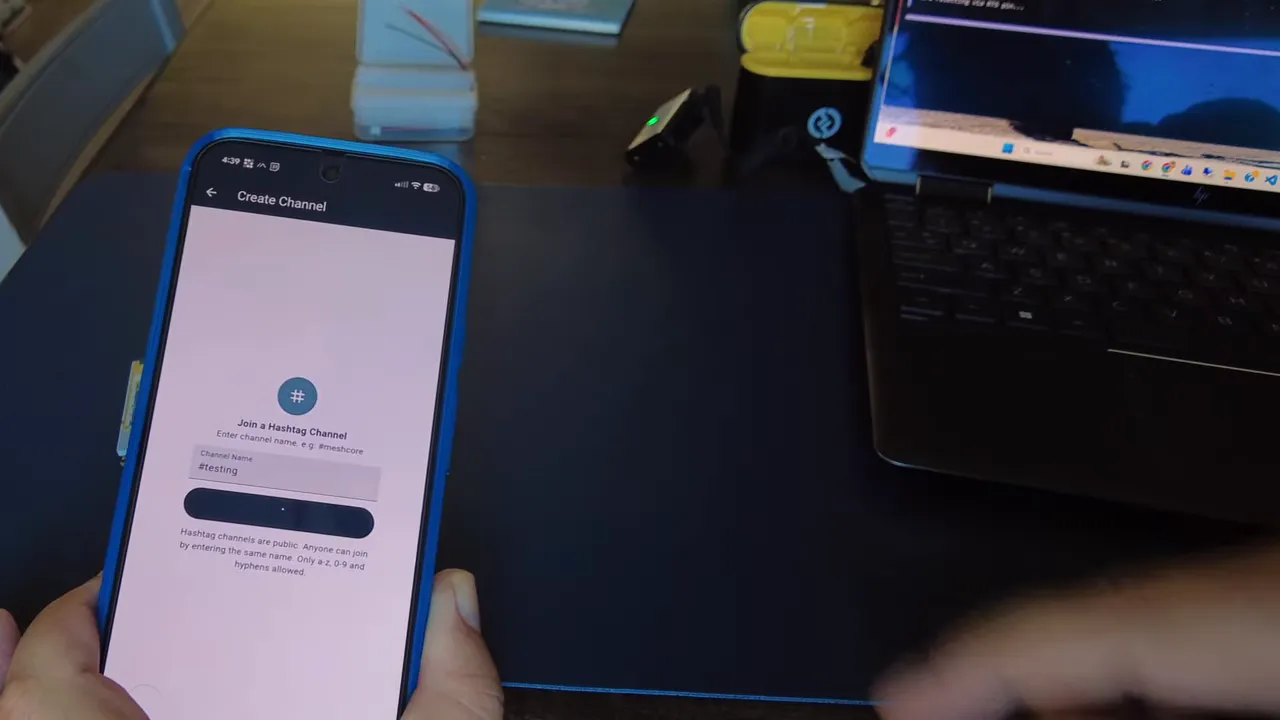
After sending a test message on that channel, I got a response back from an autobot I already had set up there. That was enough to confirm the node could both send and receive successfully.
To add an actual person as a contact in MeshCore, they need to send an advert and you need to add them. I triggered an advert from one of my other home devices, and once it appeared, I could message it directly.

At that point the Tracker V2 was functioning as a full MeshCore companion node with:
- Repeaters discovered
- Public channel access
- Custom testing channel added
- Direct companion contact available
Does GPS work in MeshCore too?
Yes, and that was the last thing I specifically wanted to verify.
Inside the MeshCore settings, I enabled the position feature. Based on the earlier Meshtastic test, I expected I might need to take it outside again, but in this case it already had enough information to resolve position and place itself on the map.
That confirmed the built-in GPS is not just functioning under Meshtastic. It also works in MeshCore, which makes this little device a lot more attractive as a true all-in-one portable tracker.
What I liked most about the Heltec Wireless Tracker V2
After testing both firmware options, the Tracker V2 came away looking really strong.
The highlights for me were:
- Very compact form factor
- Built-in GPS instead of needing an external GPS module
- Stronger radio output than the earlier Tracker V1
- Fast firmware flashing compared to some older Heltec hardware
- Works with both Meshtastic and MeshCore
- Color screen support in MeshCore
It really feels like a purpose-built tracker node. Put it in a decent case with a battery and you have something small, capable, and genuinely useful for portable mesh networking.
I especially like that the GPS is integrated. A lot of other setups end up as a pile of extra modules and wires. This keeps things neat.
Final thoughts
I think the Heltec Wireless Tracker V2 is one of the better compact tracker nodes available right now for Meshtastic and MeshCore. It is not the node I would choose for a long-term solar deployment, but for a carry node, field tracker, or portable companion, it makes a lot of sense.
The built-in GPS works. Meshtastic works. MeshCore works. The radio performance looks good. And once it is in a proper case, it should make an excellent little travel node.
If you are comparing options for portable mesh hardware, this one definitely deserves a look.
FAQ
Is the Heltec Wireless Tracker V2 good for solar deployments?
Not really as a first choice. Because it uses the ESP32-S3, it is better suited as a portable tracker than as an ultra-low-power solar node. If your goal is a solar repeater or always-on remote node, lower-power hardware may be a better fit.
Does the Heltec Wireless Tracker V2 have built-in GPS?
Yes. The built-in GPS worked in testing under both Meshtastic and MeshCore. It took a few minutes outdoors to get the first proper lock, which is normal for a fresh GPS start, but after that it performed well.
Why is Windows not recognizing my Heltec Tracker V2?
The most likely issue is a missing driver. Installing the Silicon Labs universal Windows driver usually fixes the problem. Also make sure you are using a proper data USB cable.
Which Meshtastic firmware channel should I use for the Tracker V2?
Because the hardware is relatively new, the correct firmware may only be available in the alpha channel at times. If the normal selection does not show a flashable version for the Tracker V2, check alpha.
How do I put the Heltec Tracker V2 into flashing mode?
Hold the boot button, press reset, release reset, then release boot. After that, retry flashing. This is especially useful when switching from one firmware to another and the device will not flash normally.
Does MeshCore work on the Heltec Wireless Tracker V2?
Yes. MeshCore flashed successfully, paired over Bluetooth, discovered repeaters, handled channel messaging, and used the built-in GPS. The color display also worked nicely in MeshCore.
Is the Tracker V2 better than the Tracker V1?
In the areas tested here, yes. One of the improvements mentioned was radio output, with the newer hardware running at 28 dB compared to 22 dB on the earlier Tracker V1. The integrated GPS and overall compact design also make it very appealing.