
Build a Meshnology N30 Meshtastic Node in Minutes! Beginner Guide
Published by Vivian van Zyl in Meshtastic the 07/18/2025 at 05:31 pm

Welcome to this comprehensive guide on building your very own Meshnology N30 Meshtastic node—a beginner-friendly project perfect for anyone interested in IoT and mesh networks. Created by Vivian Van Zyl of LoraMeshDevices.com, this step-by-step tutorial walks you through assembling the Meshnology N30, flashing the latest Meshtastic firmware, and configuring your node for optimal use. Whether you're new to Meshtastic or looking to expand your mesh network, this article will equip you with everything you need to get started quickly and confidently.
Table of Contents
- What Is the Meshnology N30?
- Assembling Your Meshnology N30 Node
- Flashing the Meshtastic Firmware
- Connecting and Configuring Your Node with the Meshtastic Mobile App
- Utilizing GPS and Advanced Features
- Conclusion: Why Choose the Meshnology N30?
- Frequently Asked Questions (FAQ)
What Is the Meshnology N30?
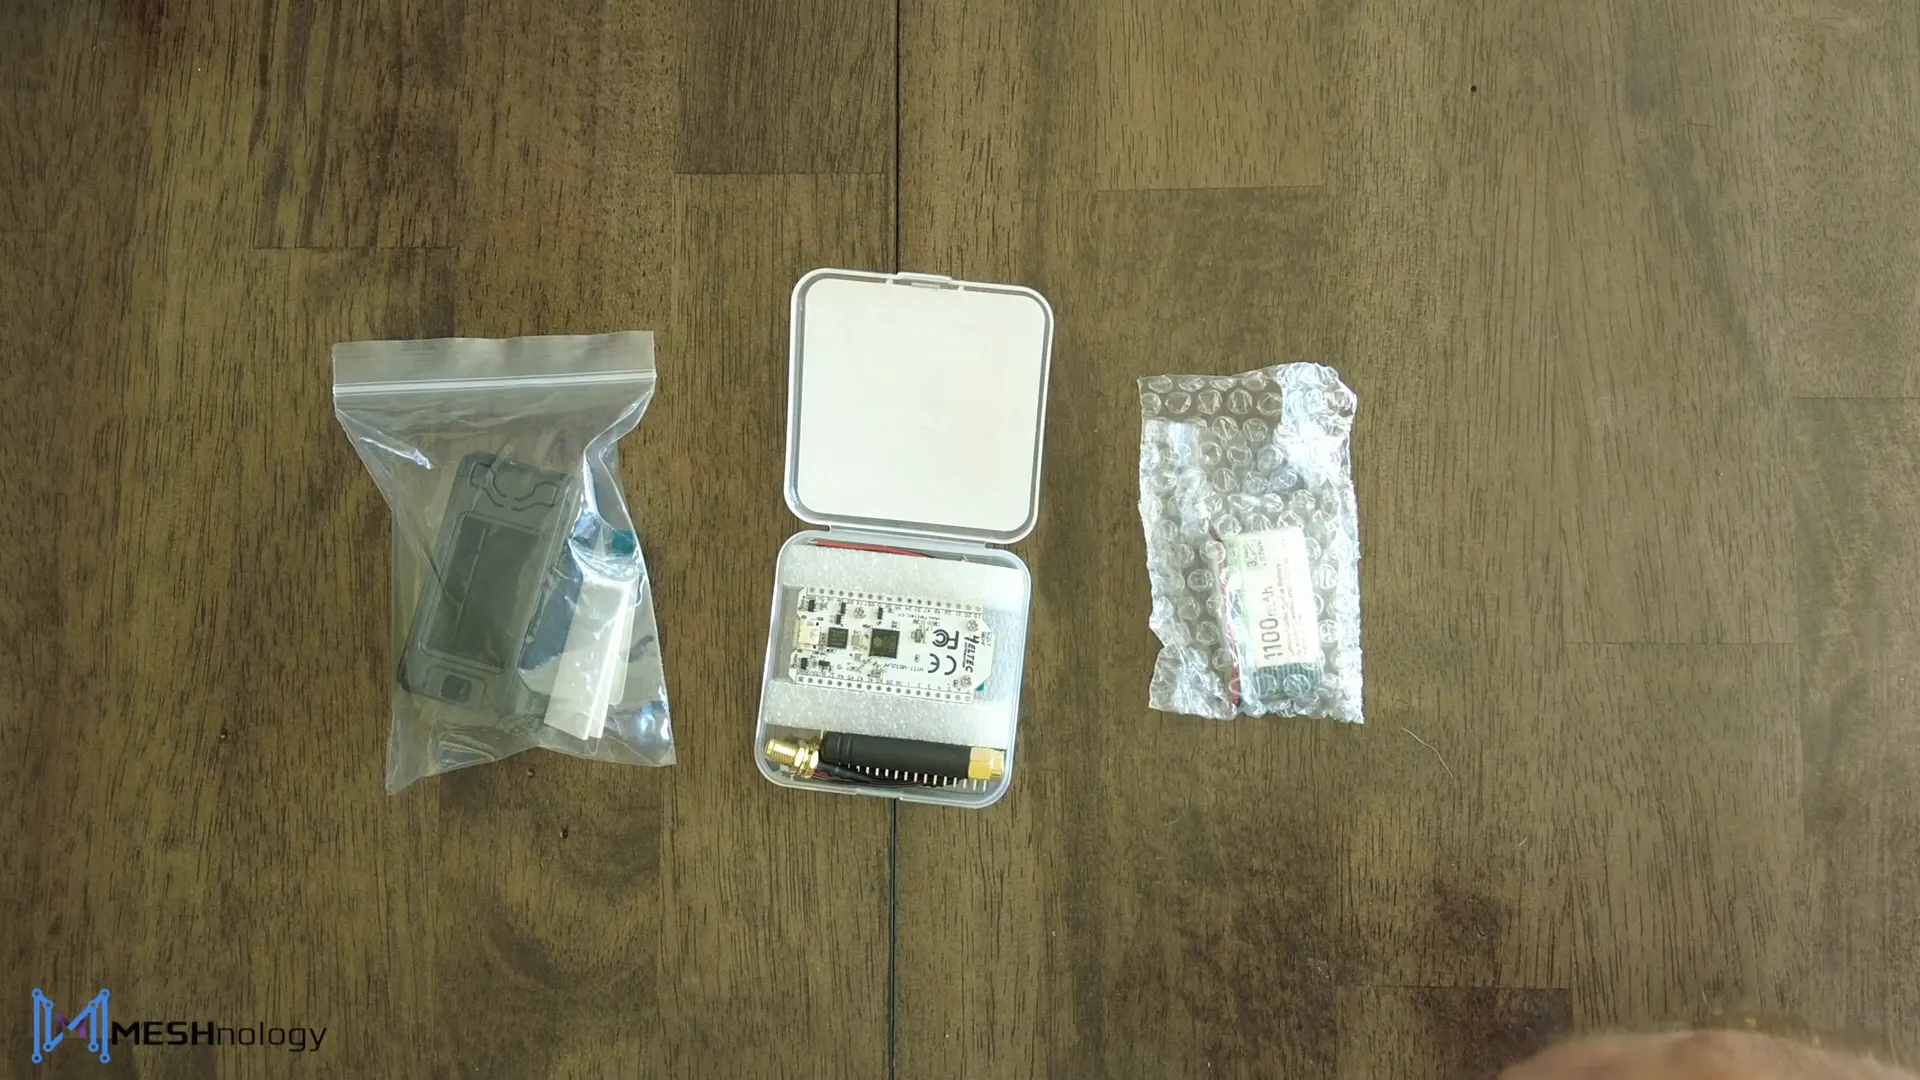
The Meshnology N30 is a compact, user-friendly Meshtastic node designed for beginners and enthusiasts alike. When you purchase the device, it typically comes as a pair, allowing you to quickly establish a mesh network with two nodes. However, you can also buy them individually if you prefer.
Each node contains the industry-standard Heltec V3 board, powered by an ESP32 microcontroller. This board is widely recognized for its reliability and compatibility with Meshtastic and MeshCore firmware. The kit includes an 1100mAh battery, a rubber ducky antenna, and a protective case, making it a complete package ready for assembly and deployment.
Assembling Your Meshnology N30 Node
Building the Meshnology N30 is straightforward and can be done in just a few minutes. Here’s how to get started:
- Open the Case: Begin by carefully opening the protective case that houses the Heltec V3 board.
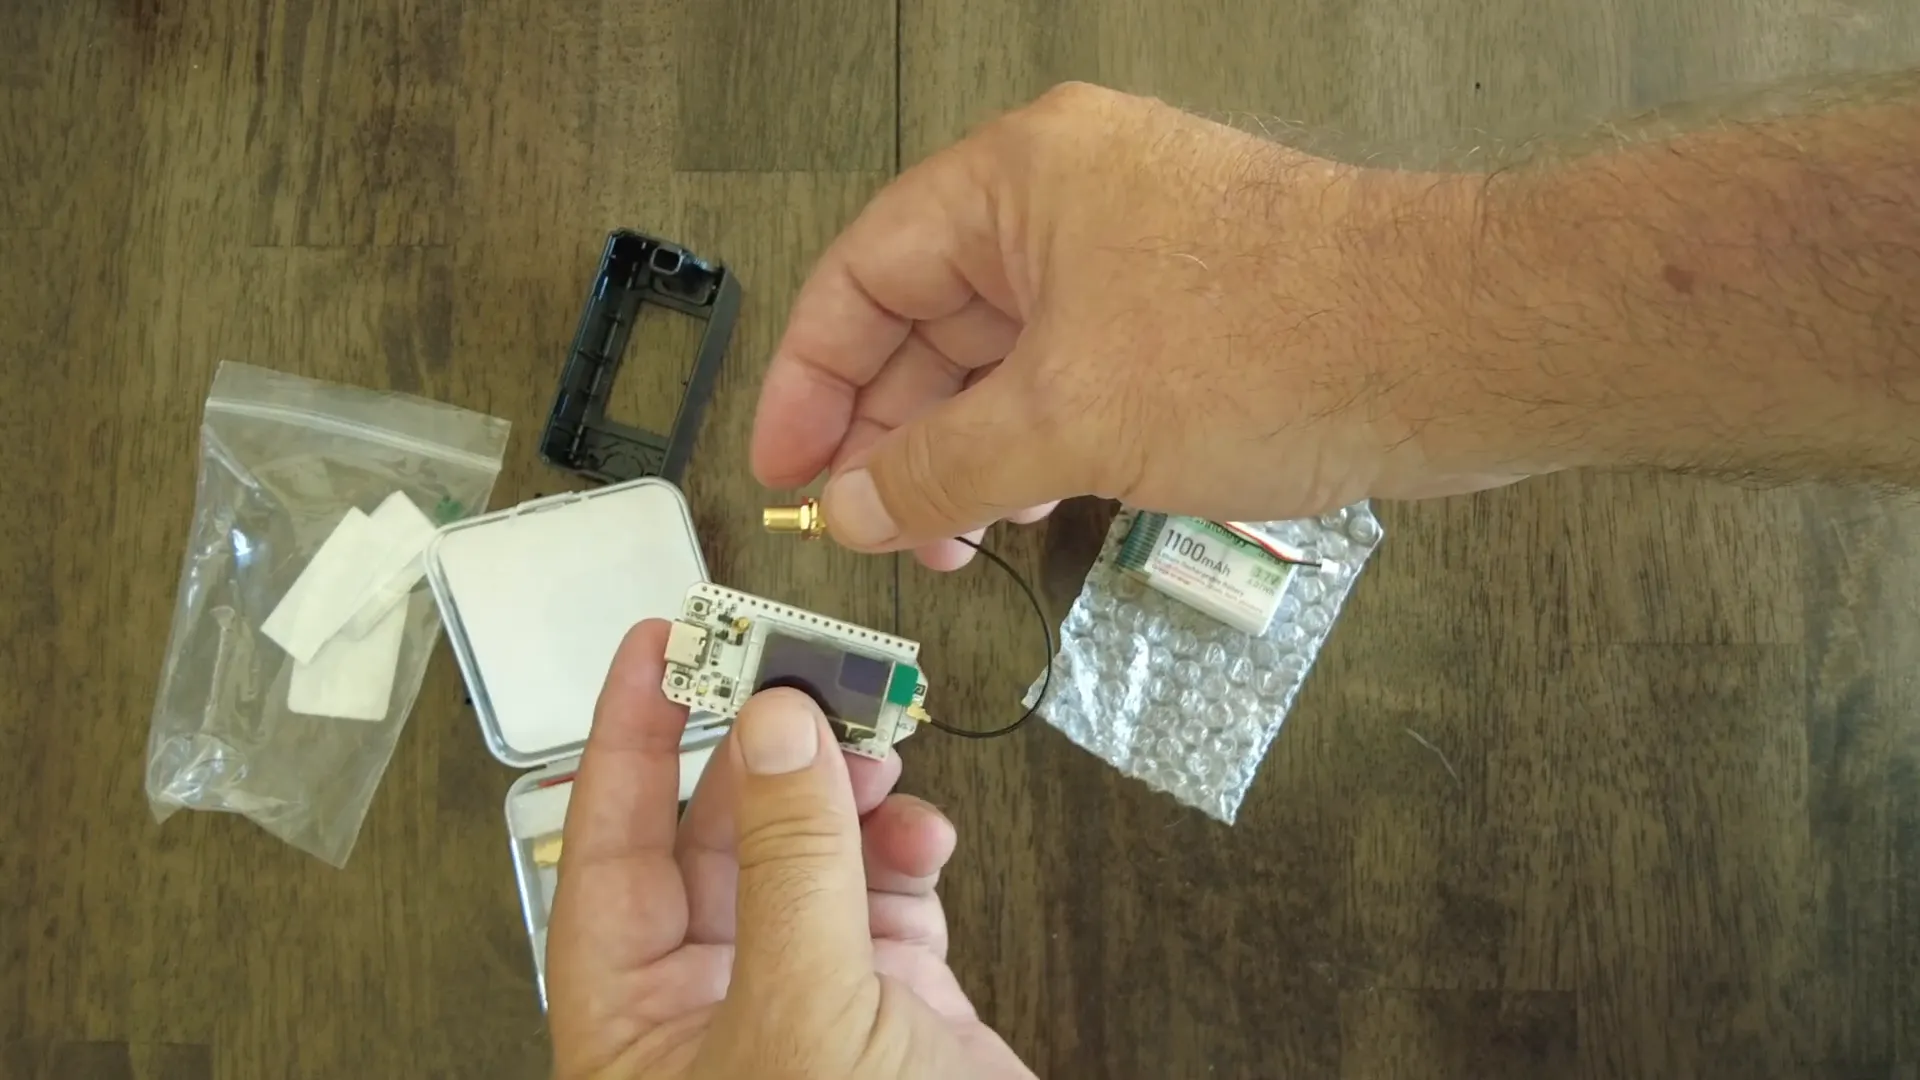
- Attach the Antenna Extension: Locate the small antenna extension cable included in the kit. This IPX plug easily clips onto the antenna port on the Heltec board.
- Insert the Board: Slide the Heltec V3 board into the case so that the USB port aligns with the case’s opening at the bottom for programming and charging.
- Secure the Antenna: Loosen the nuts at the top groove of the case where the antenna will be mounted. Attach the rubber ducky antenna but do not fully tighten the nuts yet. It is important not to power up the device without the antenna connected.
- Mount the Battery: Using the provided double-sided tape, affix the 1100mAh battery inside the bottom part of the case. Connect the battery plug to the Heltec board.
- Power On and Close the Case: Once connected, the board will power up and run diagnostics. Initially, it will display a “FAILED” message since no firmware is installed yet. Carefully close the case, ensuring the antenna cable is properly routed under the nut.
- Attach the Faceplate: Finish the assembly by placing the faceplate on the front of the case and tightening the screw by hand. You can tighten it more securely after software installation.
Flashing the Meshtastic Firmware
With your node physically assembled, the next step is to flash the Meshtastic firmware onto the Heltec V3 board. This software brings your device to life, enabling it to join and communicate within the Meshtastic network.
Follow these steps to flash the firmware:
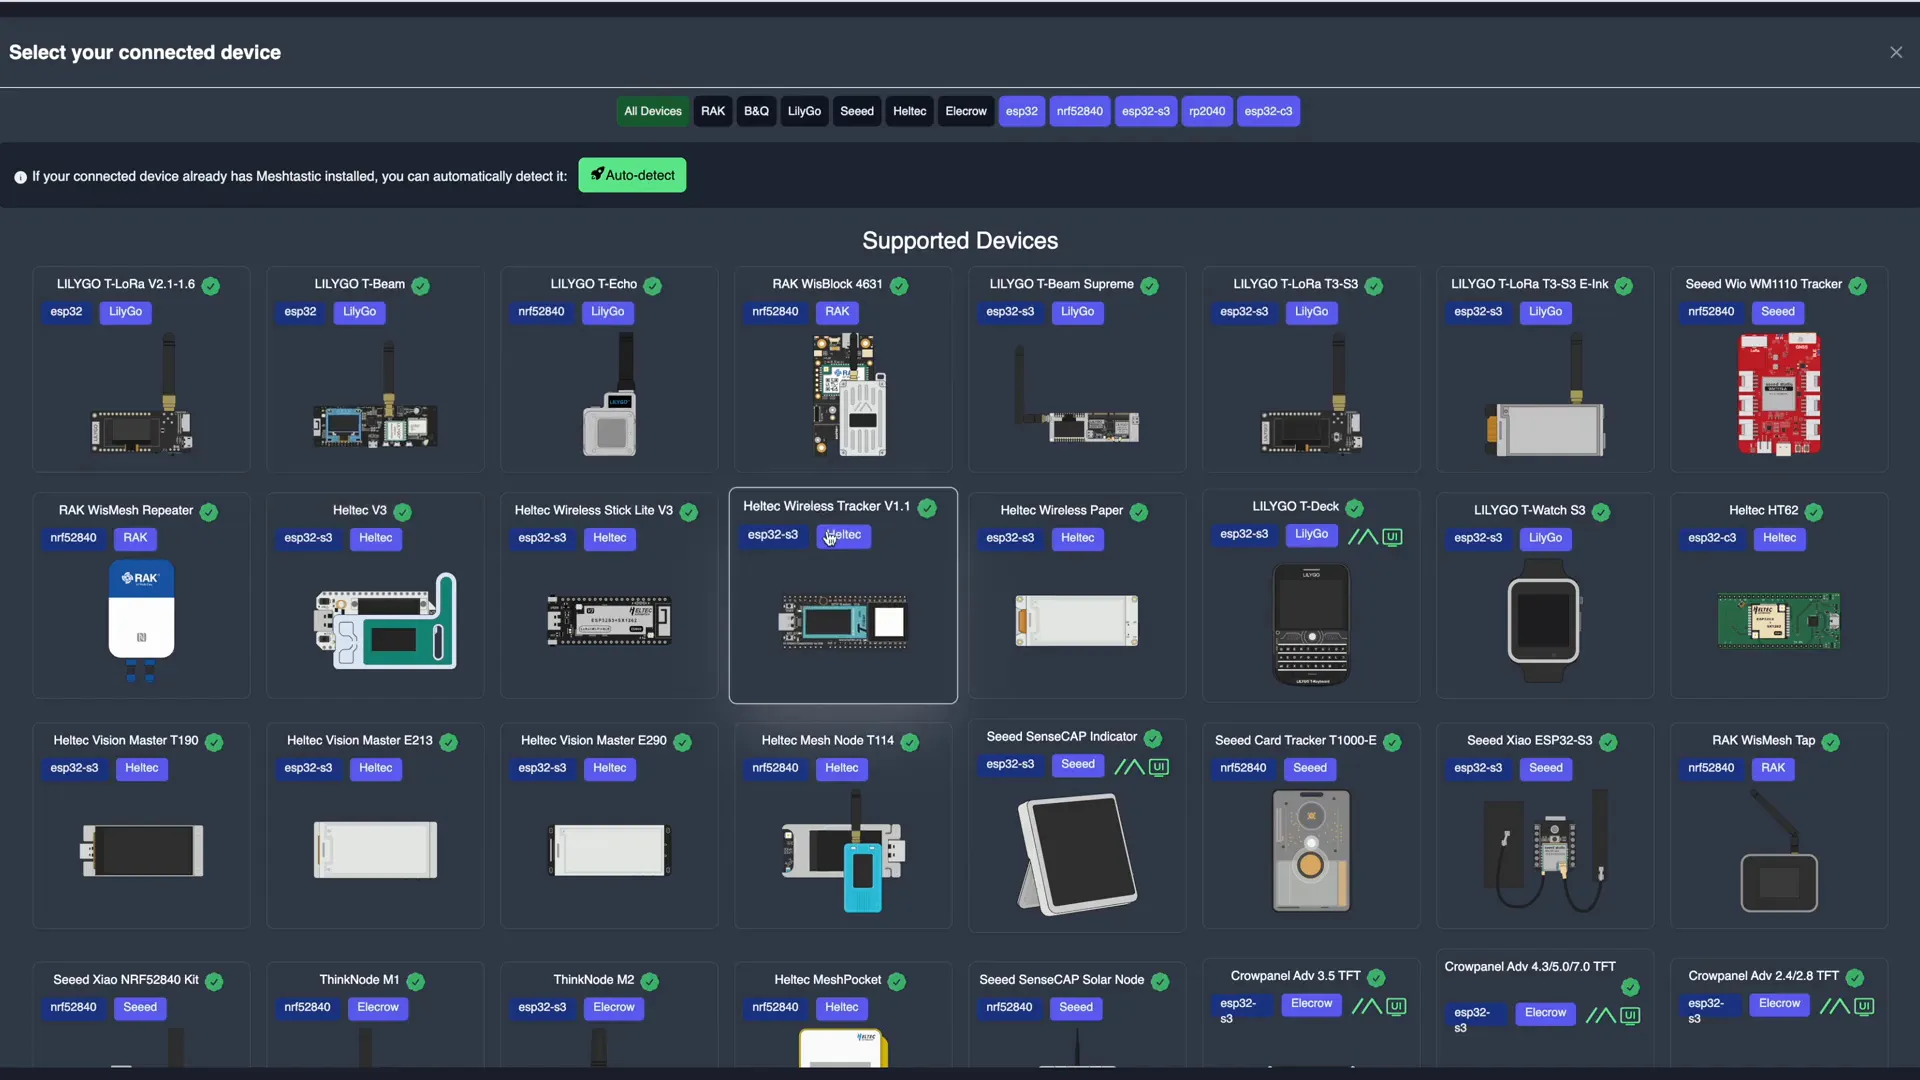
- Visit flasher.meshtastic.org.
- Select your device type—choose “Heltec V3” from the options.
- Pick the firmware version you wish to install. For this guide, the latest alpha version 2.72 was used, though you can select any preferred release.
- Check the “Full Erase” option to remove any existing data on the board. Note: If you have important data or keys, back them up before erasing.
- Click the “FLASH AND ERASE” button.
- Connect your Meshnology N30 to the computer via USB. The device will appear as a USB-to-serial bridge (UART).
- Hit “Connect” to start the flashing process. This typically takes a couple of minutes as the chip is erased and then programmed with the new firmware.
- Once complete, the interface will display “LEAVING” indicating the board is configured and ready.
Connecting and Configuring Your Node with the Meshtastic Mobile App
After flashing, you can manage and configure your Meshnology N30 node using the Meshtastic mobile app, available for Android and iOS devices.
Here’s how to connect and configure your node:
- Download and open the Meshtastic mobile app.
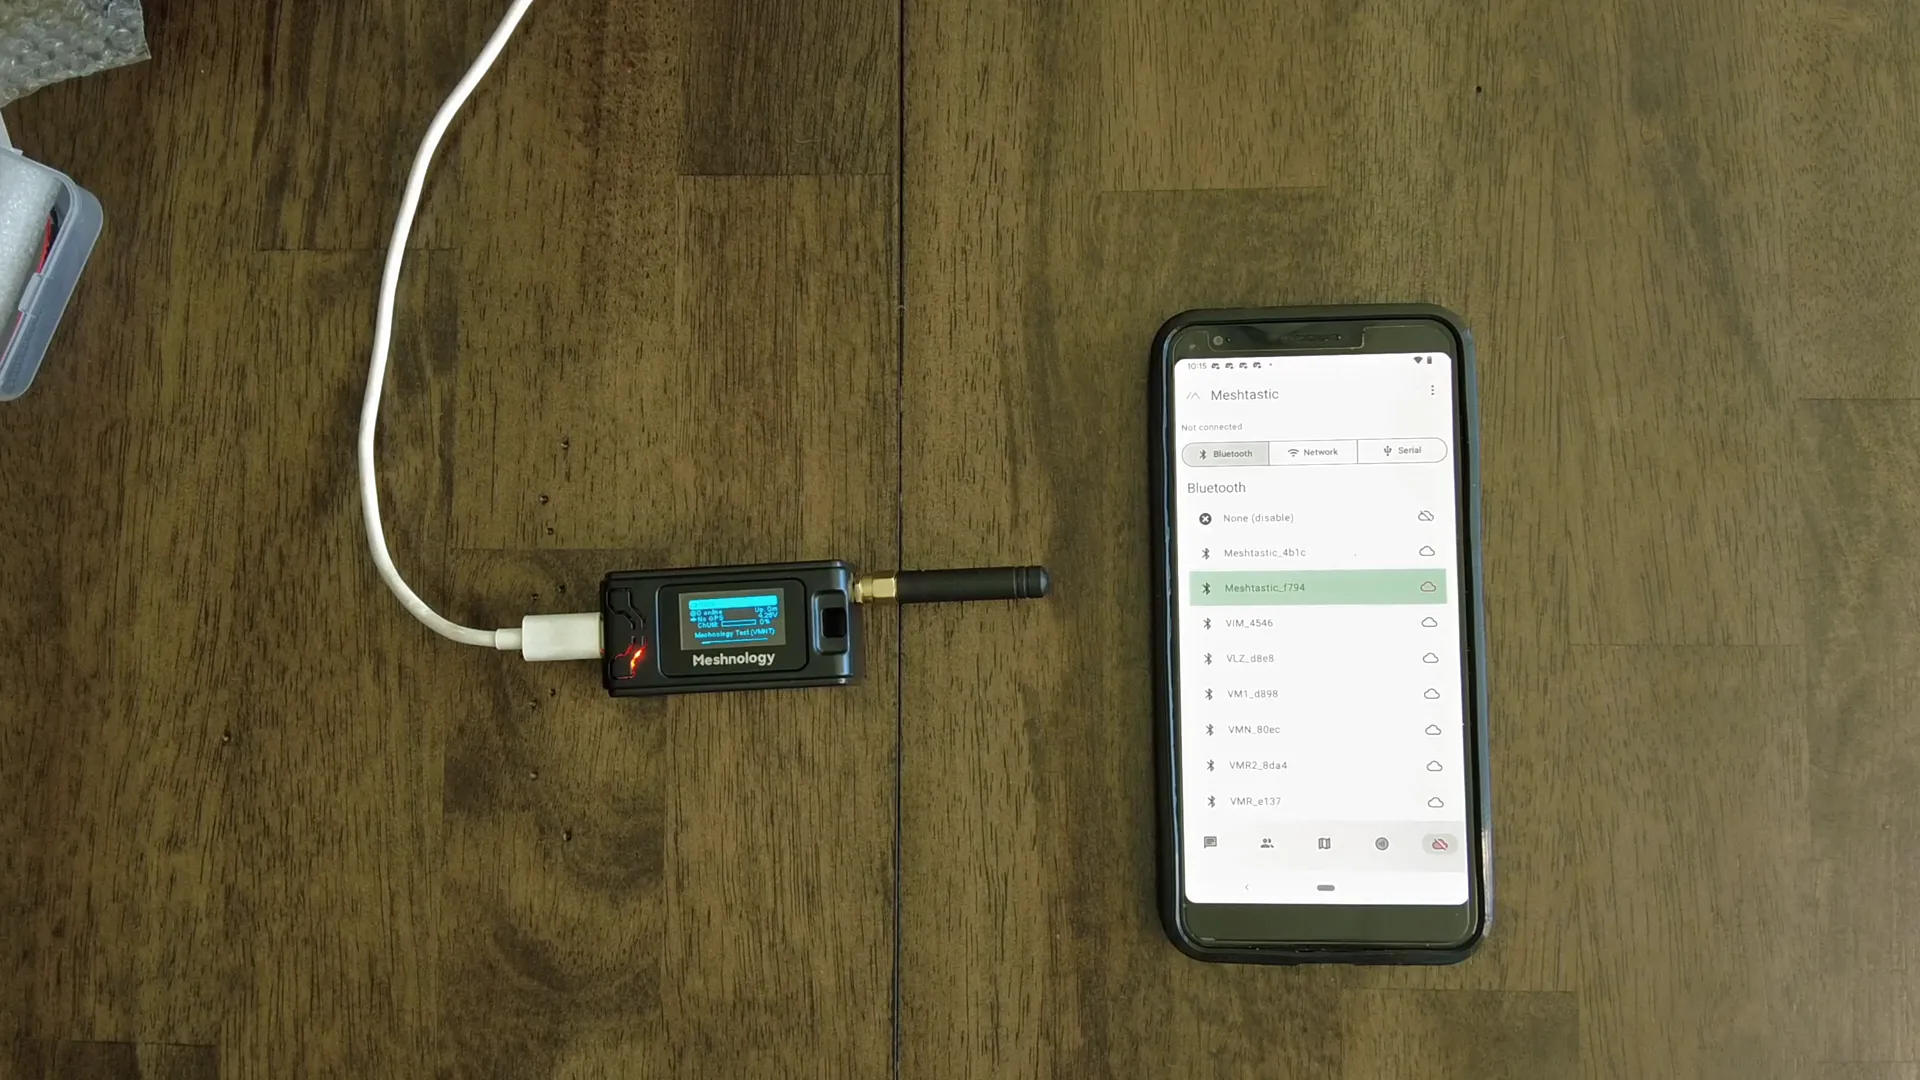
- Use the “Scan” feature to search for available Meshtastic devices nearby.
- Select your newly flashed Meshnology N30 node, which will appear with a default name like “Meshtastic F794”.
- Enter the pairing code displayed by the app to securely connect to the device.
- Once paired, navigate to the “LoRa” settings and select your region (e.g., United States) to configure frequency defaults.
- Apply the settings and wait for the node to reboot and re-establish connection.
- Next, go to “Radio Configuration” and rename your node to something memorable, such as “Meshnology Test” with a short name like “VMNT”.
- Send the changes and allow the device to reboot again.
After these steps, your Meshnology N30 node is ready to use. You can explore menus to view discovered nodes, check battery voltage, channel utilization, and more.
Utilizing GPS and Advanced Features
The Meshnology N30 node itself does not include a GPS module. However, by using the Meshtastic mobile app on your phone, you can enable GPS location sharing to provide precise positioning for your node.
Key GPS-related features include:
- Phone GPS Integration: The node can use your smartphone’s GPS to update its location on the mesh network.
- Location Precision Options: You can choose between approximate location (with a radius of uncertainty) or precise GPS location depending on your privacy preferences.
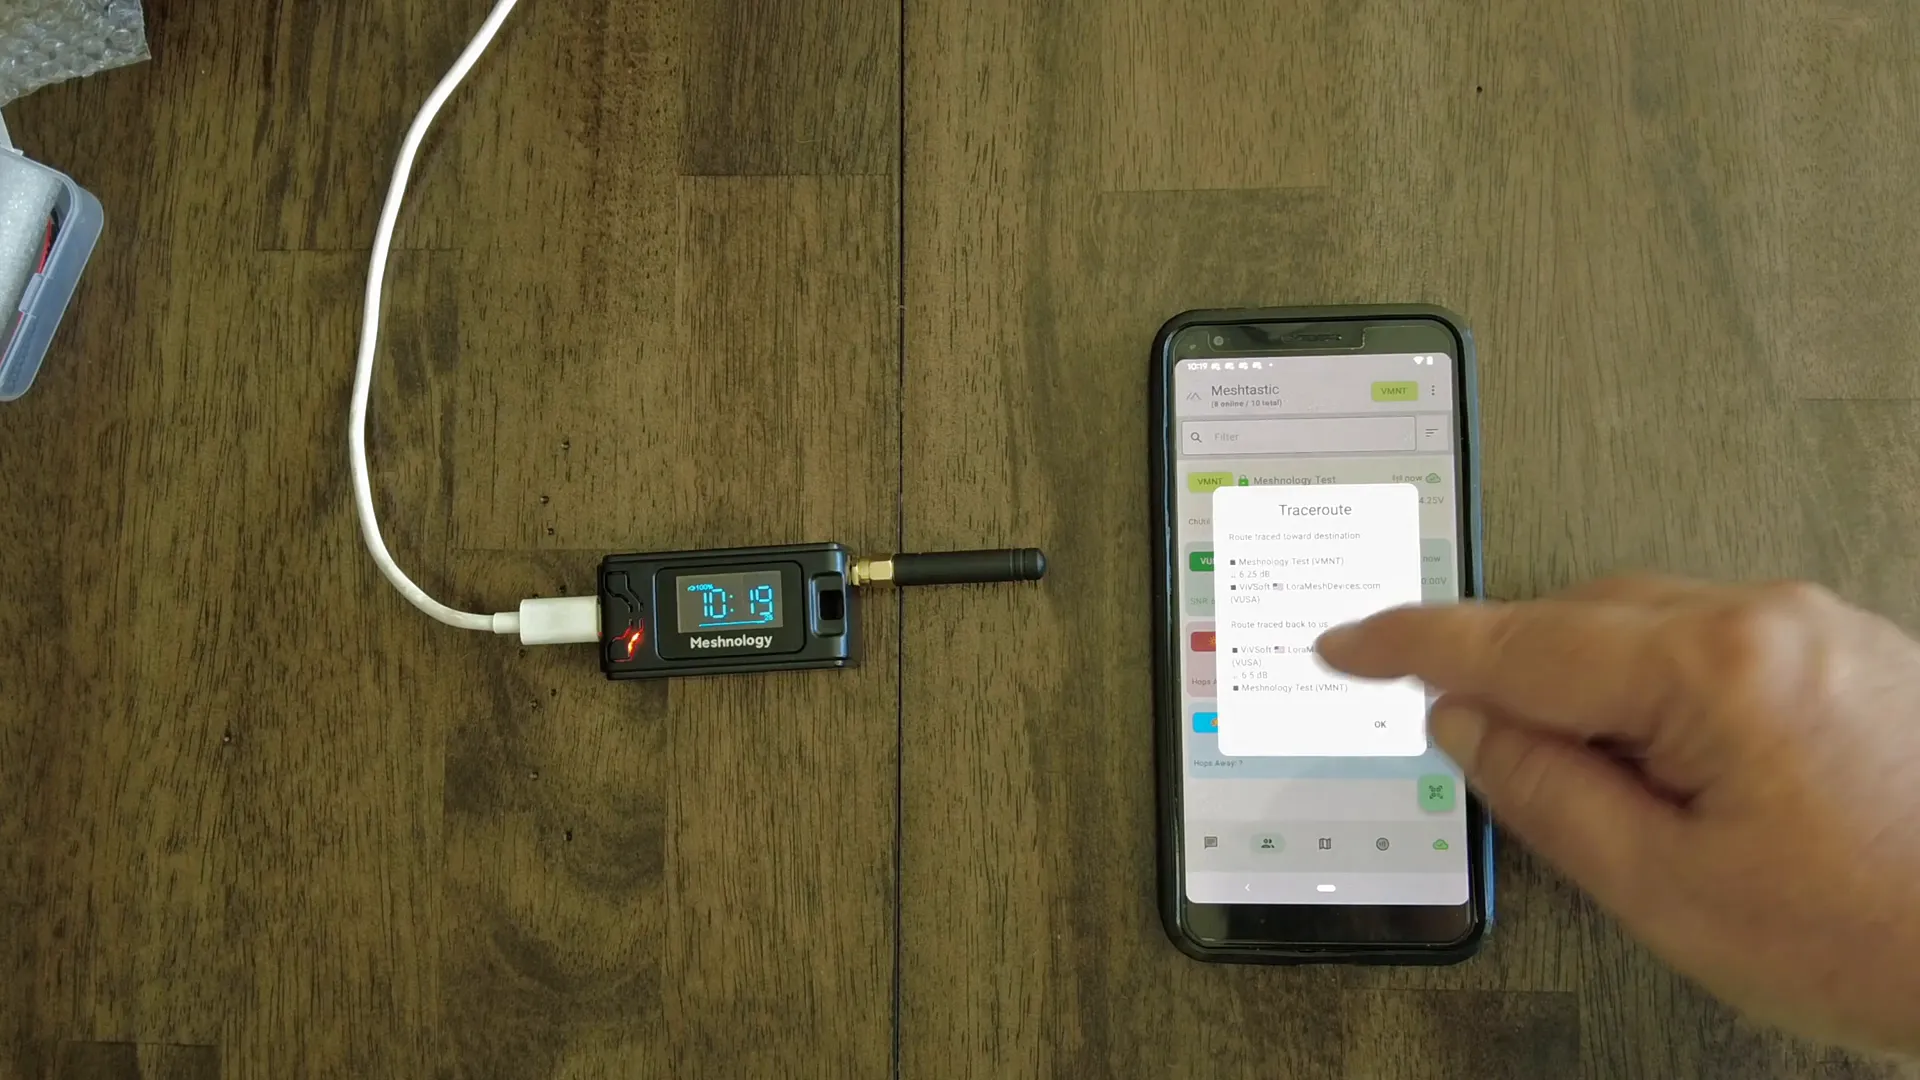
- Trace Routing: The app allows you to perform trace routes to other nodes, showing signal strength and hop details.
These capabilities enhance the usefulness of your node for outdoor activities, emergency communication, and mesh network mapping.
Conclusion: Why Choose the Meshnology N30?
The Meshnology N30 Meshtastic node stands out for its ease of assembly, beginner-friendly design, and reliable Heltec V3 hardware. Within minutes, you can build a fully functional mesh node capable of communicating over long distances using LoRa technology.
Its compatibility with the Meshtastic firmware and mobile app allows for flexible configuration, GPS integration, and seamless network expansion. Whether you want to start a personal mesh network, explore IoT applications, or participate in emergency communication setups, the Meshnology N30 offers a solid foundation.
With a simple build process, open-source software, and active community support, this node is an excellent entry point into the world of mesh networking.
Get started today and unlock the potential of Meshnology!
Frequently Asked Questions (FAQ)
What is included in the Meshnology N30 kit?
The kit includes a Heltec V3 ESP32 board, an 1100mAh battery, a rubber ducky antenna, a protective case, antenna extension cable, double-sided tape for mounting the battery, and a faceplate.
Do I need more than one Meshnology N30 node?
Yes, mesh networks require multiple nodes to communicate. It’s recommended to purchase at least two nodes to start building your mesh network.
Can I use the Meshnology N30 without flashing Meshtastic firmware?
The device comes without firmware installed. Flashing Meshtastic or compatible firmware is necessary to enable mesh network functionality.
How do I configure the node for my region?
Using the Meshtastic mobile app, you can select your country or region to set the appropriate LoRa frequency settings. This ensures legal and optimal operation.
Does the Meshnology N30 have built-in GPS?
No, the node itself does not have GPS. However, you can share your phone’s GPS location with the node through the Meshtastic app.
Is the Meshnology N30 compatible with other firmware?
Yes, it supports Meshtastic firmware primarily, but you can also load MeshCore or other compatible firmware depending on your network needs.