
Building a Meshtastic Solar Node with Active Cooling
Published by Vivian van Zyl in Meshtastic the 11/01/2024 at 07:52 pm
Creating a Meshtastic Solar Node is an exciting project that allows for long-range communication in a sustainable manner. In this guide, we'll explore how to build a solar-powered node that can withstand the elements and operate autonomously, all while keeping its components cool. This setup is particularly useful for remote locations where traditional power sources are unavailable or unreliable.
Table of Contents
- Understanding the Basics of a Solar Node
- Building the Solar Node
- Final Adjustments
- Testing Your Solar Node
- Conclusion
- Frequently Asked Questions
Understanding the Basics of a Solar Node
A solar node is designed to be self-sustaining, meaning it generates its own power and can operate continuously without manual intervention. This is crucial when the node is installed in hard-to-reach places, such as rooftops or poles. The goal is to create a system that recharges itself, ensuring uninterrupted operation.
Choosing the Right Components
For this project, we will be using a RAK4630, which is a low-power LoRa module. This choice is strategic because:
- The RAK4630 is highly efficient and can operate for extended periods on a small battery.
- It offers approximately 300 hours of runtime on a 2000 mAh battery compared to just 10-20 hours with the ESP32.
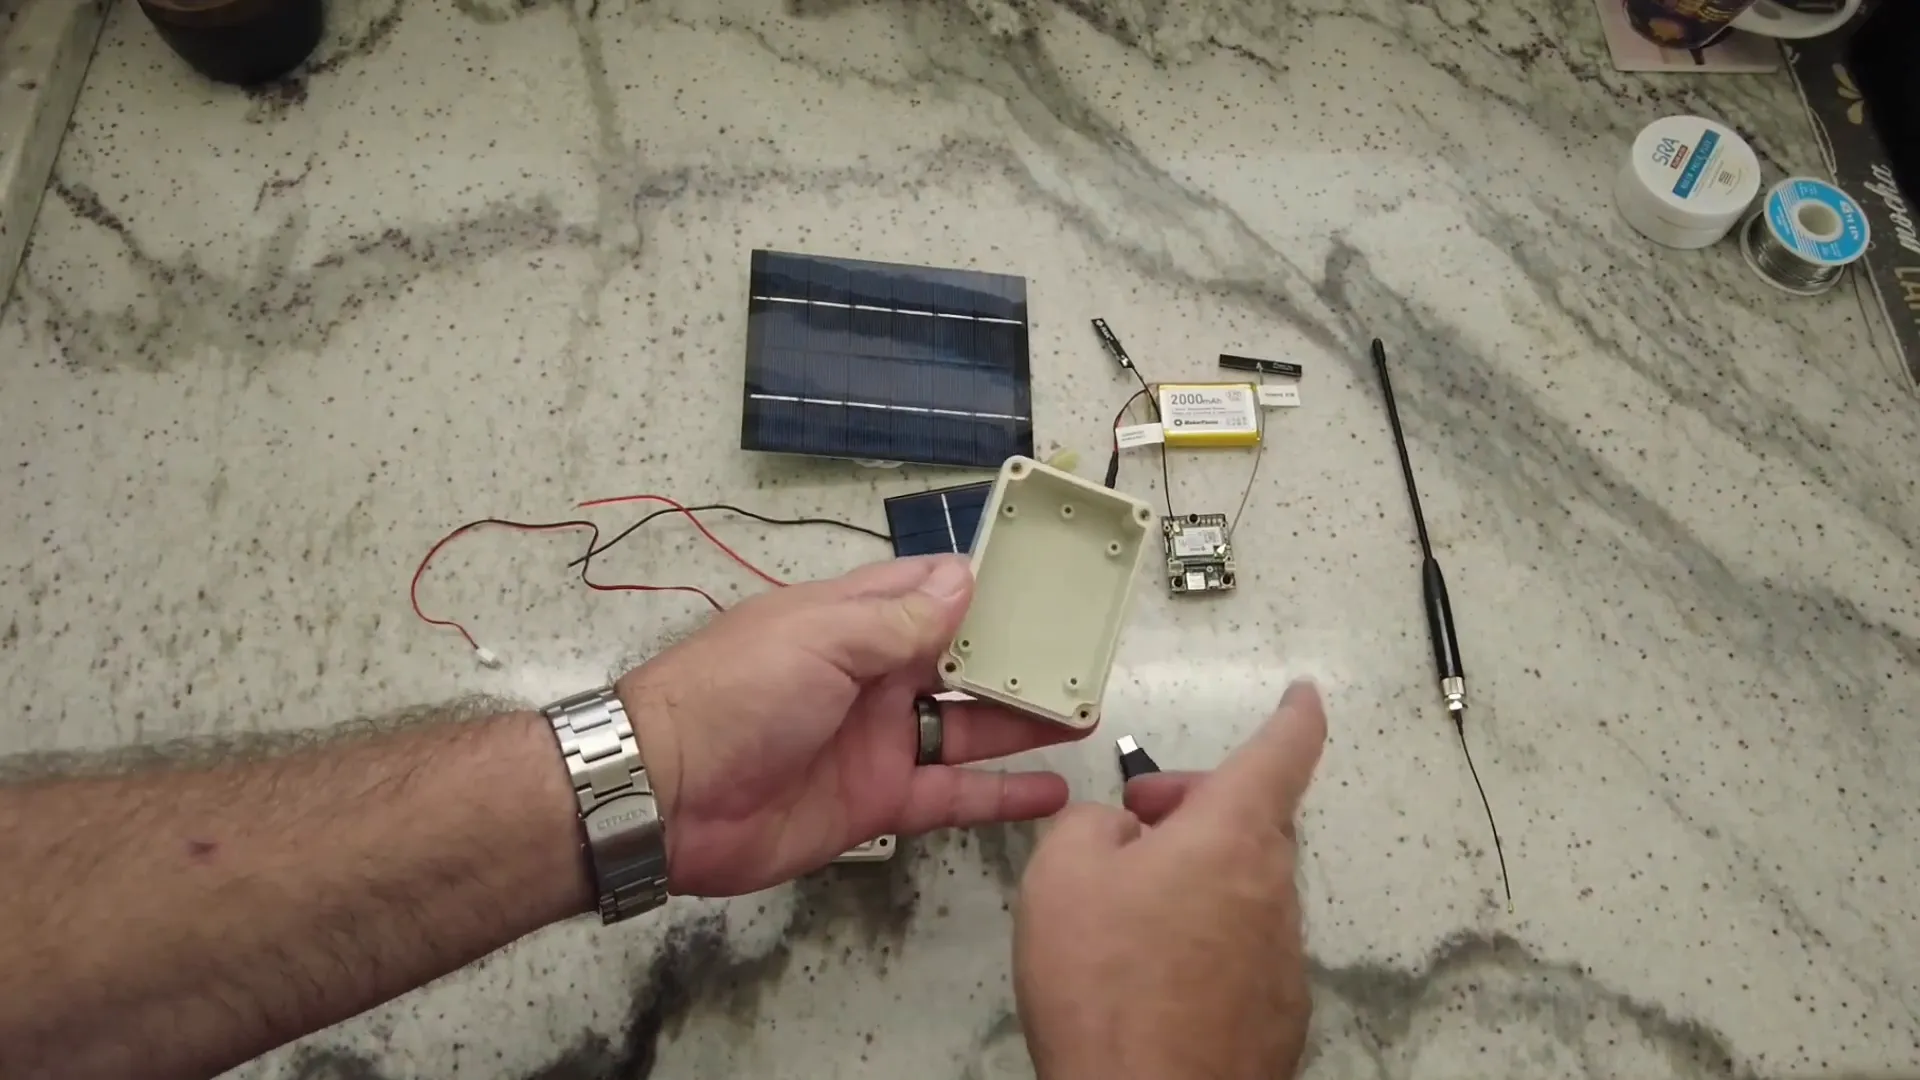
Additionally, we will use a compact case to house the components. The case is small enough to fit in the palm of your hand, making it suitable for mounting in various locations.
Powering the Node
To keep the node charged, we will integrate a tiny USB solar panel. This panel will plug into the USB output of the RAK4630 and provide a continuous power source during daylight hours.
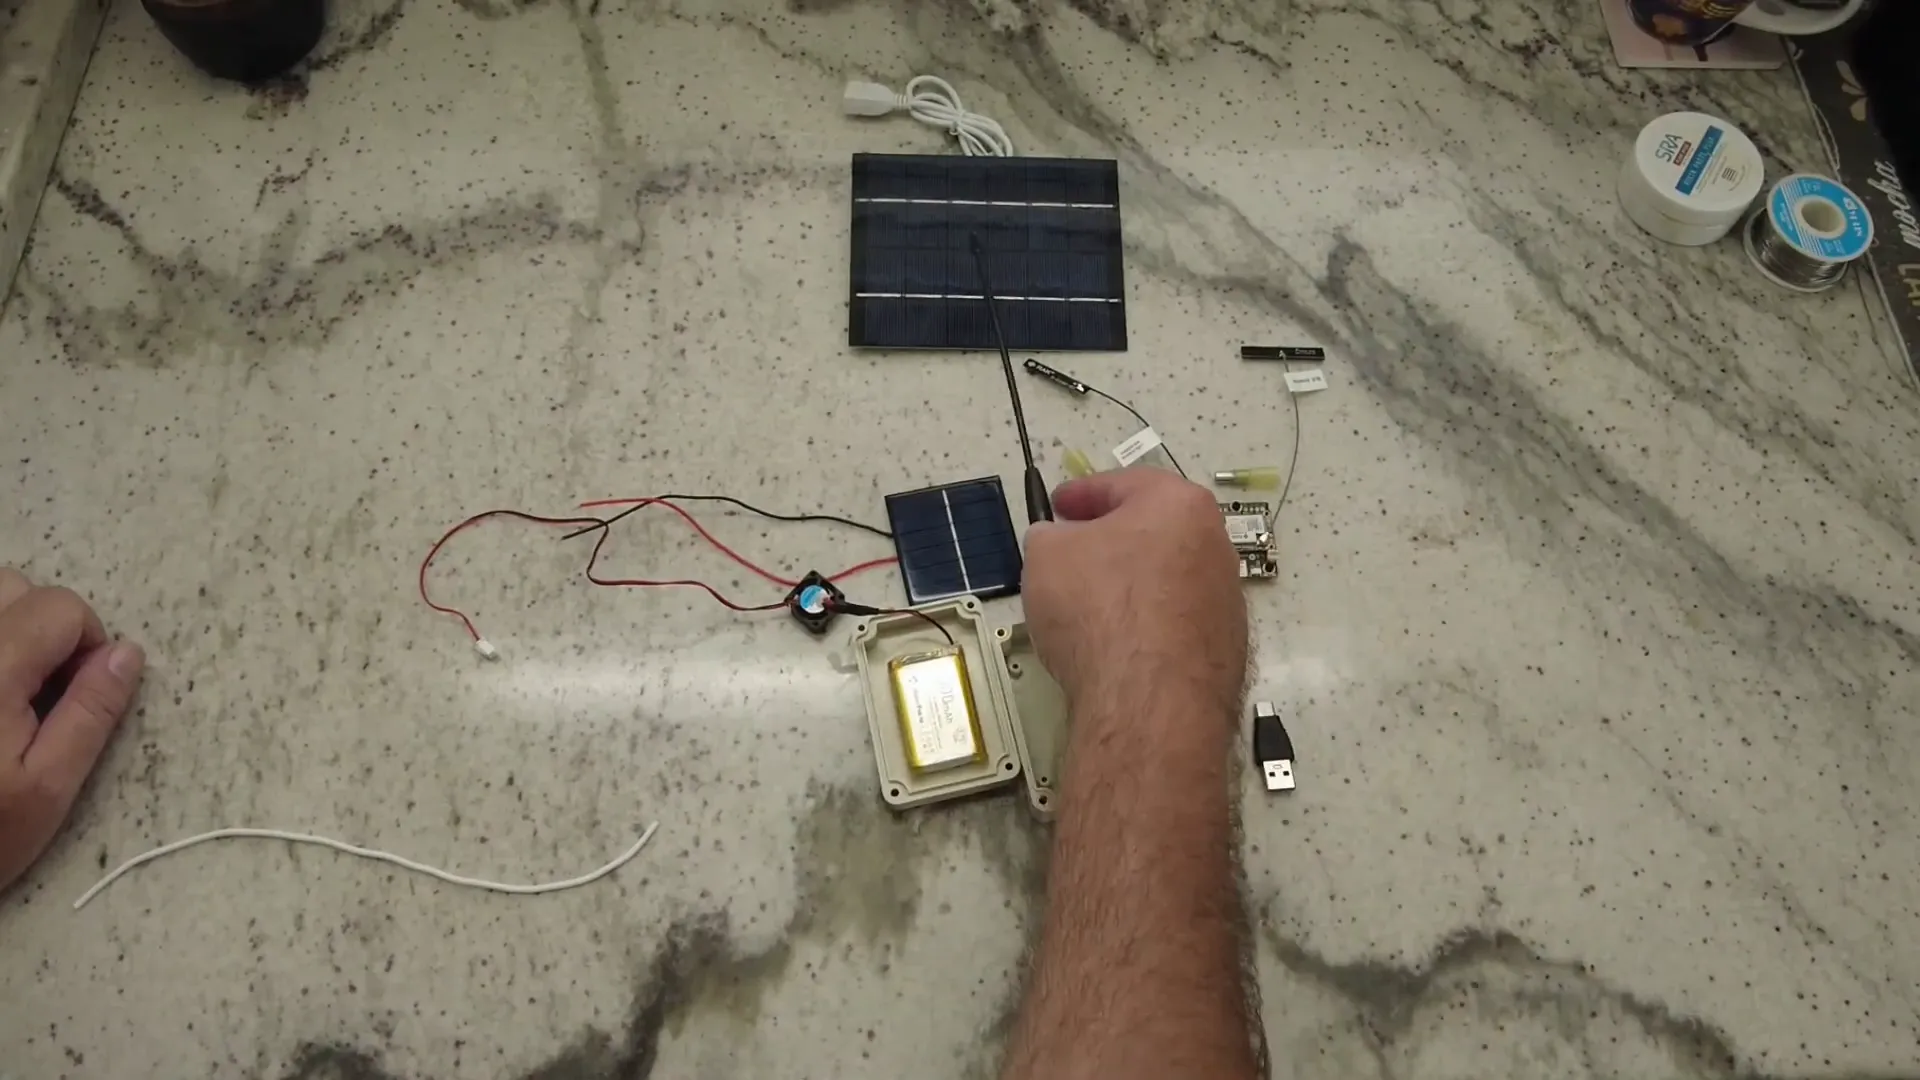
For cooling, we will also incorporate a small 20mm fan powered by its own solar panel. This fan will help maintain an optimal temperature for the battery and other components, especially during hot weather.
Building the Solar Node
Now, let's dive into the construction of the Meshtastic Solar Node. Here’s a step-by-step guide:
Step 1: Assemble the Components
Begin by gathering all necessary components:
- RAK4630 module
- 2000 mAh battery
- USB solar panel
- 20mm fan
- Additional solar panel for active cooling
- Compact case
- Airflow pipes
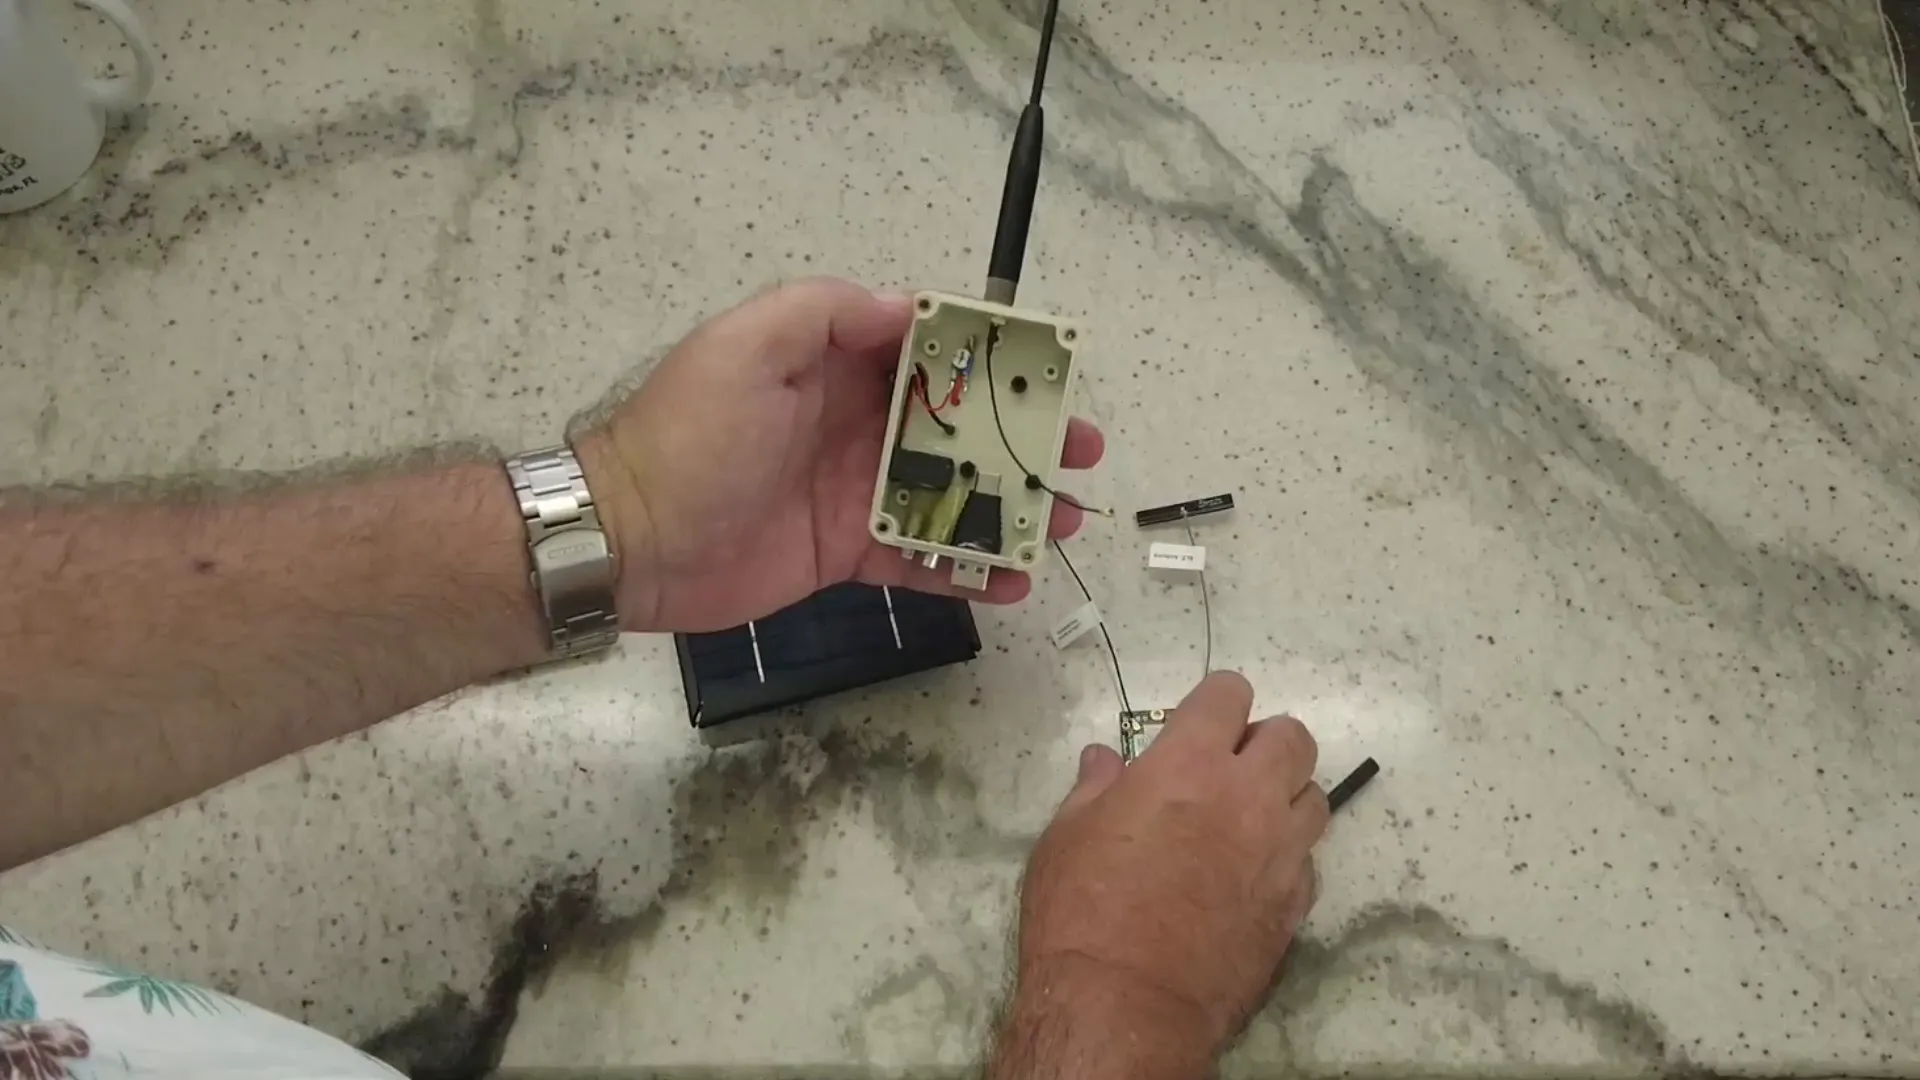
Step 2: Mount the RAK4630 and Battery
Secure the RAK4630 and the battery inside the compact case. Ensure that the USB power output is accessible from the bottom of the case for easy charging.
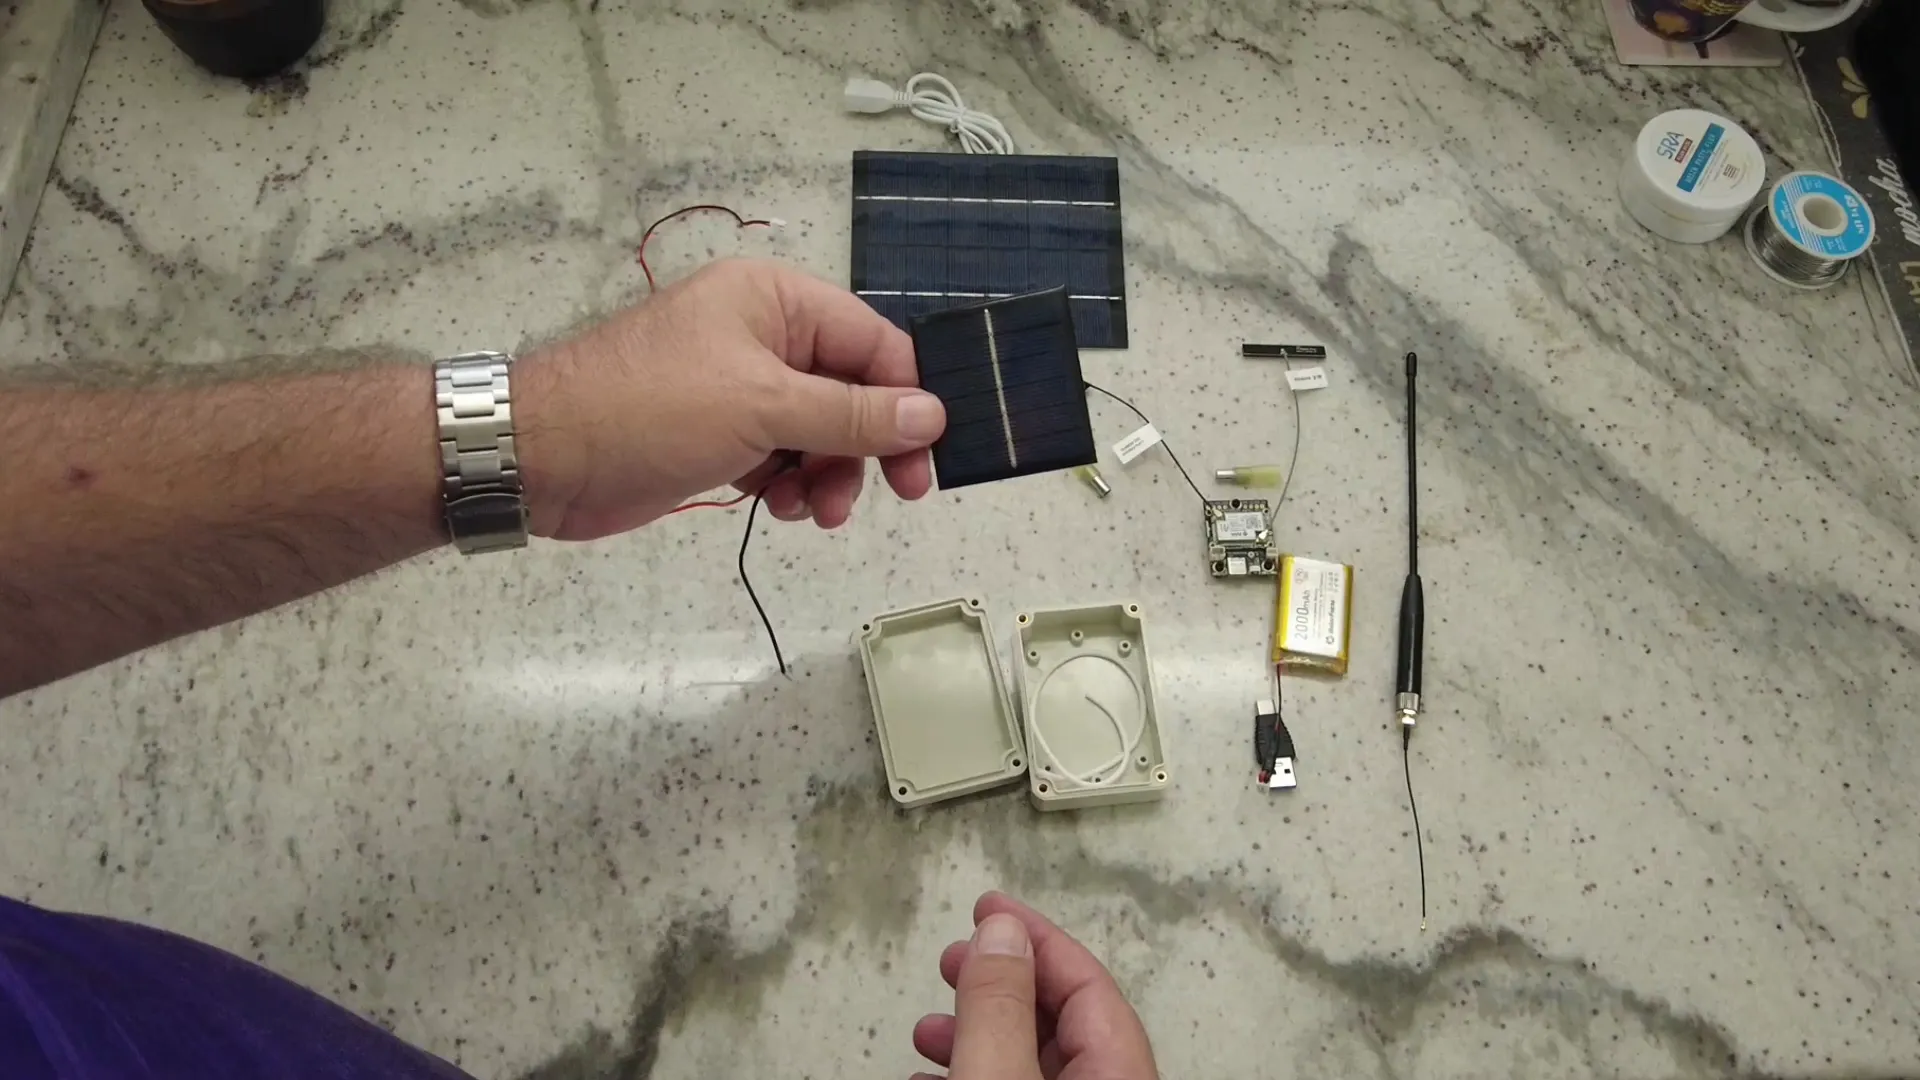
Step 3: Install the Solar Panels
Attach the USB solar panel to the case, ensuring it is positioned to receive maximum sunlight. The fan will also have its own solar panel, which should be mounted nearby.
Step 4: Implement Active Cooling
To prevent overheating, we need to ensure proper airflow. Install the 20mm fan and connect it to its dedicated solar panel. The fan will draw air in from the outside and circulate it around the battery and RAK4630.
Step 5: Create Airflow Pipes
Install the airflow pipes at the bottom of the case. These will help channel rainwater away from the internal components while allowing fresh air to circulate.
Make sure the pipes are angled correctly so that any water that runs down the sides of the case can drip out without entering the unit.
Final Adjustments
Once everything is assembled, make final adjustments to ensure all components are securely mounted. Add any necessary cable tie mounts to facilitate easy installation on a pole or roof.
Testing Your Solar Node
Before deploying your Meshtastic Solar Node, it's essential to conduct a few tests:
- Check if the solar panels are charging the battery as expected.
- Monitor the fan to ensure it operates correctly when the solar panel receives sunlight.
- Verify that the airflow pipes effectively prevent water from entering the unit.
Once you confirm that everything works as intended, you can mount the node in your desired location. Make sure it’s positioned to get plenty of sunlight for optimal performance.
Conclusion
Building a Meshtastic Solar Node with active cooling is a rewarding project that combines technology with sustainability. By following these steps, you can create a reliable communication node that operates independently, making it perfect for remote locations.
Frequently Asked Questions
What is a Meshtastic Solar Node?
A Meshtastic Solar Node is a self-sustaining communication device that uses solar power to operate continuously without the need for traditional power sources.
Why use a RAK4630 over an ESP32?
The RAK4630 is more power-efficient, allowing it to run much longer on a single battery charge compared to the ESP32.
How does active cooling work in this setup?
Active cooling is achieved by using a small fan powered by its own solar panel, which helps maintain optimal temperatures for the battery and electronics.
Can I use this setup in different weather conditions?
Yes, the design includes features to protect against rain and ensure proper airflow, making it suitable for various weather conditions.
Where can I find the components needed for this project?
Most components can be at LoraMeshDevices.com.
Parts List:
- Type-C Male to USB3.0 Male Adapter