
Creating Your Own Meshtastic Node with ESP32C6
Published by Vivian van Zyl in Meshtastic the 02/14/2025 at 04:04 pm

Are you ready to dive into the exciting world of Meshtastic? In this blog post, we will explore how to build your very own DIY ESP32C6 Serial Meshtastic Node. This project not only showcases the capabilities of the ESP32C6 but also integrates seamlessly with the Meshtastic network, allowing you to send messages easily via API or browser. Let's get started!
Table of Contents
- Overview of the ESP32C6 Meshtastic Node
- Getting Started with Your Node
- Controlling the LED
- Sending Messages via API
- Why Choose Meshtastic?
- Components Required
- Expanding Your Project
- FAQ Section
- Conclusion
Overview of the ESP32C6 Meshtastic Node
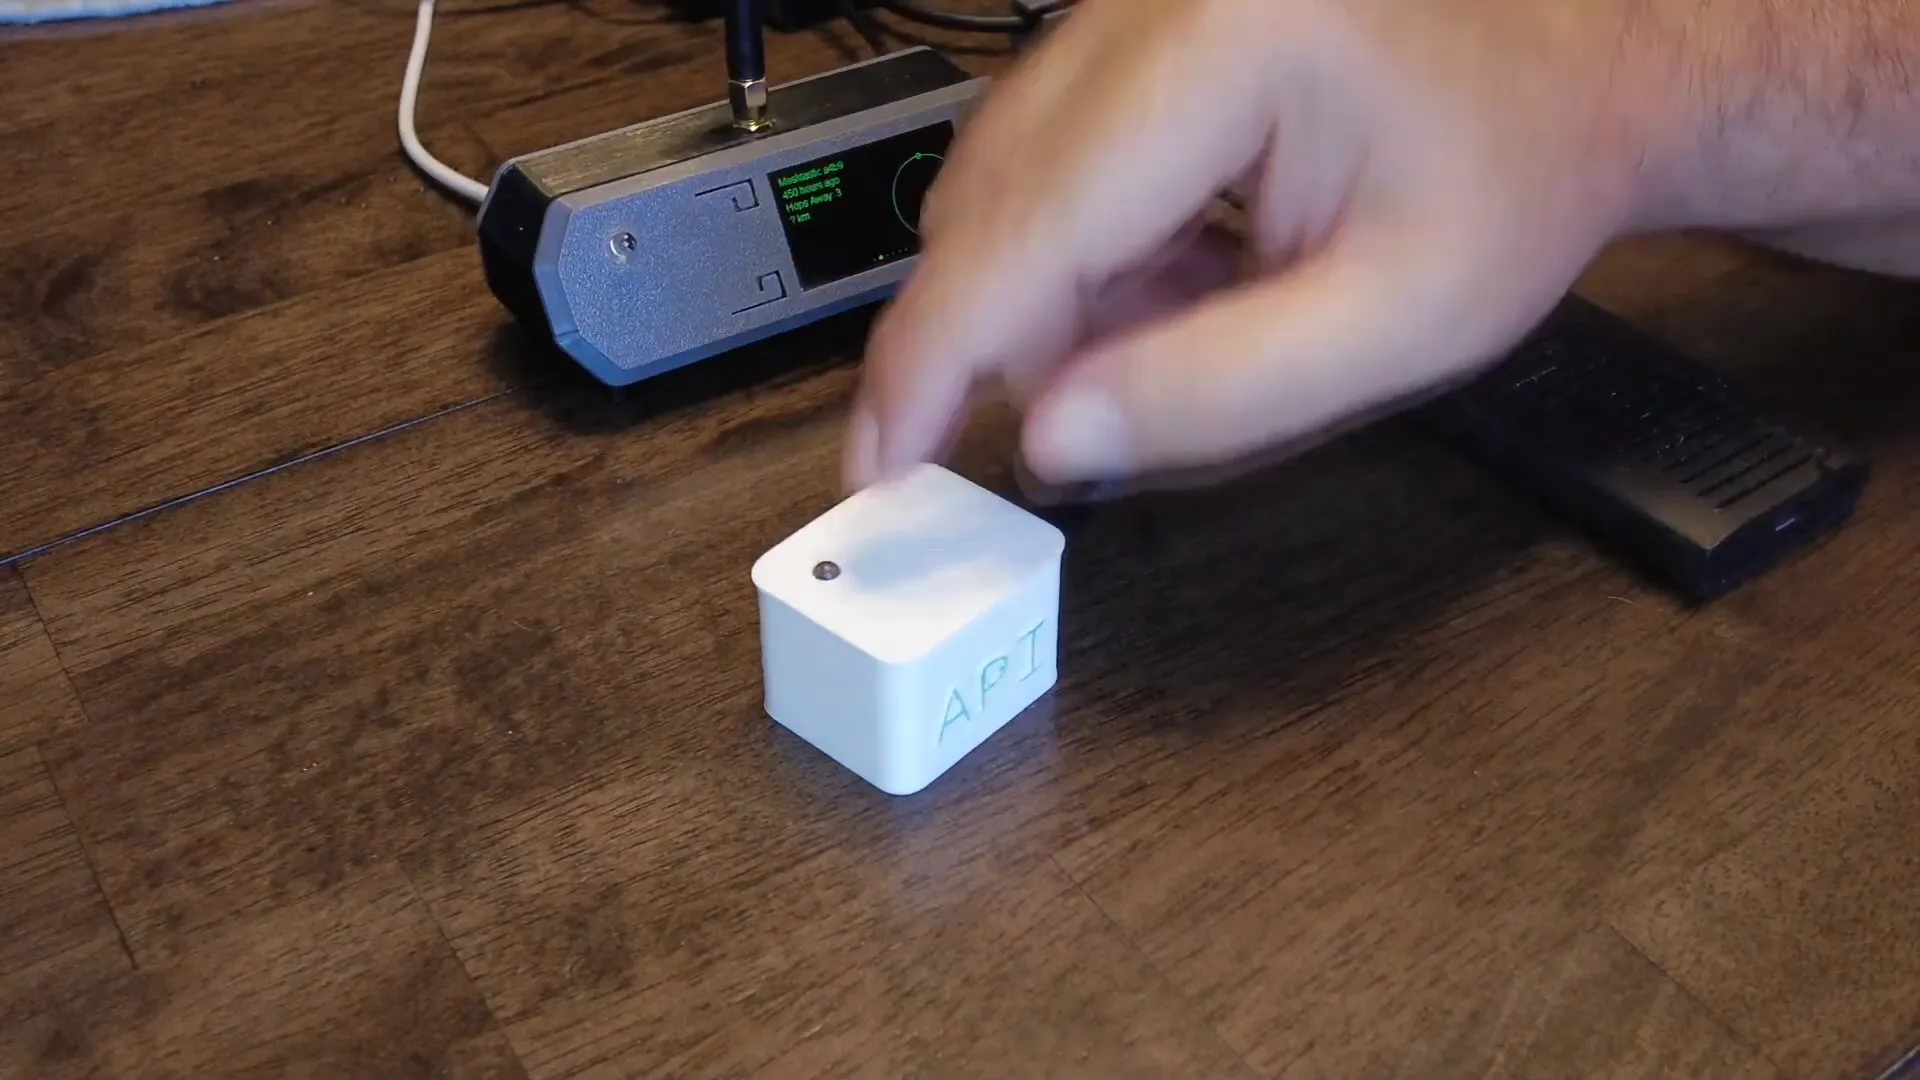
This project centers around the ESP32C6, a powerful microcontroller that enhances the functionality of Meshtastic nodes. The design includes a compact box featuring an API label on one side and a 915 MHz label on the other. This setup allows you to send Meshtastic messages using various methods, such as an API call or through a web browser.
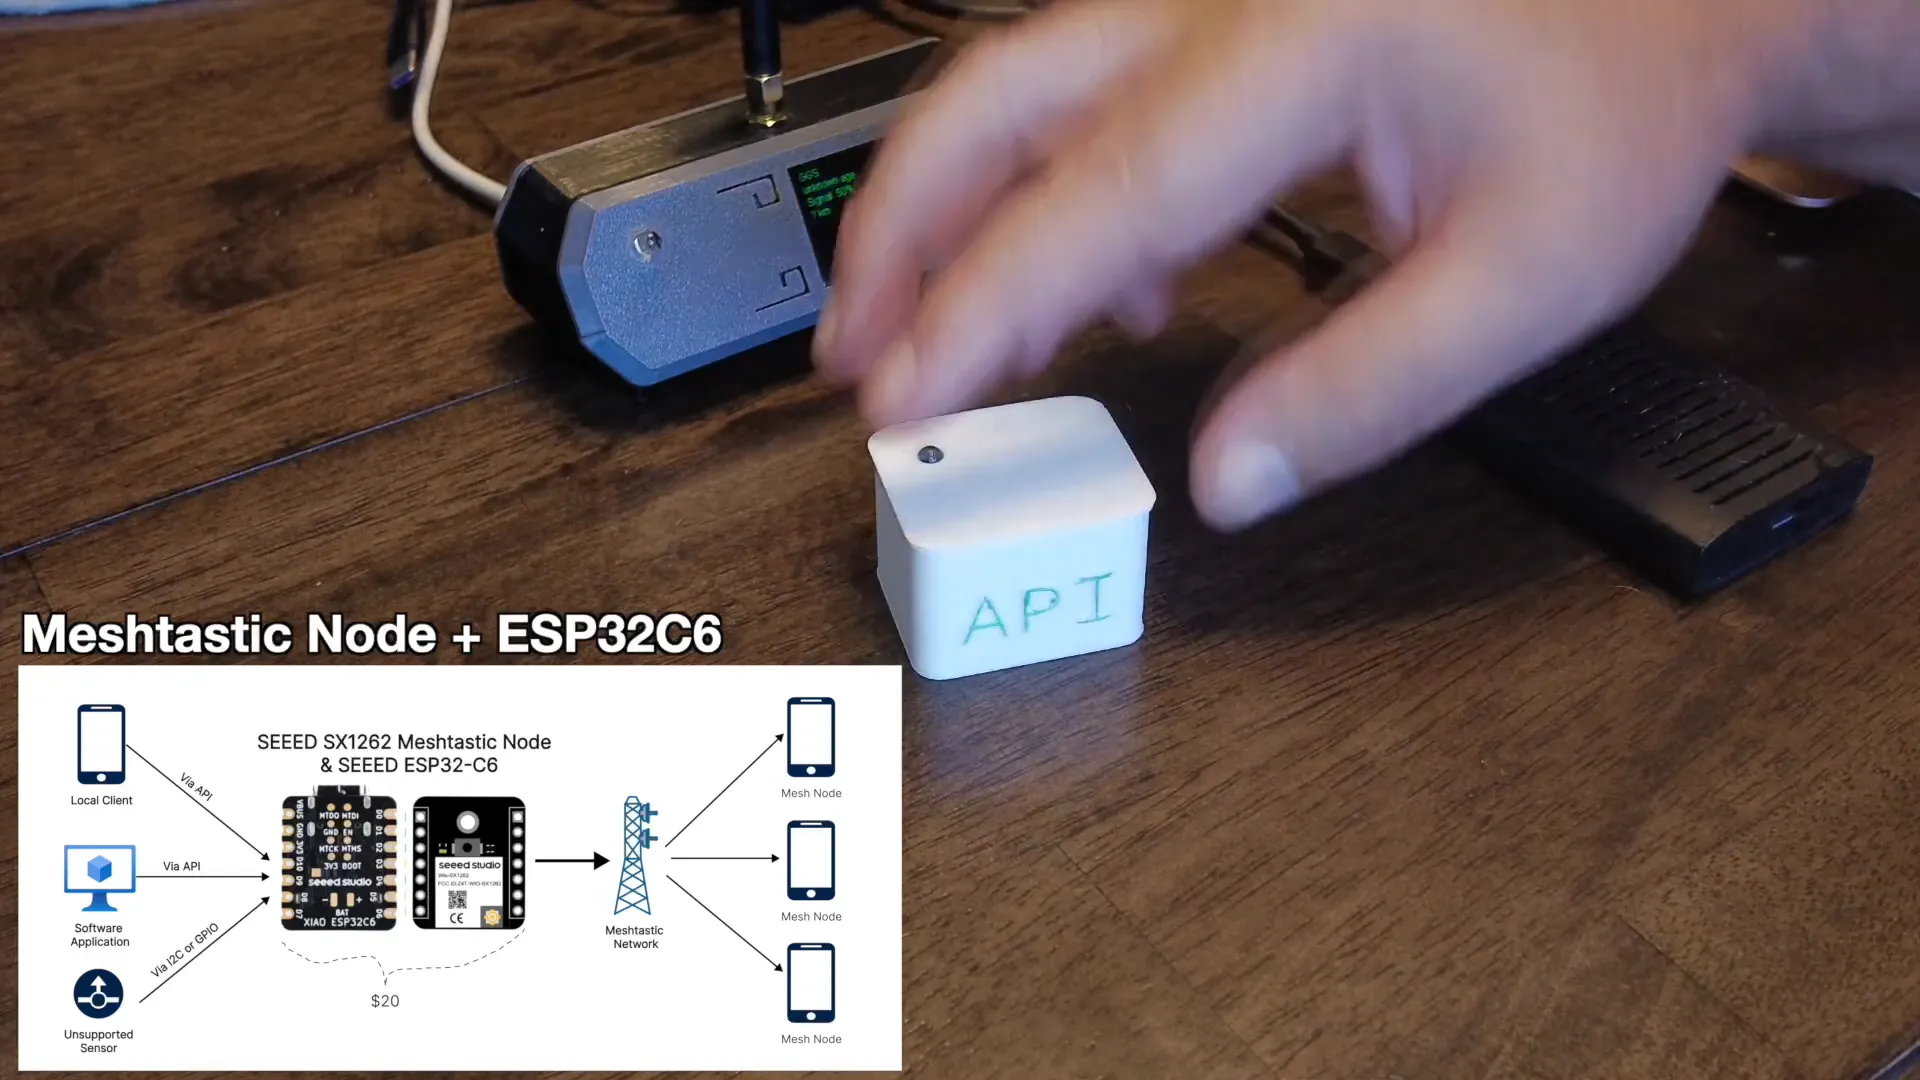
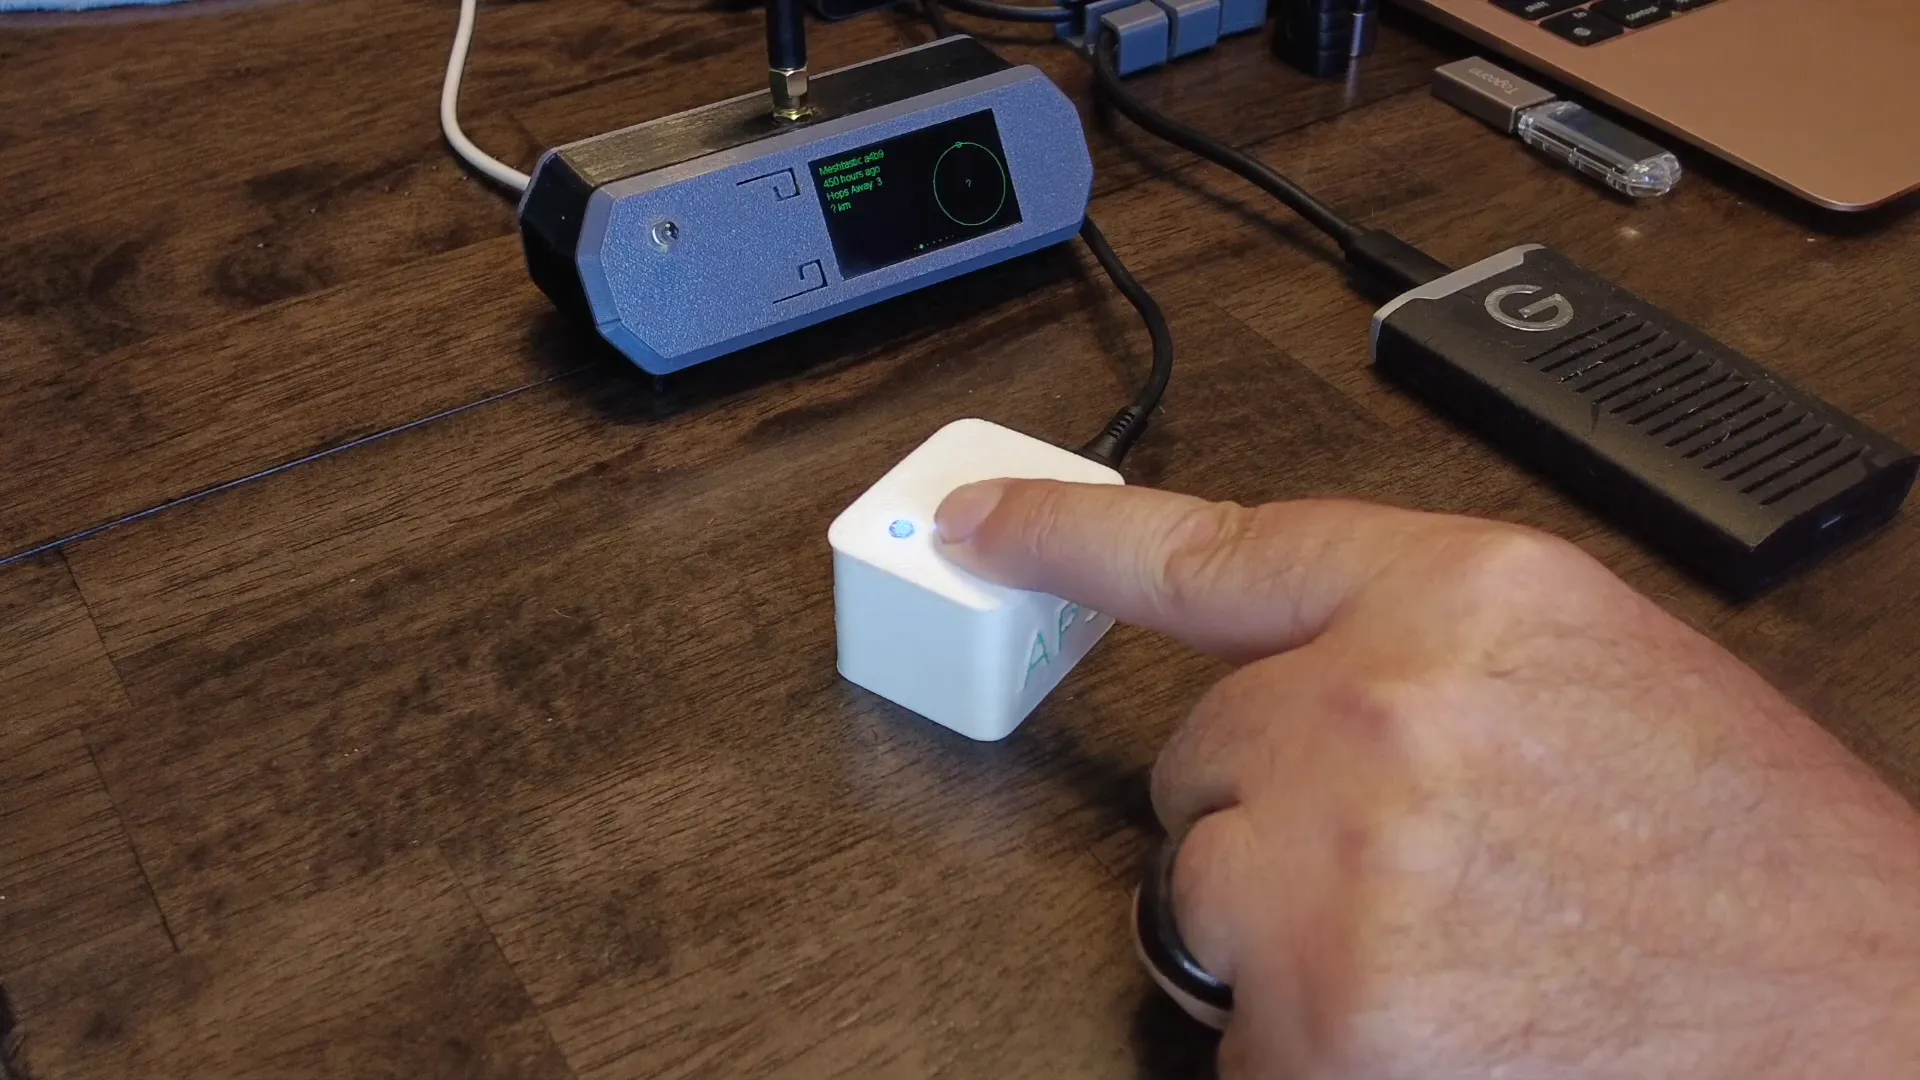
Inside the box, you'll find a small LED indicator at the top and a designated space for a USB cable. The core components include an ESP32 node and an SX1262 node, both equipped with antennas for optimal signal transmission. Additionally, there is room for a second ESP32C6, which connects to the primary ESP32 via a serial interface. This setup enables the ESP32C6 to send messages efficiently.
Getting Started with Your Node
Once you have assembled your hardware, the first step is to power it up. The LED indicator will help you determine whether the device is connecting to your Wi-Fi network. When the device successfully connects, the LED will flash three times slowly, indicating that it is active and ready for use.
To interact with your node, you will need to know its IP address. For example, if your node's IP address is 192.168.86.39, you can use this address to access the device from your computer.
Controlling the LED
One of the first features you can test is the LED control. By entering the following command in your browser:
http://192.168.86.39/LED/onyou can turn the LED on. To turn it off, simply replace "on" with "off" in the command:
http://192.168.86.39/LED/offIt's that simple! This basic interaction demonstrates how you can control your node using straightforward API commands.
Sending Messages via API
The primary function of your Meshtastic node is to send messages. To do this, you can use an endpoint set up specifically for sending messages. For instance, you can send a welcome message by accessing the following endpoint:
http://192.168.86.39/send_message?msg=Welcome to API!After sending the message, you’ll see a confirmation that the message was sent successfully. Your node will also indicate receipt of the message, confirming that everything is working as intended.
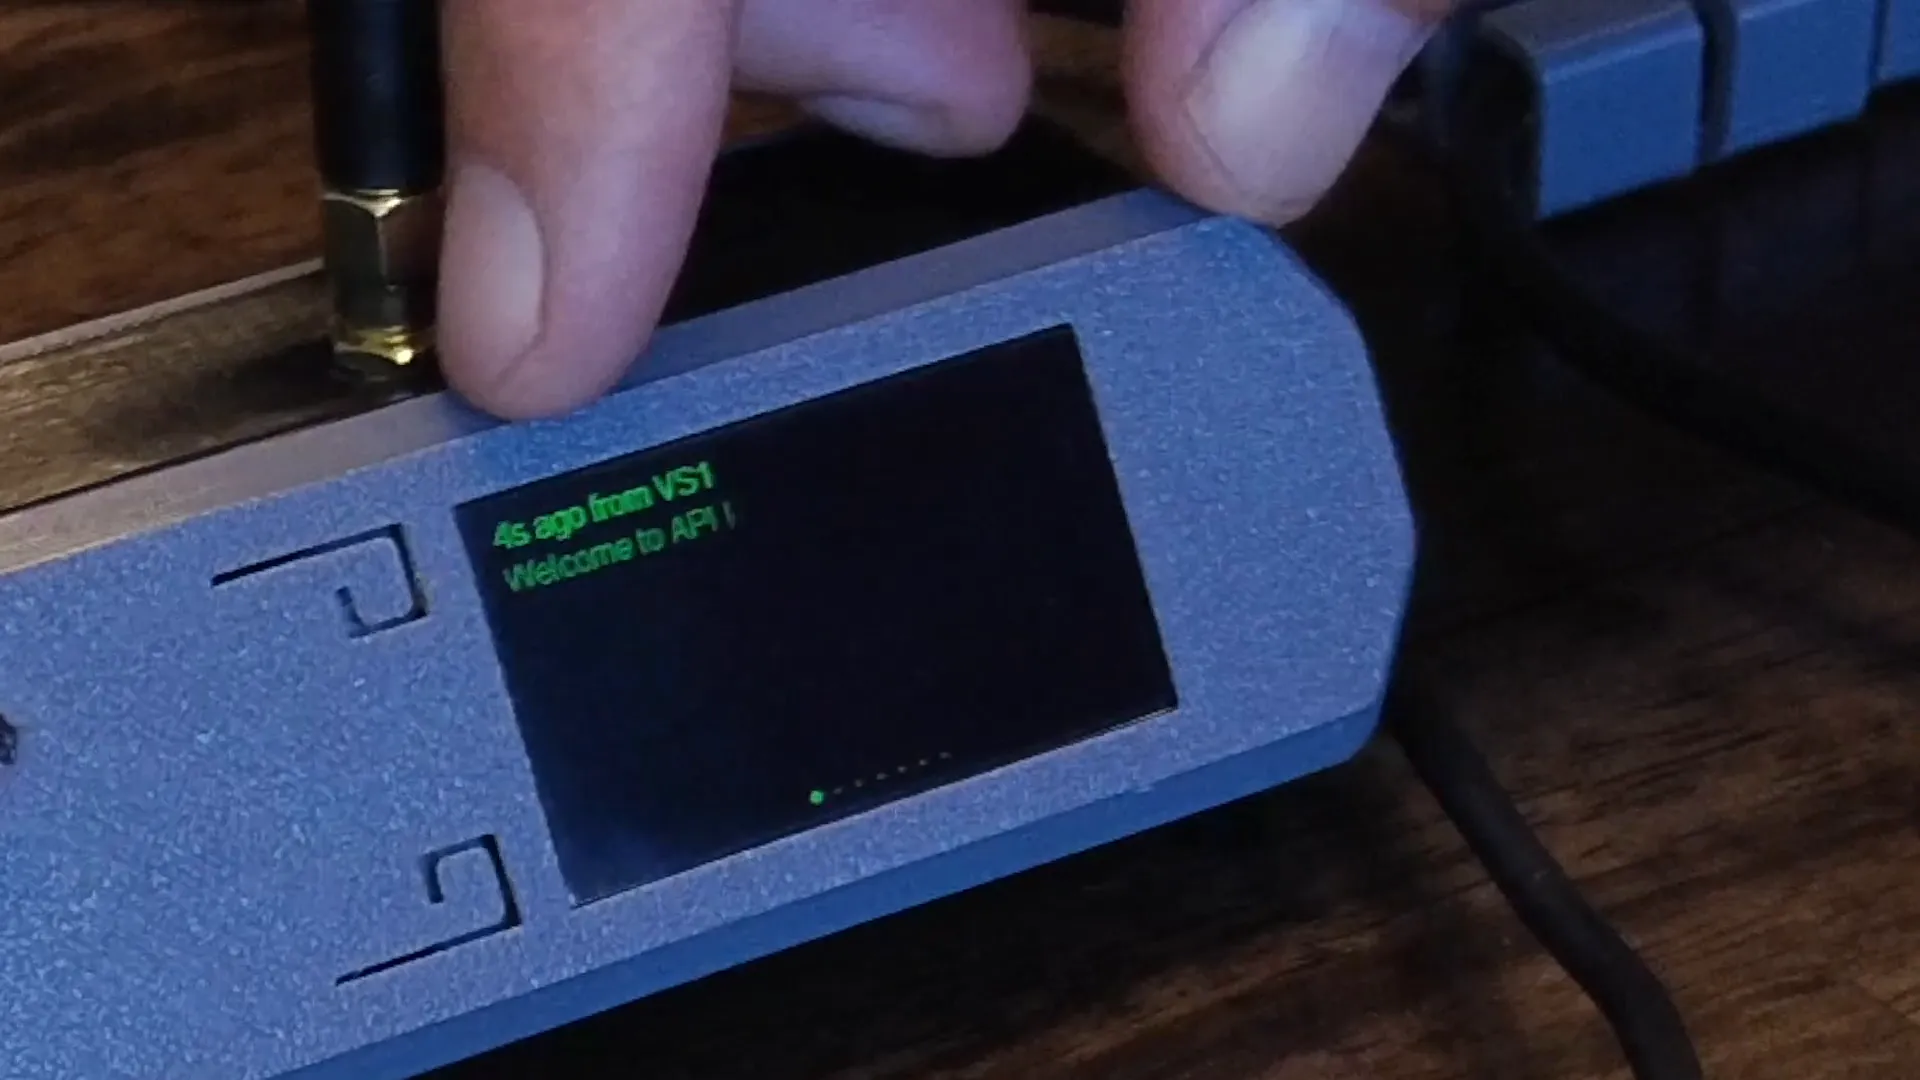
This simple API setup allows you to send messages to your Meshtastic network effortlessly, bridging the gap between modern devices and 915 MHz mesh networks.
Why Choose Meshtastic?
Meshtastic offers an incredible opportunity for anyone interested in IoT and mesh networking. It provides a way to communicate without relying on traditional internet connections, making it perfect for outdoor adventures, emergency communications, or remote areas where cellular signals are weak. Plus, the flexibility of using ESP32 modules makes it accessible for hobbyists and developers alike.
Components Required
To build your own Meshtastic node, you will need the following components:
- ESP32C6 microcontroller
- SX1262 LoRa module
- LED indicator
- USB cable
- Custom enclosure (for housing components)
You can find the ESP32C6 and other related components available for purchase at Loramesh Devices.
Expanding Your Project
This project is just the beginning! Once you have your basic node running, consider expanding its capabilities. Here are a few ideas:
- Integrate additional sensors (temperature, humidity, etc.)
- Develop a mobile app for easier message management
- Experiment with different mesh networking protocols
- Connect multiple nodes for a larger network
The possibilities are endless, and each addition can enhance your understanding and control of IoT technologies.
FAQ Section
What is Meshtastic?
Meshtastic is an open-source project that allows users to create long-range communication networks using low-power devices. It enables messaging between devices without requiring a cellular network.
How do I power my Meshtastic node?
You can power your node using a USB cable connected to a power source, such as a power bank or a wall adapter.
Can I use other microcontrollers with Meshtastic?
Yes, while the ESP32C6 is a popular choice, other ESP32 models and compatible microcontrollers can also be used with Meshtastic.
Where can I buy Meshtastic devices?
You can find a variety of Meshtastic devices available at Loramesh Devices.
Is there a community for Meshtastic users?
Yes! There are active communities on platforms like Discord and GitHub where users share tips, projects, and support for Meshtastic.
Conclusion
Building your own Meshtastic node with the ESP32C6 is an exciting project that opens up a world of possibilities in IoT communication. Whether you're looking to create a personal messaging system or expand your skills in hardware and software integration, this project is a fantastic starting point. Get your components, start building, and join the Meshtastic community today!