
DIY Car Alarm with Meshtastic Sensors: A Step-by-Step Guide
Published by Vivian van Zyl in Meshtastic the 07/15/2025 at 01:17 am

If you’re a tech enthusiast or just curious about how to secure your vehicle using cutting-edge IoT technology, this guide is for you. Using Meshtastic sensors, you can build a reliable, custom car alarm system that communicates wirelessly without relying on the internet. This article breaks down the hardware setup, software configuration, and practical uses of Meshtastic detection sensor modules, inspired by an innovative project from Vivian Van Zyl of LoraMeshDevices.com.
Table of Contents
- Introduction to Meshtastic Sensor Networks
- Hardware Components and Setup
- Software Configuration for Meshtastic Sensor Nodes
- Testing and Using Your DIY Car Alarm
- Advantages of Using Meshtastic for Security Sensors
- Conclusion
- Frequently Asked Questions (FAQ)
Introduction to Meshtastic Sensor Networks
Meshtastic is an open-source, decentralized mesh network technology that allows devices to communicate over long distances using LoRa radios. By integrating various types of sensors with Meshtastic nodes, you can create a responsive network that sends alerts whenever a sensor is triggered. Whether it’s a motion sensor, vibration sensor, flood sensor, or light sensor, Meshtastic nodes can detect events and broadcast messages across the mesh.
In this project, the focus is on building a DIY car alarm using a Meshtastic node paired with a motion sensor. The system sends notifications to a receiver node connected to a smartphone, allowing you to monitor your car remotely without internet dependence.
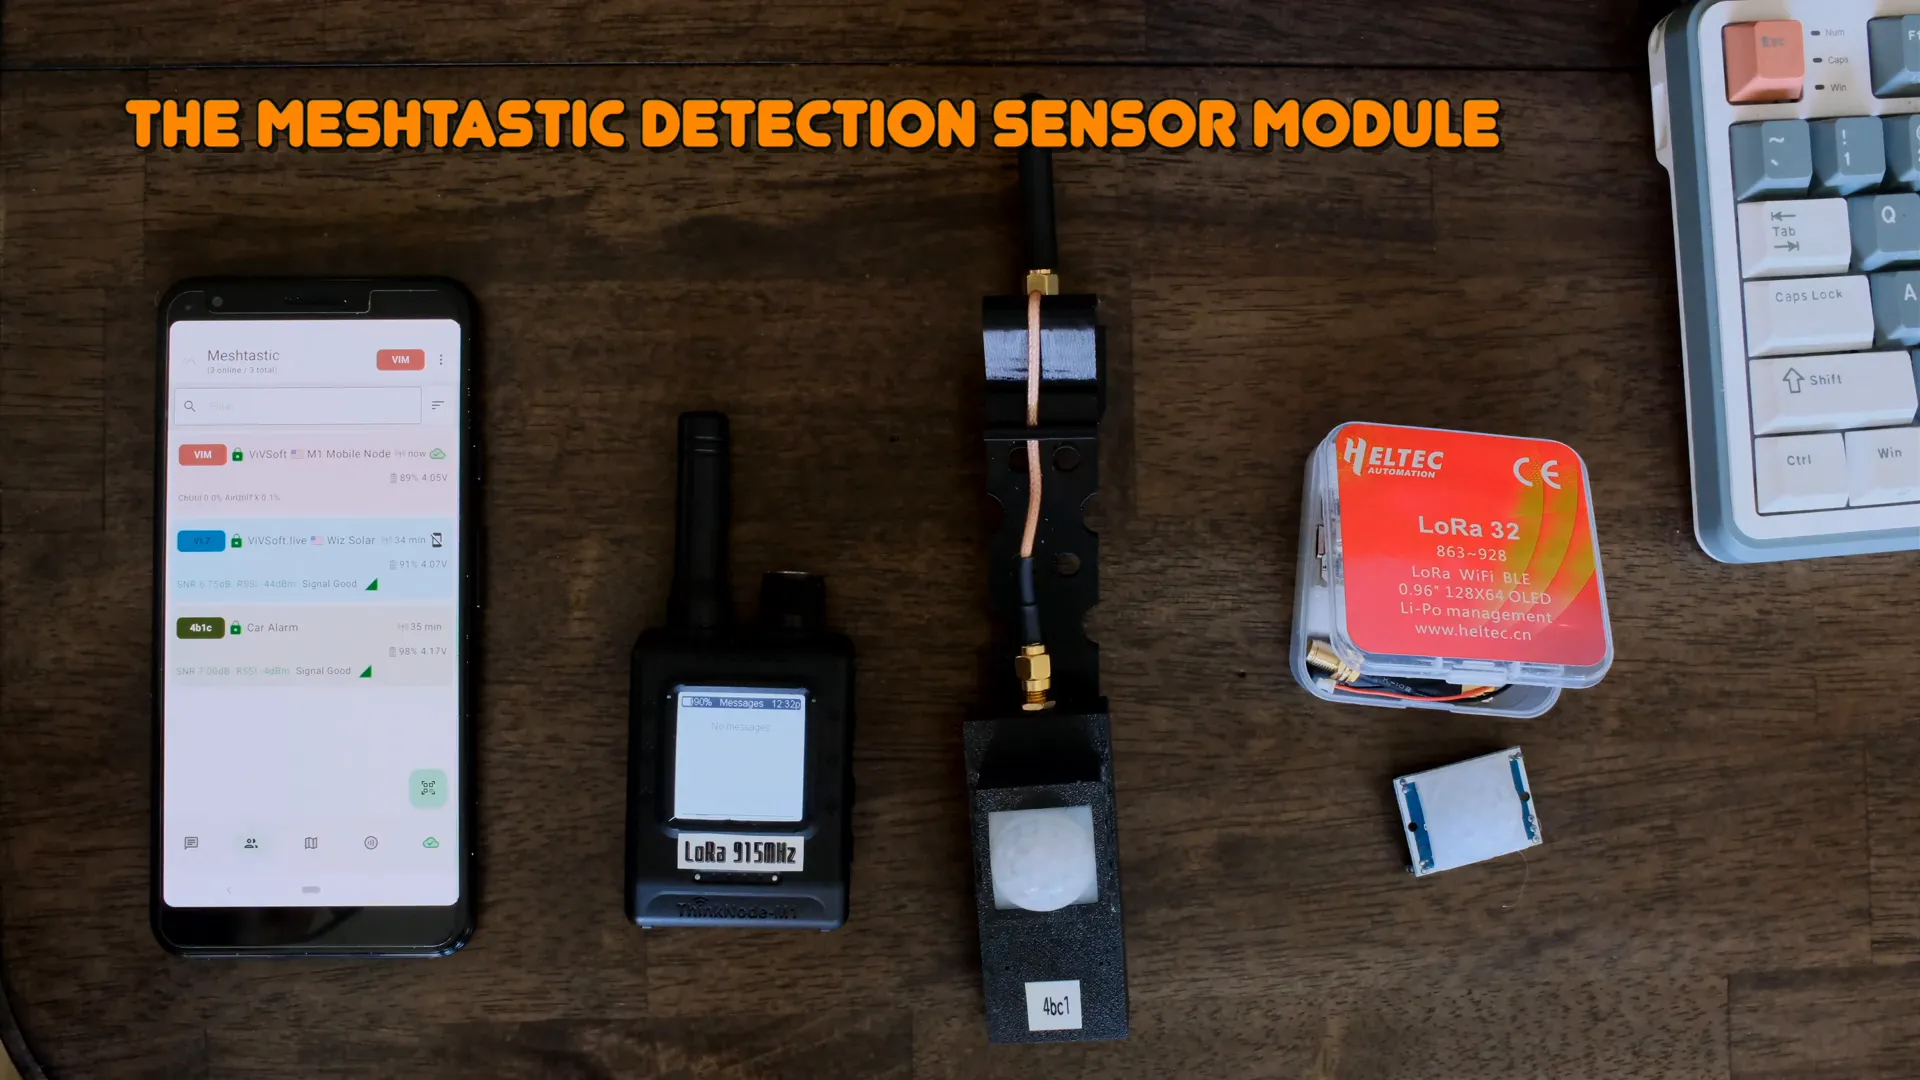
Hardware Components and Setup
The hardware setup is straightforward and involves just a few key components:
- ThinkNode M1: Acts as the receiver connected to your smartphone.
- Heltec T190 (or Heltec V3): The main sensor node that connects to the motion sensor.
- Motion Sensor: A simple three-wire sensor that detects movement.
- Antenna Setup: Installed outside the car window to maximize signal strength.
The motion sensor features three wires: a 5V power wire, a ground wire, and a sensing wire in the middle. When motion is detected, the sensor outputs a high voltage on the sensing pin. This sensing wire is connected to a GPIO pin on the Heltec T190 node (pin 15 in this setup) to trigger the event.
To ensure reliable performance, the sensor’s re-trigger jumper is configured to prevent automatic retriggering, and sensitivity is set to the lowest level to minimize false alarms. The entire system runs on just these three connections: 5V, ground, and the sensing wire linked to the GPIO pin.
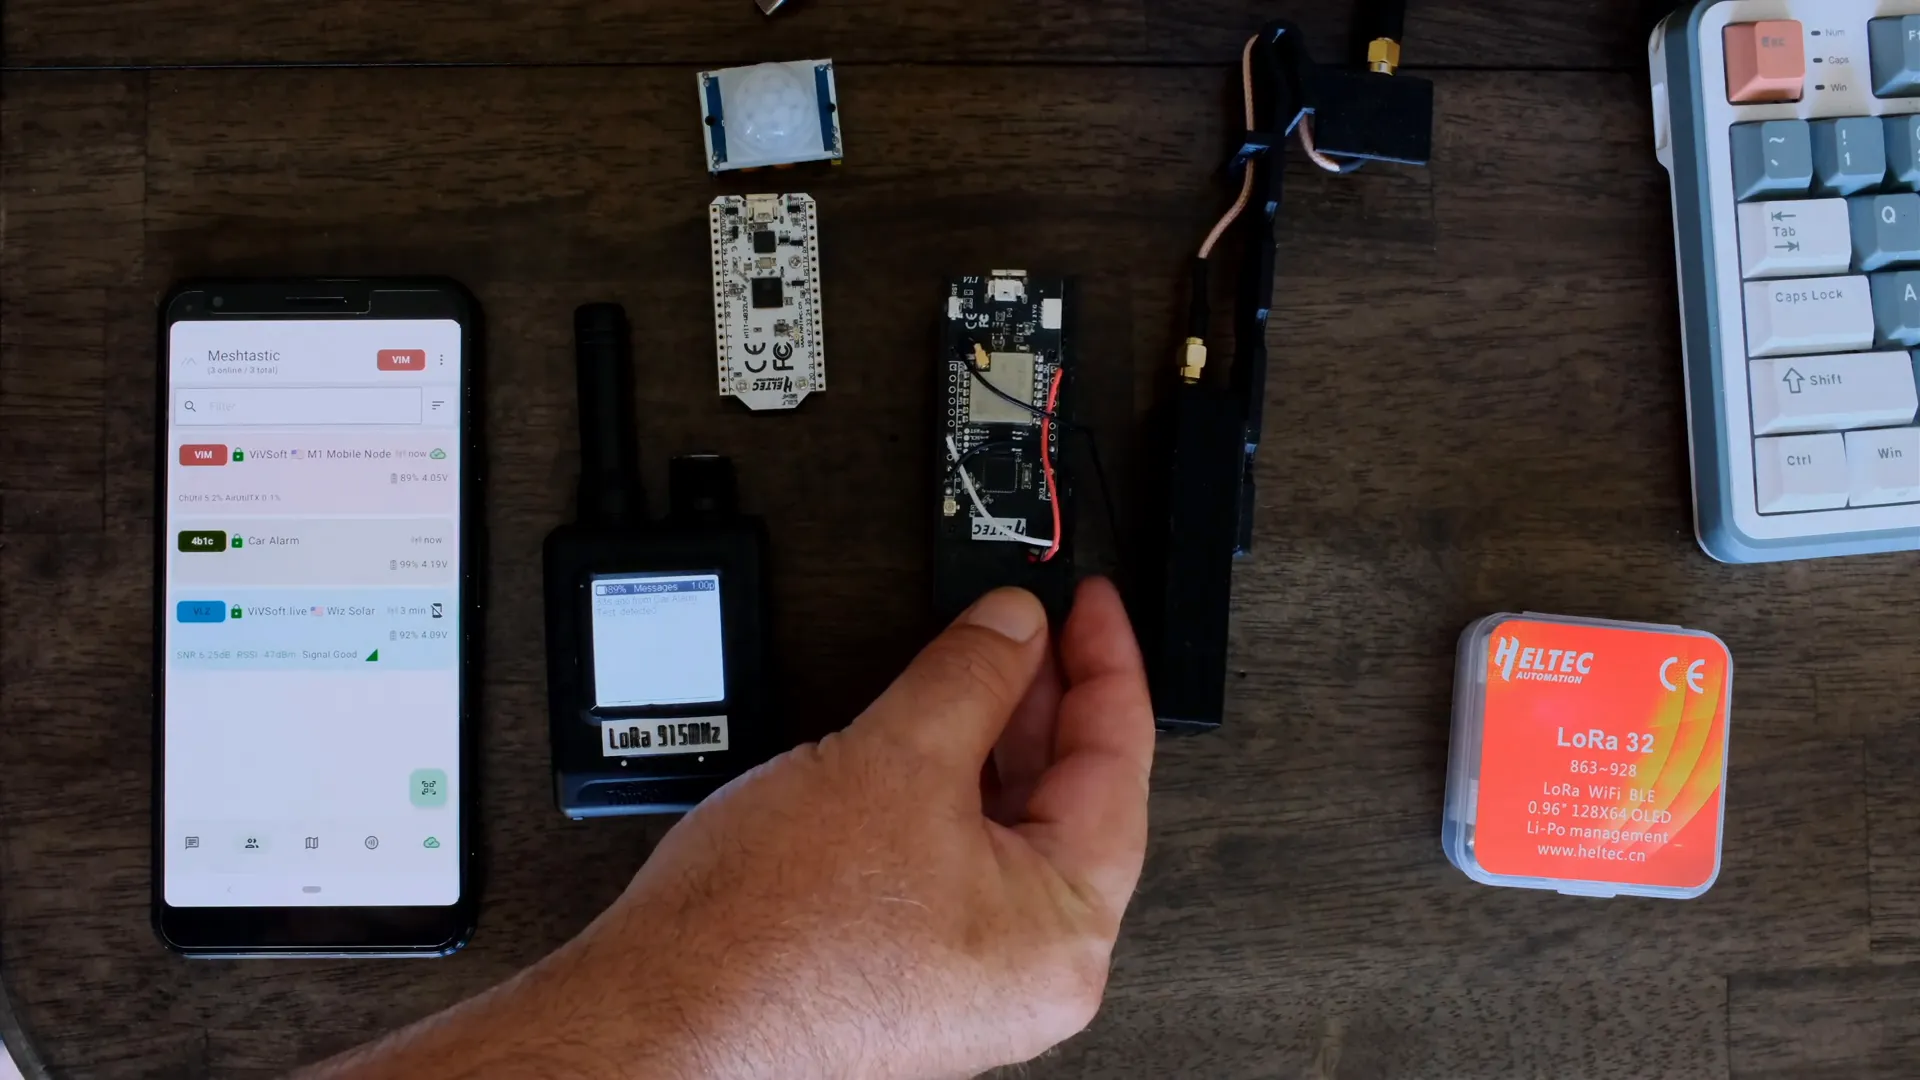
Practical Installation
The sensor node is mounted on a small kit clipped over the car window, positioning the antenna externally for better signal transmission. Depending on your application—whether inside a shed, at a gate, or in a home—the antenna setup may vary to optimize coverage.
Software Configuration for Meshtastic Sensor Nodes
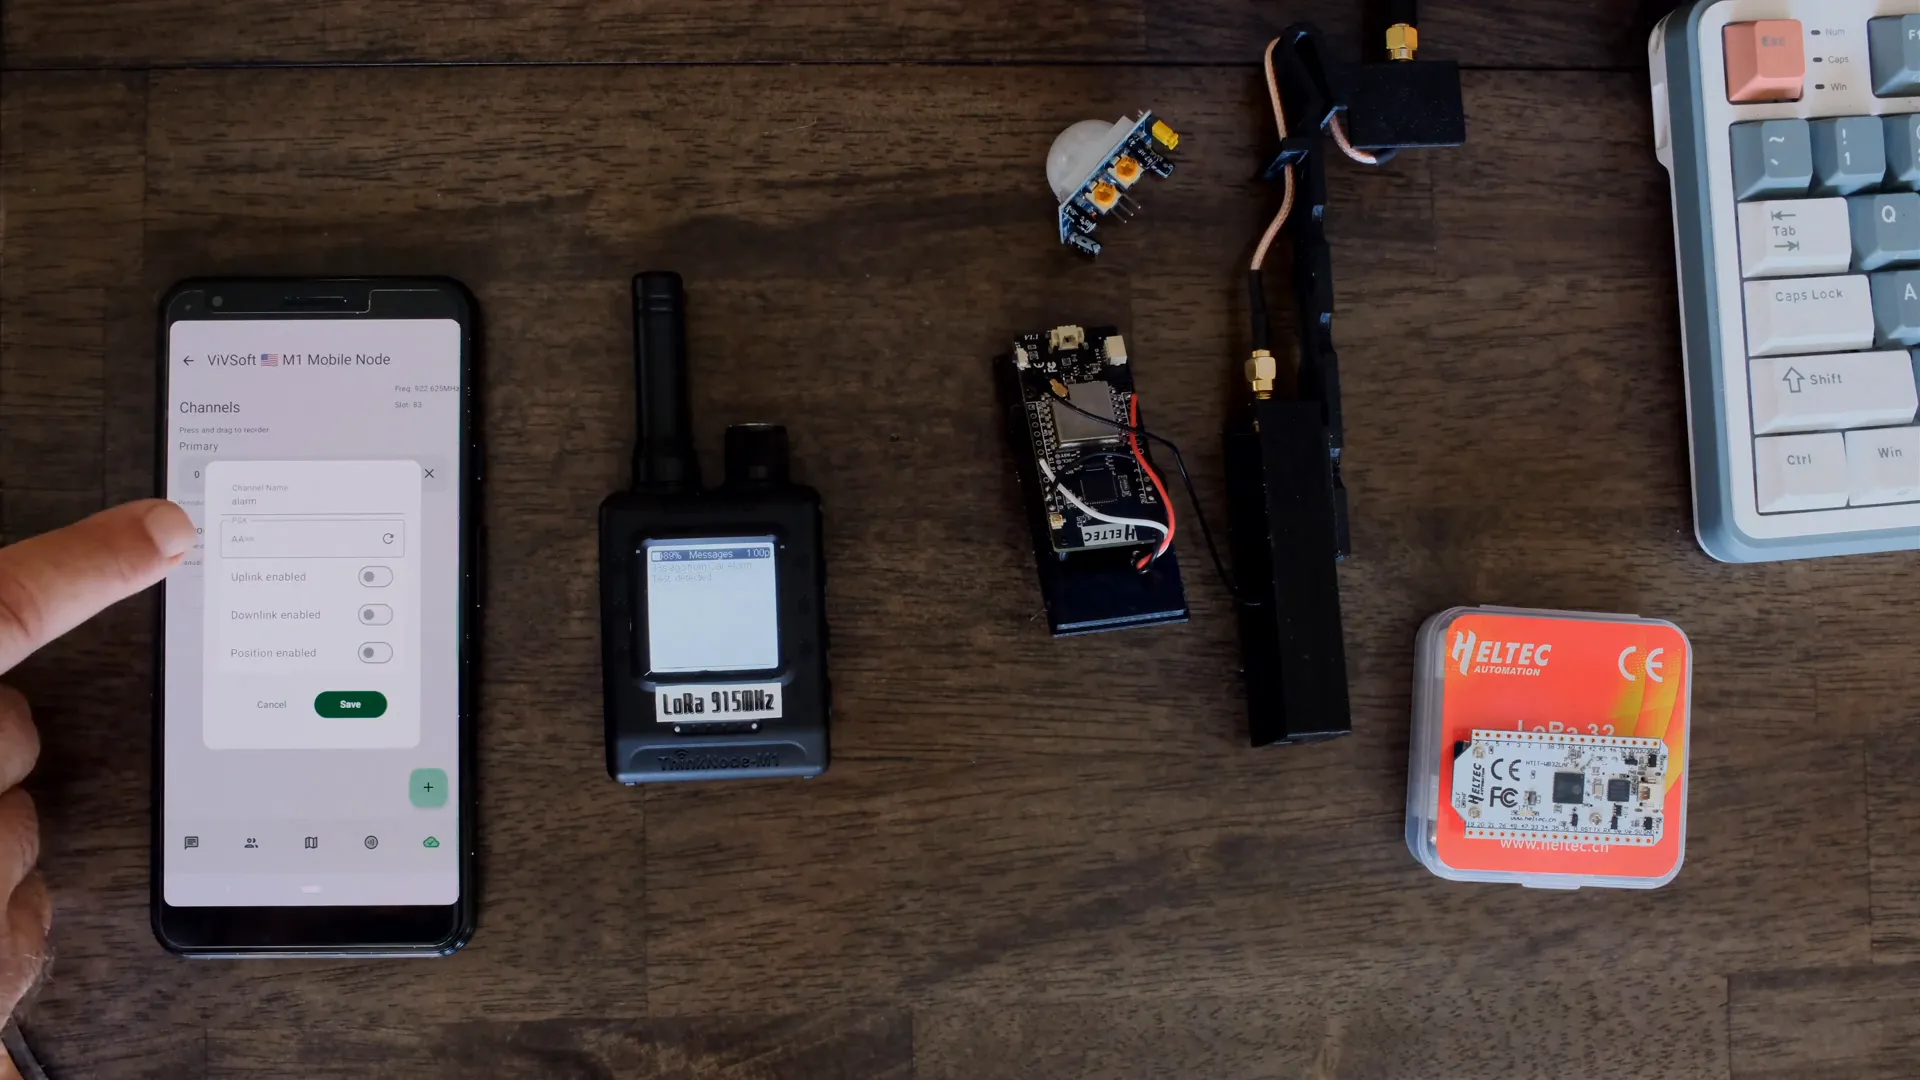
Setting up the software correctly is crucial to ensure your Meshtastic sensor network operates smoothly and securely. Here are the key steps:
- Create a Custom Channel: Meshtastic does not allow detection sensor modules to operate on the default “long fast” channel. You need to create your own channel with a unique name and key. In this project, the channel is renamed to alarm with a custom key for privacy and network separation.
- Set Frequency Slot: All nodes in the mesh network—receiver, sensor node, and relay nodes like solar-powered nodes—are set to the same frequency slot to ensure communication. Slot 83 was selected here, which corresponds to 922.625 MHz, moving the network away from default frequencies and reducing interference.
- Configure Detection Sensor Module: On the sensor node, enable the detection sensor module and set the minimum broadcast interval (e.g., 10 seconds) to prevent flooding the network with repeated messages. Customize the message text (such as “test”) and assign the GPIO pin being monitored (pin 15 in this case).
- Set Trigger Type: Choose the trigger type as rising edge, meaning the event is triggered when the monitored pin voltage changes from low to high—matching the behavior of the motion sensor output.
Mesh Network Overview
This setup consists of three nodes:
- The ThinkNode M1 as the receiver connected to your phone.
- The Car Alarm node with the motion sensor attached.
- A solar-powered relay node installed on a roof to extend the mesh network’s range.
Messages triggered by the sensor node travel through this mesh, allowing you to receive alerts even miles away from the car without relying on cellular or Wi-Fi networks.
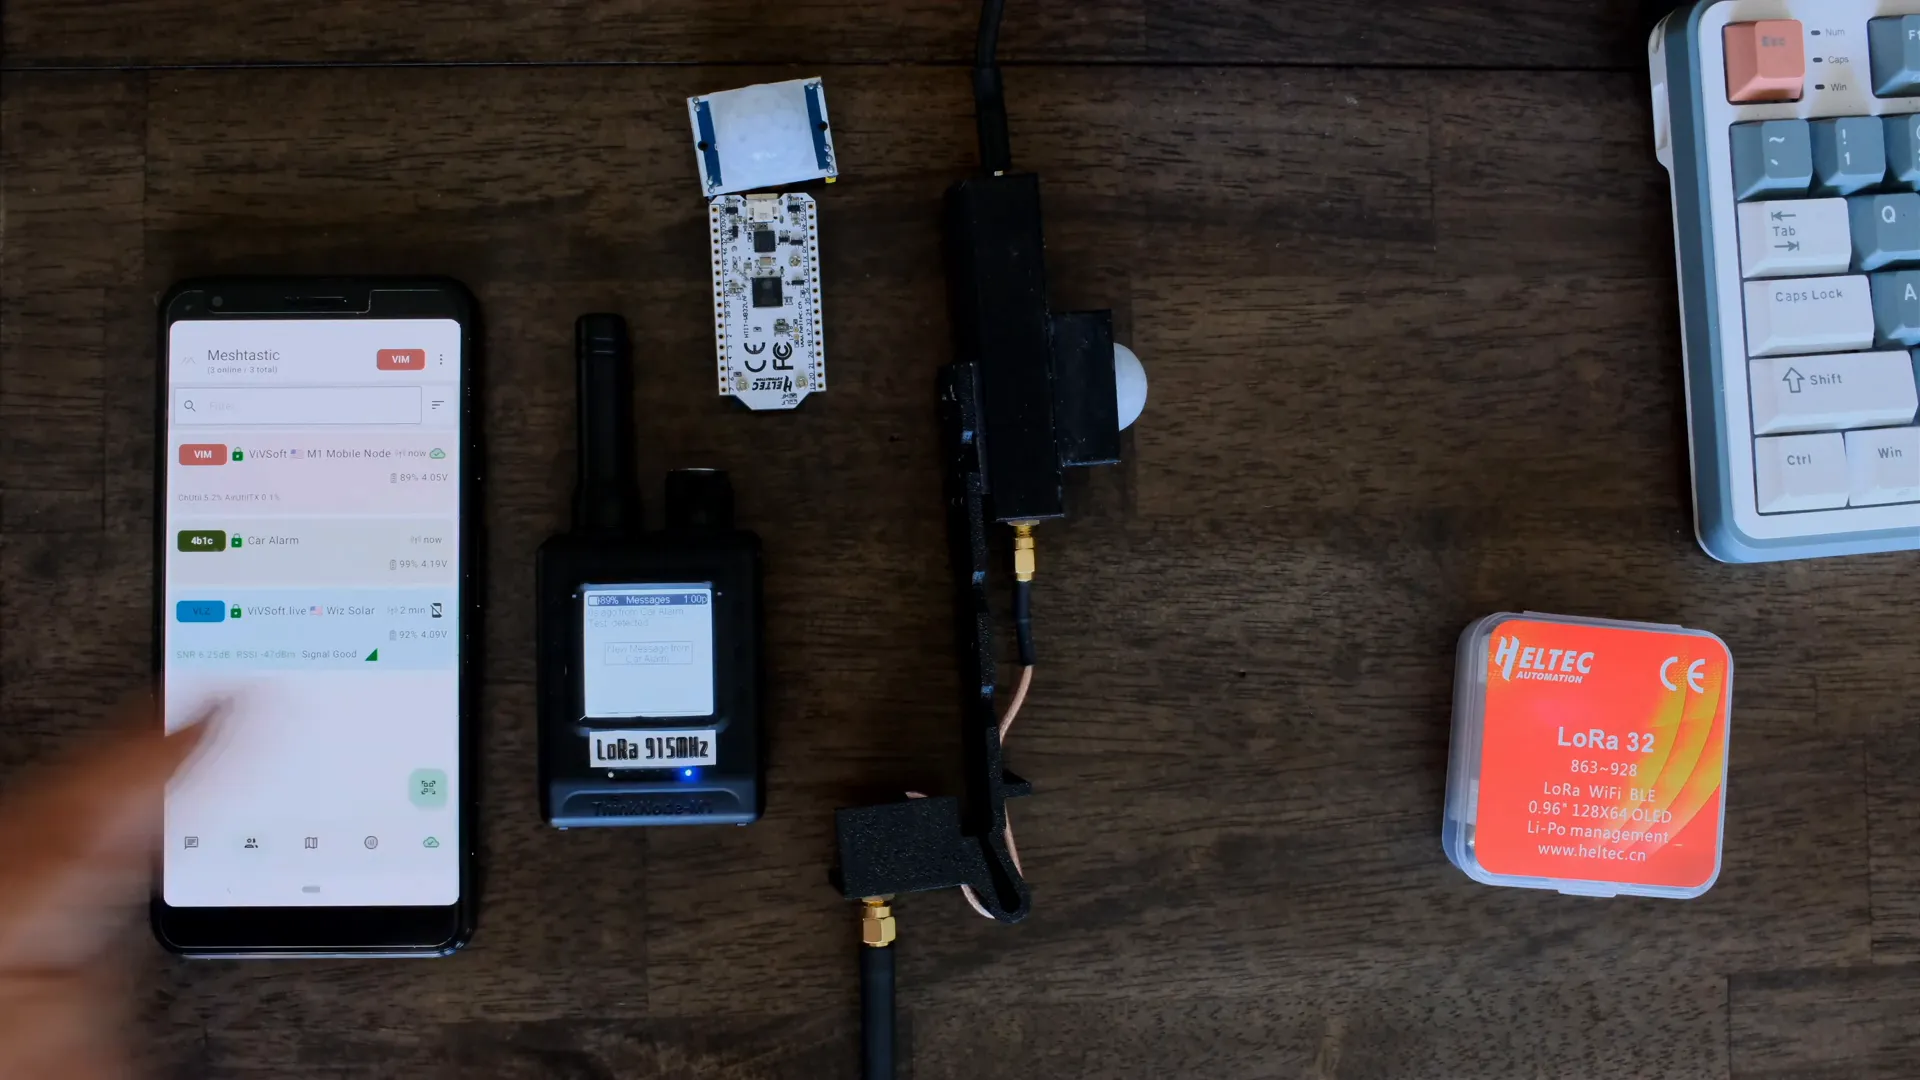
Testing and Using Your DIY Car Alarm
Once assembled and configured, testing the system is as simple as triggering the motion sensor. When motion is detected, the sensor node sends a message that appears on the ThinkNode receiver and your mobile app with a notification sound and the custom message text (e.g., “Test detected”).
This instant messaging capability makes it ideal not only for car security but also for diverse applications such as monitoring gates, sheds, water pumps, or flood sensors around your property.
Advantages of Using Meshtastic for Security Sensors
- Internet Independence: The mesh network operates without Wi-Fi or cellular data, providing reliable communication in remote or signal-poor areas.
- Scalability: You can add thousands of sensors across your properties, all communicating seamlessly within the mesh.
- Customizability: Flexible hardware and software configurations allow you to tailor triggers, messages, and network settings.
- Low Power Consumption: Devices like the Heltec T190 are energy efficient, especially when combined with solar-powered relay nodes.
Conclusion
Building a DIY car alarm with Meshtastic sensors is an exciting project that combines IoT innovation with practical security solutions. By wiring a simple motion sensor to a Heltec T190 node, configuring a custom mesh network channel, and setting up proper software triggers, you can monitor your vehicle or other assets remotely with ease.
This approach offers unmatched flexibility, privacy, and reliability—perfect for tech-savvy users looking to explore mesh networks beyond traditional internet-dependent systems. Whether securing a car, gate, or pump, Meshtastic provides a powerful platform for sensor-based alerting.
Ready to start your own project? Experiment with different sensors, customize your messages, and expand your mesh network to fit your unique needs.
Frequently Asked Questions (FAQ)
What types of sensors can I use with Meshtastic?
You can use a wide range of sensors including motion sensors, vibration sensors, flood/water sensors, light sensors, and more. As long as the sensor outputs a digital signal that can be connected to a GPIO pin, it can trigger messages on the Meshtastic network.
Do I need internet or cellular service for this system to work?
No, the Meshtastic mesh network operates independently of the internet or cellular networks. Devices communicate directly using LoRa radio frequencies, making it ideal for remote or off-grid locations.
How far can the Meshtastic car alarm system communicate?
Range varies based on antenna setup and environmental factors, but with proper antennas and relay nodes, communication can span multiple miles, allowing you to receive alerts from a significant distance.
Can I customize the alert messages sent by the sensors?
Yes, you can customize the text message sent when a sensor is triggered, making it easy to identify which sensor or location the alert is coming from.
Is this system scalable for multiple sensors?
Absolutely. You can add thousands of sensor nodes to your Meshtastic mesh network, enabling comprehensive monitoring across large properties or multiple locations.