
DIY Meshtastic: Building a Base Station with the Heltec Vision Master T190
Published by Vivian van Zyl in Meshtastic the 01/13/2025 at 08:52 pm

Are you ready to dive into the world of Meshtastic? Today, we’ll explore how to create an eye-catching, functional base station using the Heltec Vision Master T190. This project showcases the potential of the T190 display in a home setting, offering enhanced visibility and usability for your Meshtastic communication needs.
Table of Contents
- What is Meshtastic?
- Introducing the Heltec Vision Master T190
- Building the Base Station
- Understanding the Functionality
- Configuring the Device
- LED Notifications
- Exploring Canned Messages
- Final Thoughts
- FAQ
What is Meshtastic?
Meshtastic is an open-source project that enables long-range, low-power communication between devices using LoRa technology. It creates a mesh network that allows users to send messages without relying on traditional cellular or Wi-Fi networks. This makes it perfect for outdoor adventures, emergency communications, or simply staying connected in areas with poor network coverage.
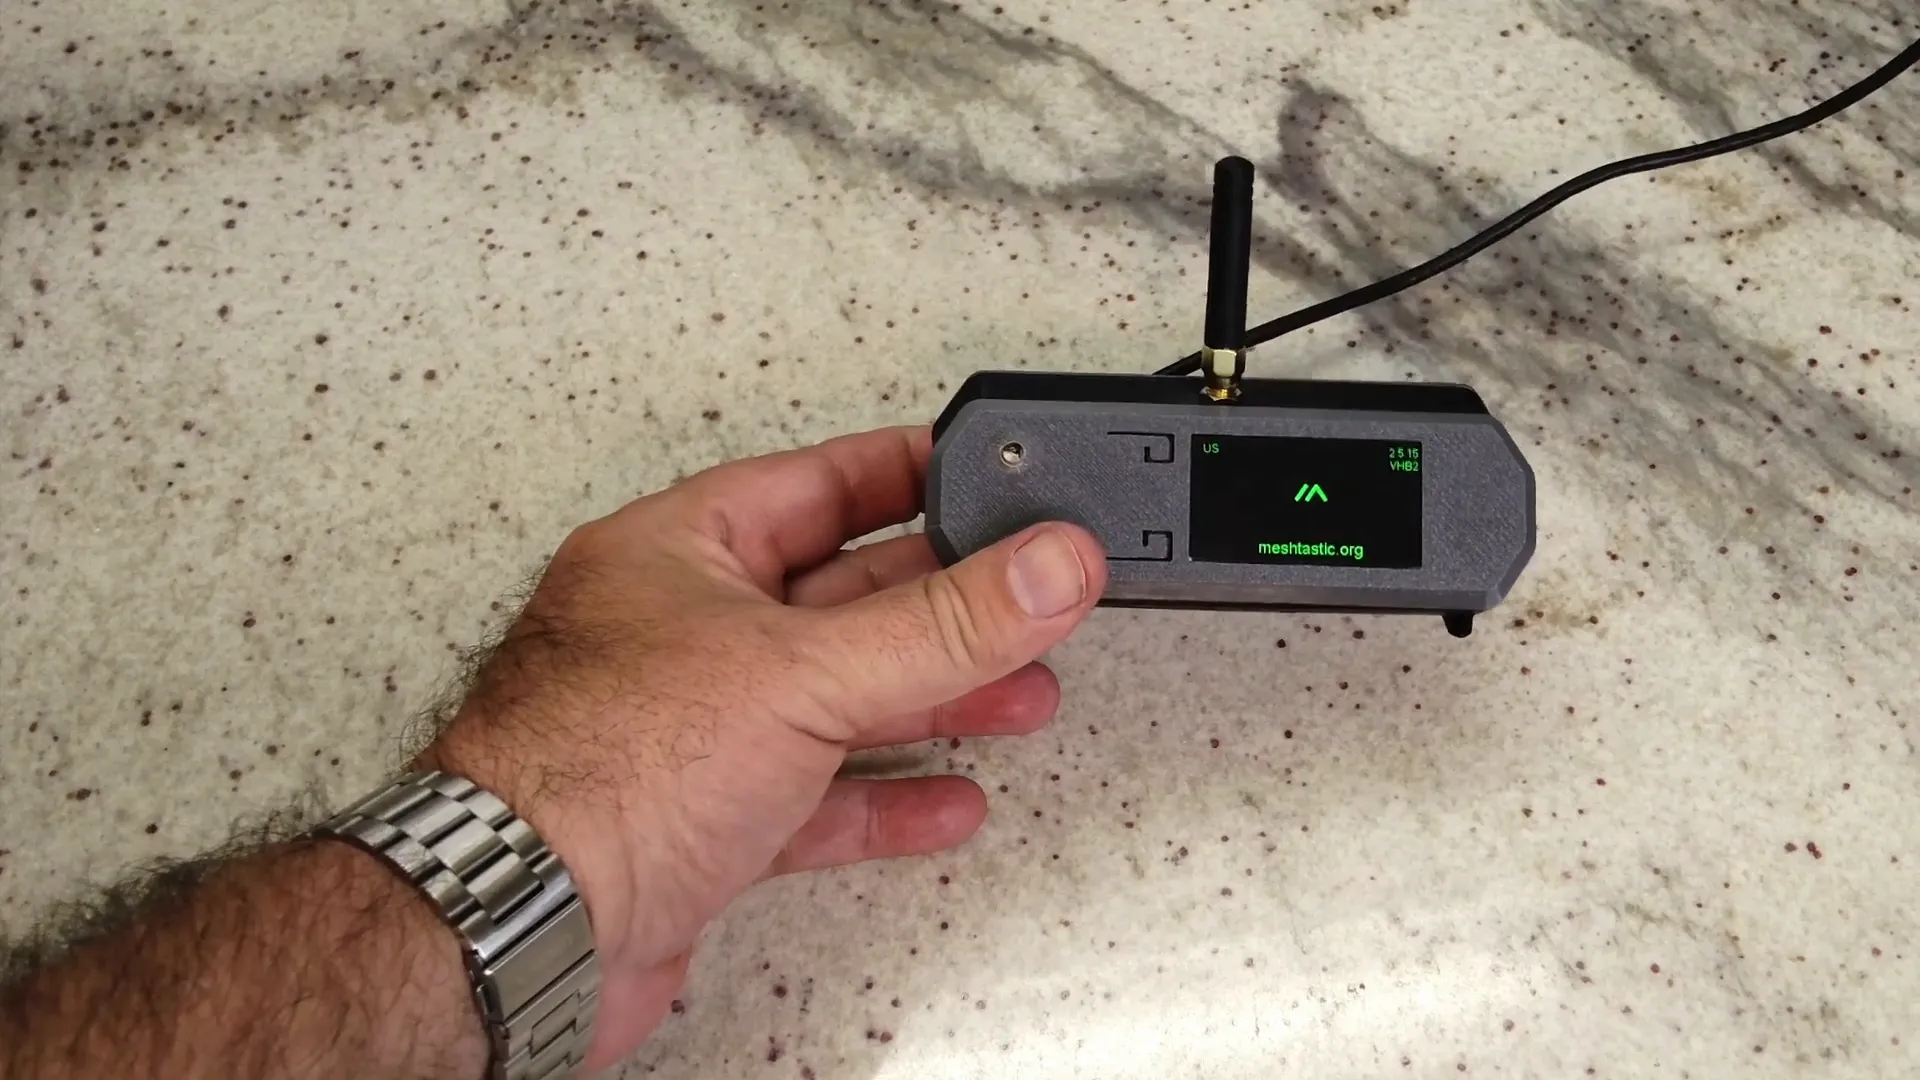
Introducing the Heltec Vision Master T190
The Heltec Vision Master T190 is a standout choice for your Meshtastic node due to its large, full-color display. Unlike the more common Heltec ESP32 V3 with its smaller screen, the T190 offers improved readability, making it easy to see messages from across the room. However, as of now, the full color capabilities of the display are not fully supported in Meshtastic, which is the only downside to this impressive device.
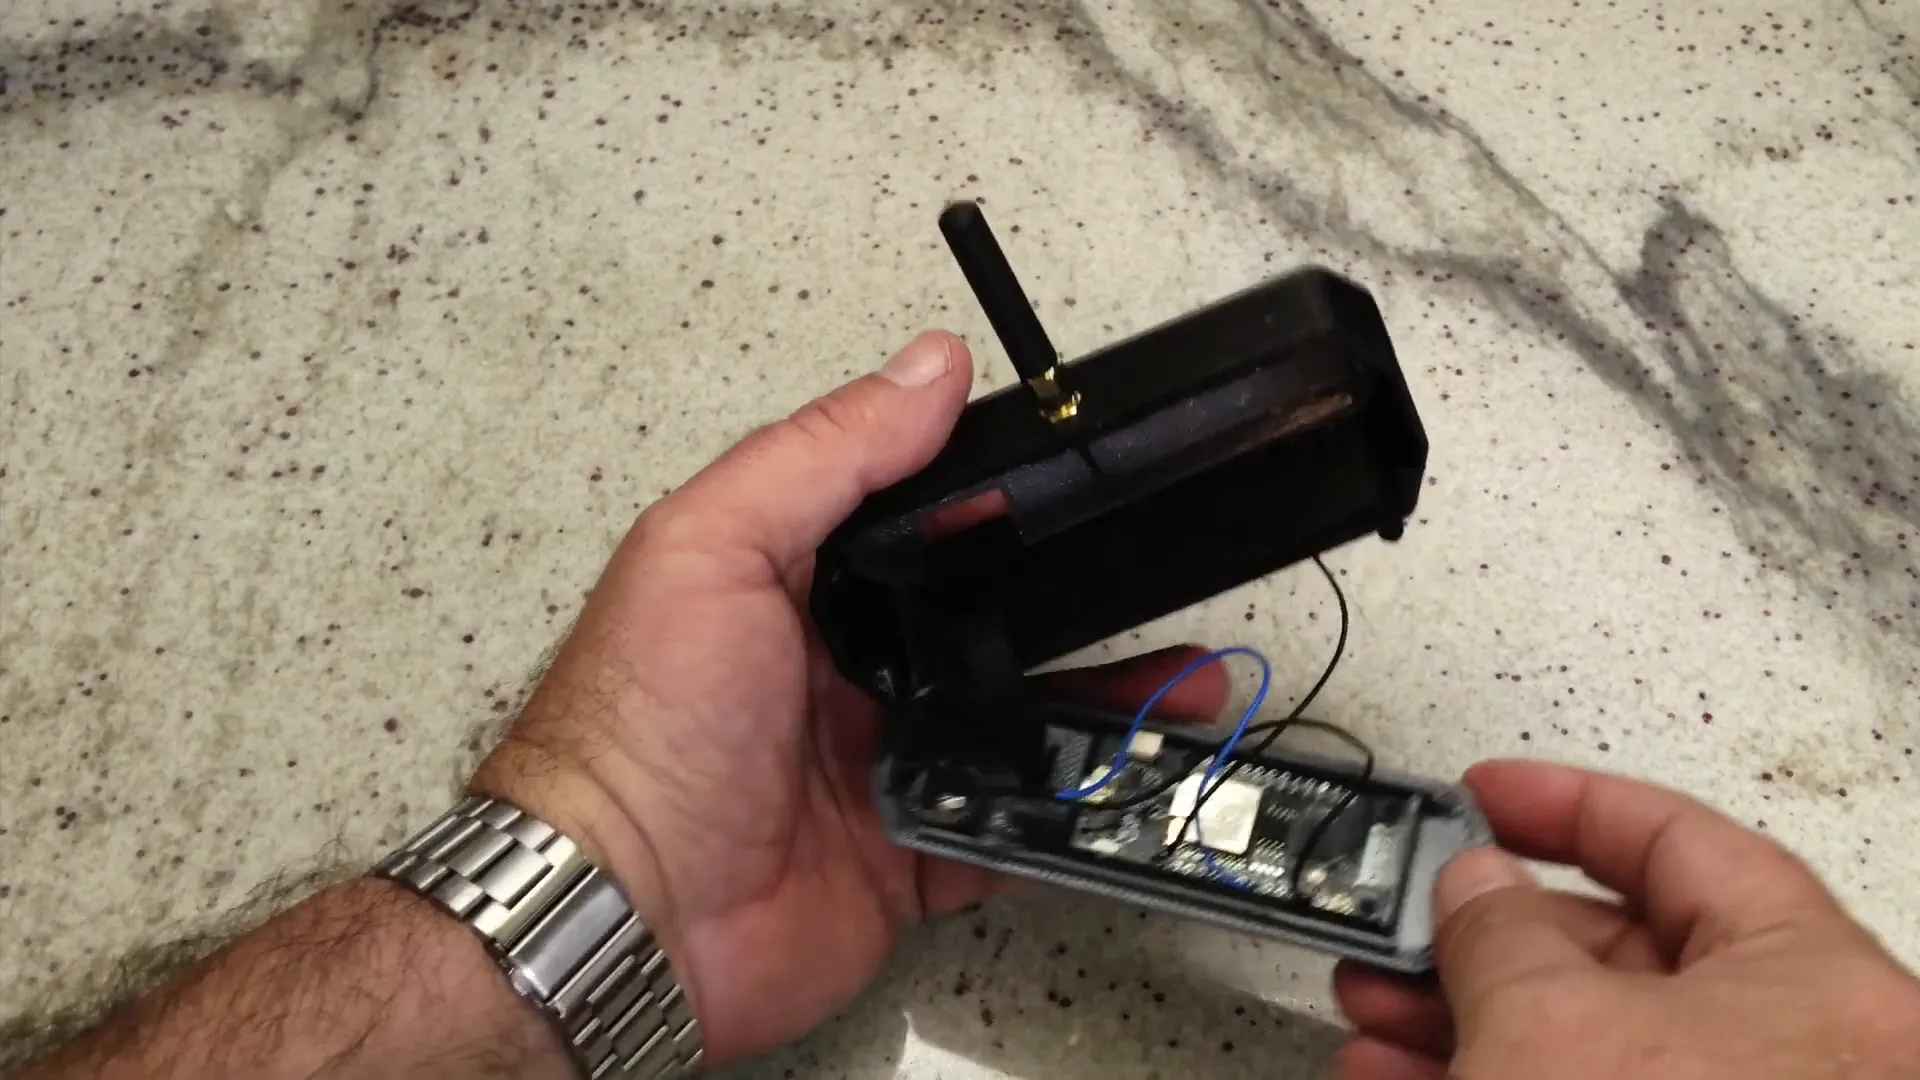
Building the Base Station
To build your Meshtastic base station, you’ll need the following components:
- Heltec Vision Master T190
- USB elbow joint adapter
- LED indicator
- Resistor (330 ohm)
- Antenna
Assembly Steps
Here’s a step-by-step guide on how to assemble your base station:
- Setting Up the Display: First, secure the Heltec Vision Master T190 in an appropriate casing. Ensure it sits against the front plate.
- USB Port Configuration: Use an elbow joint for the USB port so that it can connect from the back, keeping the sides clear.
- Connecting the LED: Attach the LED to pin fifteen of the Vision Master. Connect one wire from ground to a short pin of the LED, and connect the other wire through a 330-ohm resistor to the long leg of the LED.
- Adding the Antenna: Ensure the antenna is properly installed for optimal reception.
Understanding the Functionality
The Heltec Vision Master T190 comes equipped with two buttons:
- The top button serves as a user button, allowing you to scroll through the Meshtastic screens.
- The bottom button accesses the canned messages menu, enabling you to send pre-set messages quickly.
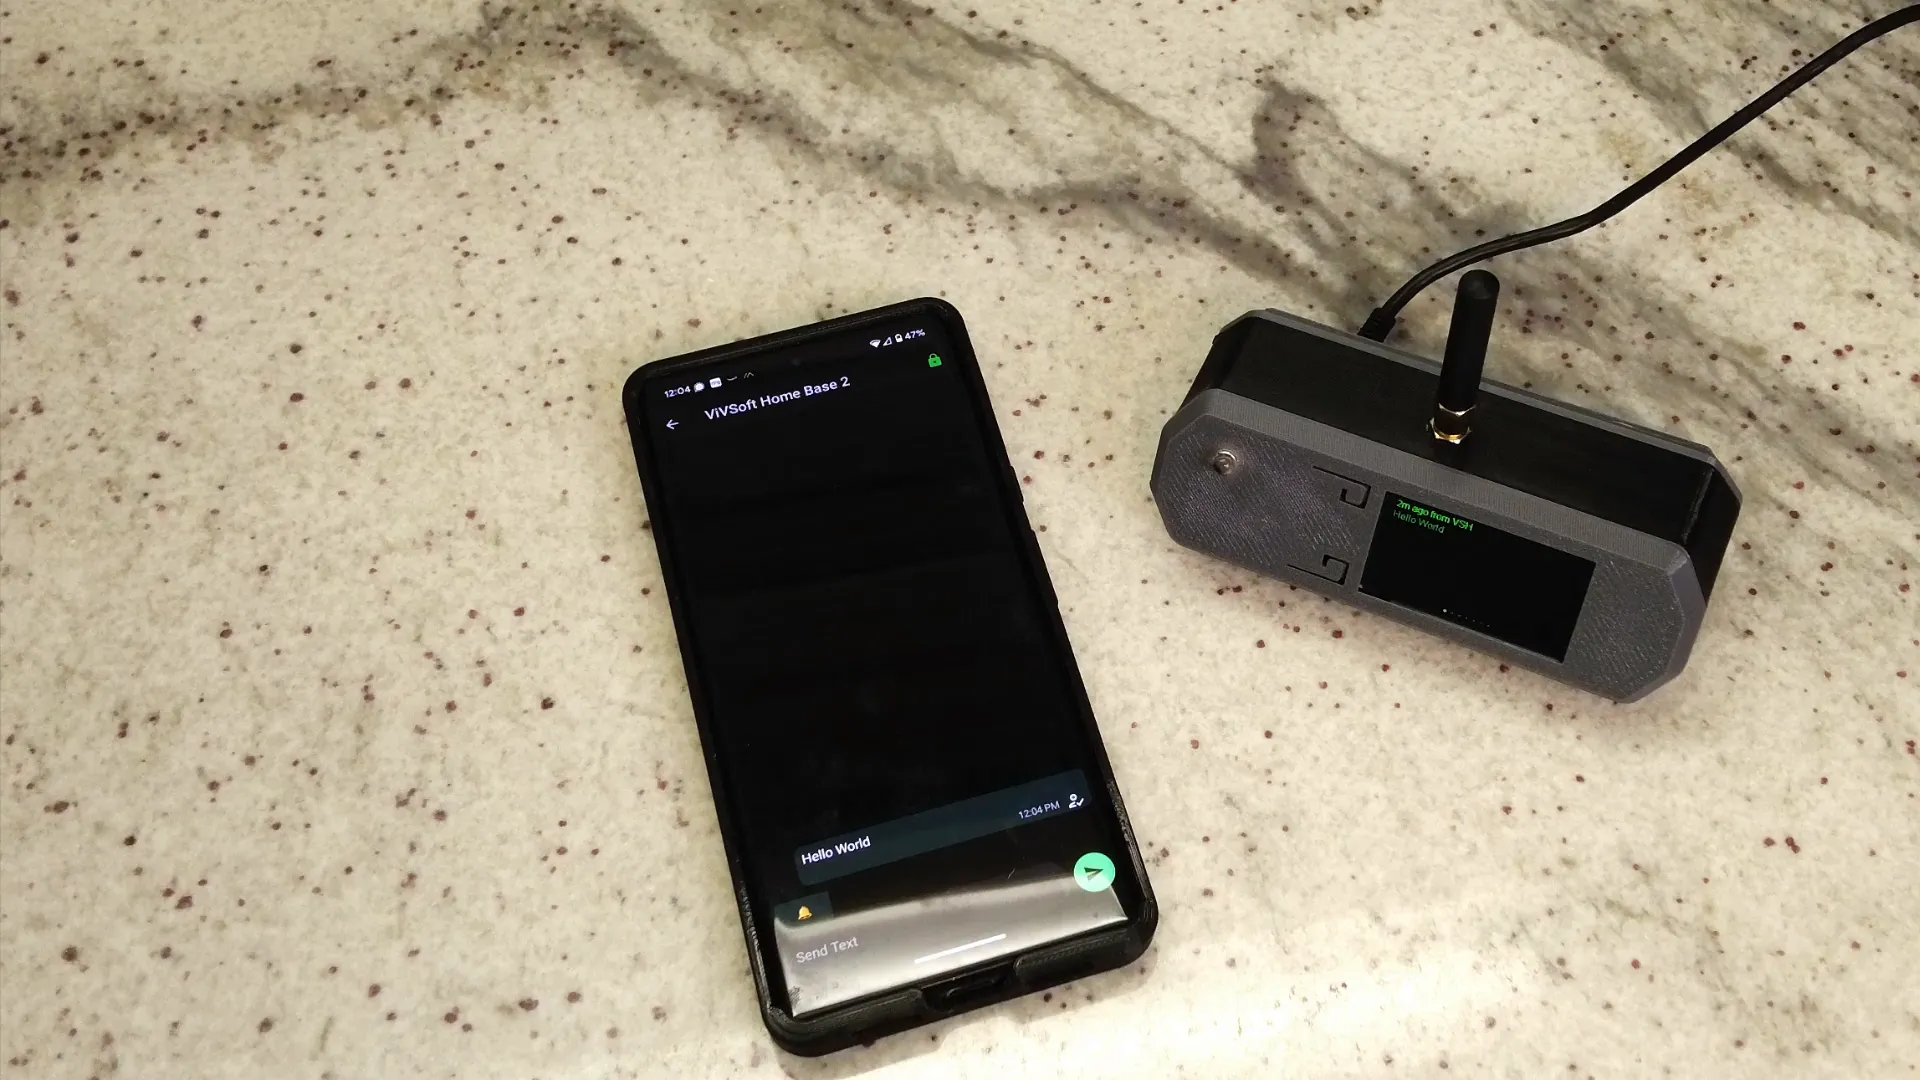
Configuring the Device
Once assembled, it's time to configure your Meshtastic node. Follow these steps:
- Power On: Connect the device to a USB power source and turn it on.
- Connect to the App: Use the Meshtastic app to connect to your node and view all connected devices.
- Sending Messages: To send a message, select a connected node from the app, type your message, and send it. The LED will flash to indicate that a message has been received.
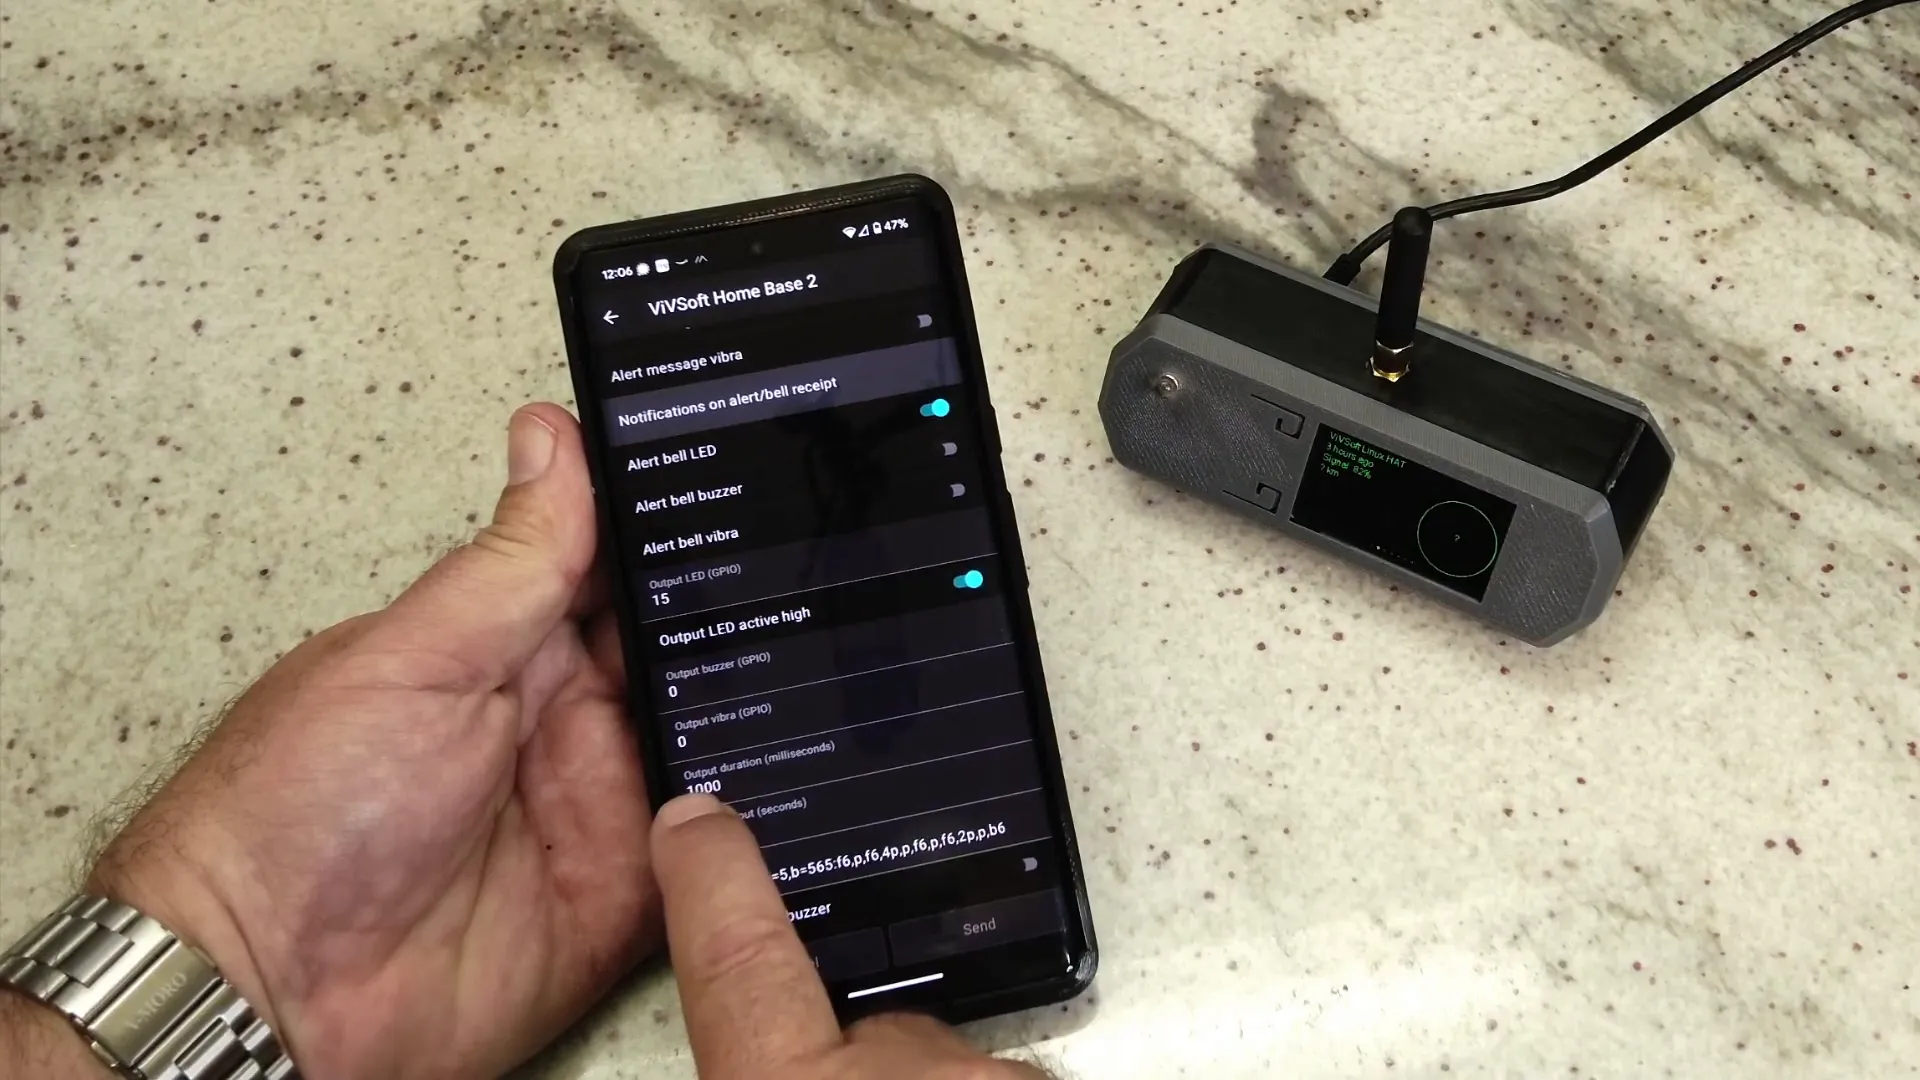
LED Notifications
The LED indicator adds a layer of functionality to your setup. It can be configured to flash when a message is received, providing a visual alert. Here's how to set it up:
- In the radio configuration, navigate to external notifications.
- Enable alerts for the LED and specify the pin number (pin fifteen in this case).
- Set the duration for how long the LED should flash (e.g., one second, sixty seconds, or more).
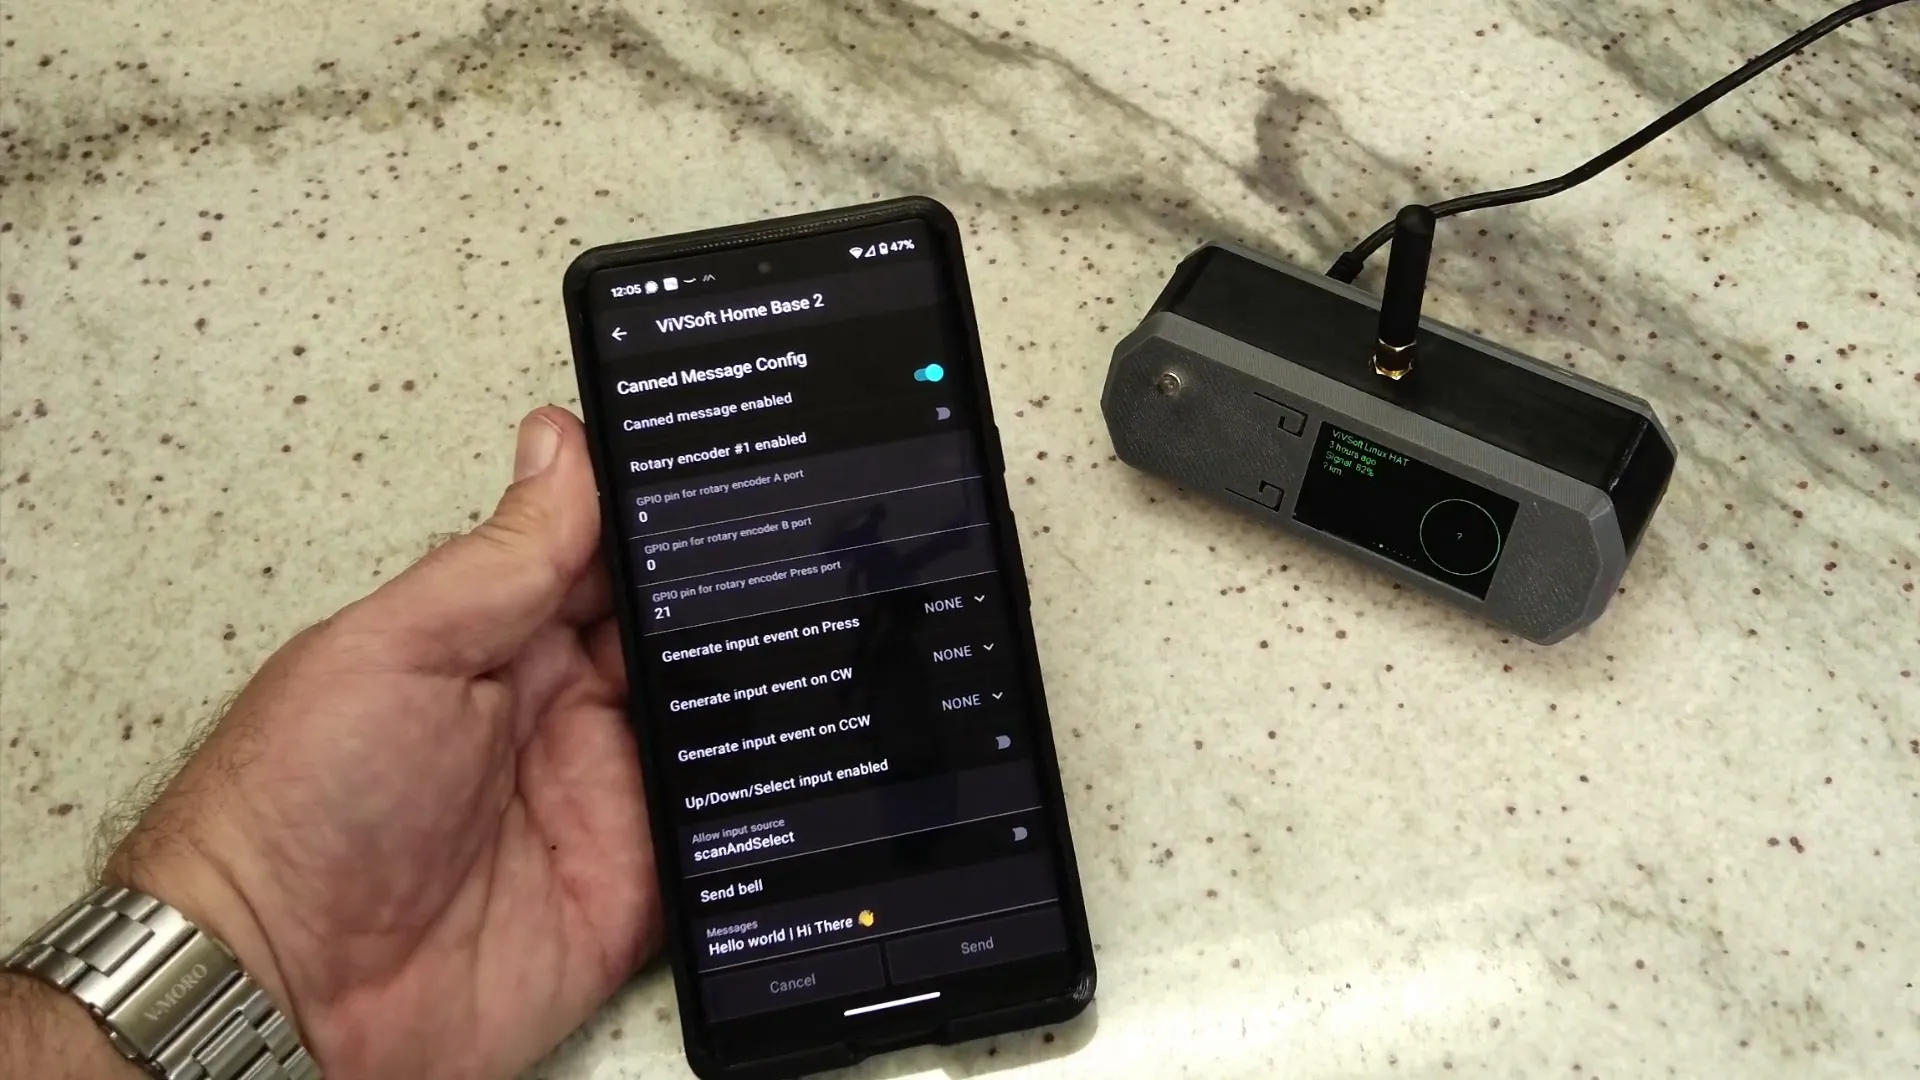
Exploring Canned Messages
Canned messages allow for quick replies or broadcasts without typing each time. You can set these up in the app:
- Navigate to the canned messages menu in the app.
- Input your messages separated by a pipe character (|).
- Enable the canned messages feature to allow quick access during operation.
Final Thoughts
The Heltec Vision Master T190 offers a fantastic way to enhance your Meshtastic communication experience. With its large display, LED notifications, and easy-to-use interface, it’s a great addition to any home station. Future upgrades could include adding GPS or other sensors, making it an even more versatile device.
If you're interested in building your own Meshtastic base station, consider checking out the Heltec Vision Master T190 on Amazon or explore more options at Loramesh Devices.
FAQ
What is Meshtastic used for?
Meshtastic is primarily used for long-range communication in areas without cellular or Wi-Fi coverage. It’s perfect for outdoor activities, emergencies, and community messaging.
Can I customize the messages on my Meshtastic device?
Yes, you can set up canned messages in the app for quick replies or broadcasts, making communication seamless and efficient.
Is the Heltec Vision Master T190 compatible with other Meshtastic devices?
Absolutely! It operates just like any other Meshtastic node, allowing you to connect and communicate with other devices in the network.
What additional features can I add to my base station?
You can enhance your base station by adding GPS modules, sensors, or additional LEDs for notifications and functionality.
Where can I find more information about building a Meshtastic node?
For more detailed guides and resources, you can visit the official Meshtastic website or community forums for tips and support.