
DIY RAK Wireless WisBlock Solar Node Build: A Practical Step-by-Step Guide
Published by Vivian van Zyl in Meshtastic the 11/12/2025 at 03:27 pm

The RAK Wireless wisblock platform makes building a dependable solar-powered IoT node straightforward and affordable. This guide walks through a compact, practical build that uses a RAK Wireless wisblock (NRF-based) board, a 2W solar panel, a 2000 mAh battery, Bluetooth and LoRa antennas, and a waterproof enclosure. The goal is a self-charging, standalone node ready for MeshTastic or MeshCore firmware.
Table of Contents
- What you need
- Overview: Why choose a RAK Wireless wisblock for solar nodes
- Step-by-step build
- Troubleshooting and practical tips
- Software and final setup
- FAQ
- Final thoughts
What you need
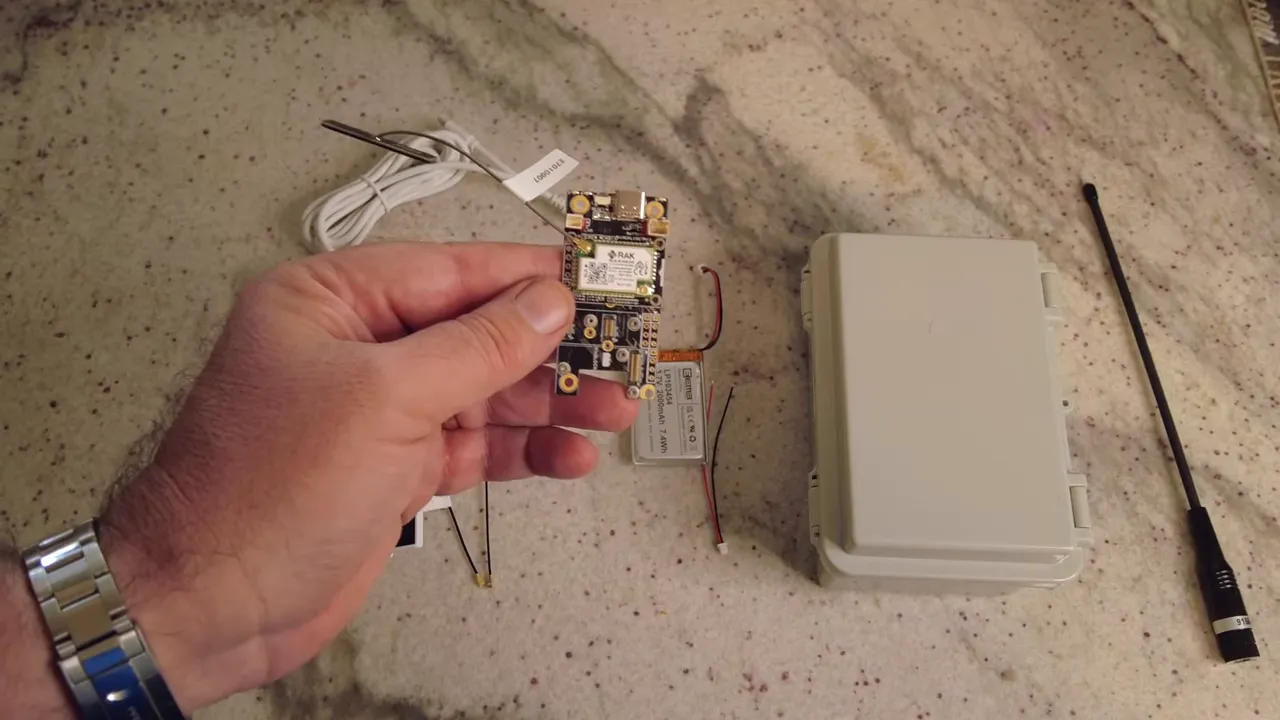
- Core board: RAK Wireless wisblock (NRF-based) with solar and power connectors
- Battery: 18650-style 2000 mAh
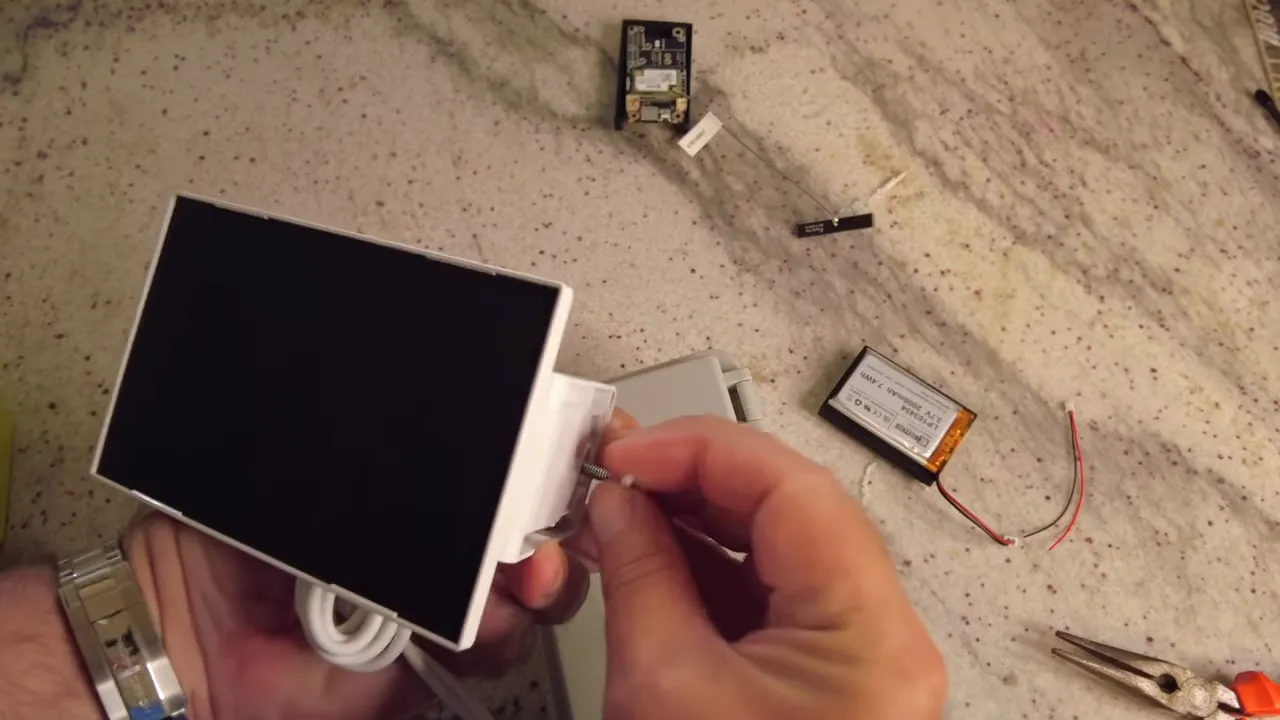
- Solar panel: 2W panel with pigtail and mounting bracket
- Antennas: LoRa SMA pigtail and external Bluetooth antenna
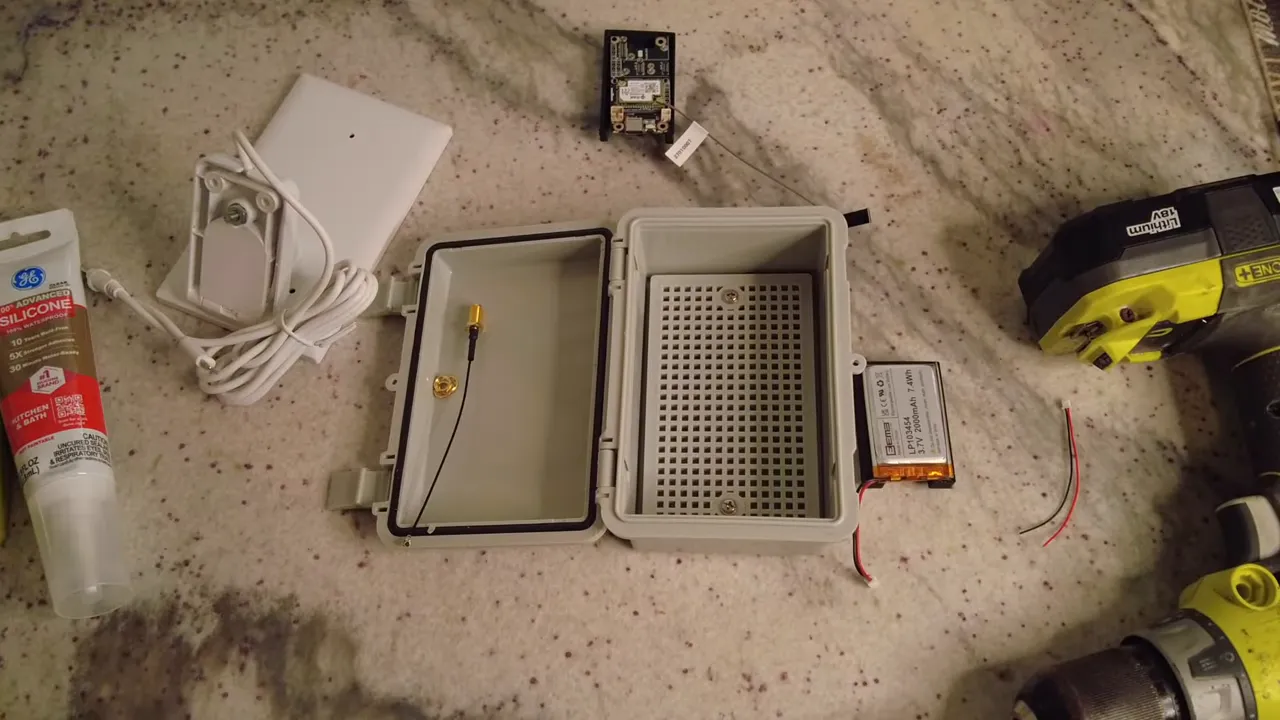
- Enclosure: Waterproof case with internal pegboard
- Tools & consumables: drill bits (6 mm and 4 mm), soldering iron, heat shrink, silicone sealant, double-sided tape, cable ties, and small hardware
Overview: Why choose a RAK Wireless wisblock for solar nodes
The RAK Wireless wisblock boards are NRF-based, which means low-power radio performance ideal for solar applications. The boards include a dedicated solar power connector so the panel can charge the battery directly. They also provide separate connections for external Bluetooth and LoRa antennas, improving range and reliability in the field.
Remember polarity: the board marks the positive pad with a small red marker — always align the red wire to that marker.
Step-by-step build
1. Prepare the enclosure and drill antenna and panel holes
Plan antenna placement so the enclosure opens in a comfortable direction and avoid drilling through internal components. Use a ~6 mm bit for the SMA pigtail hole near the top, and 4 mm bits for the solar panel mount and the panel pigtail entry. Test-fit the hardware, then tighten the pigtail nut and secure the washer. Leave final silicone sealing until the internal wiring is tidy.
2. Mount the solar panel bracket and feed the pigtail
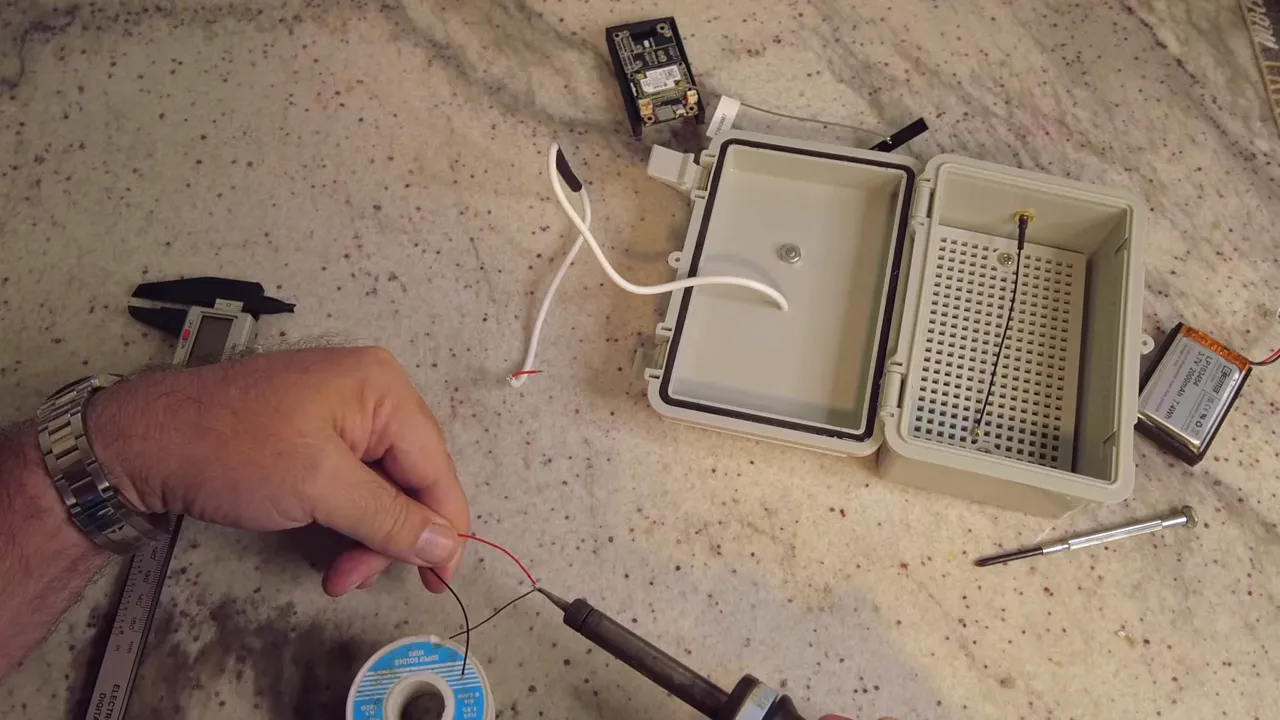
Use the included adjustable bracket so the panel angle can be tuned after installation. Feed the solar panel cable through the lower 4 mm hole, trim and strip it to reveal the two wires: positive and negative. Label or note polarity before soldering.
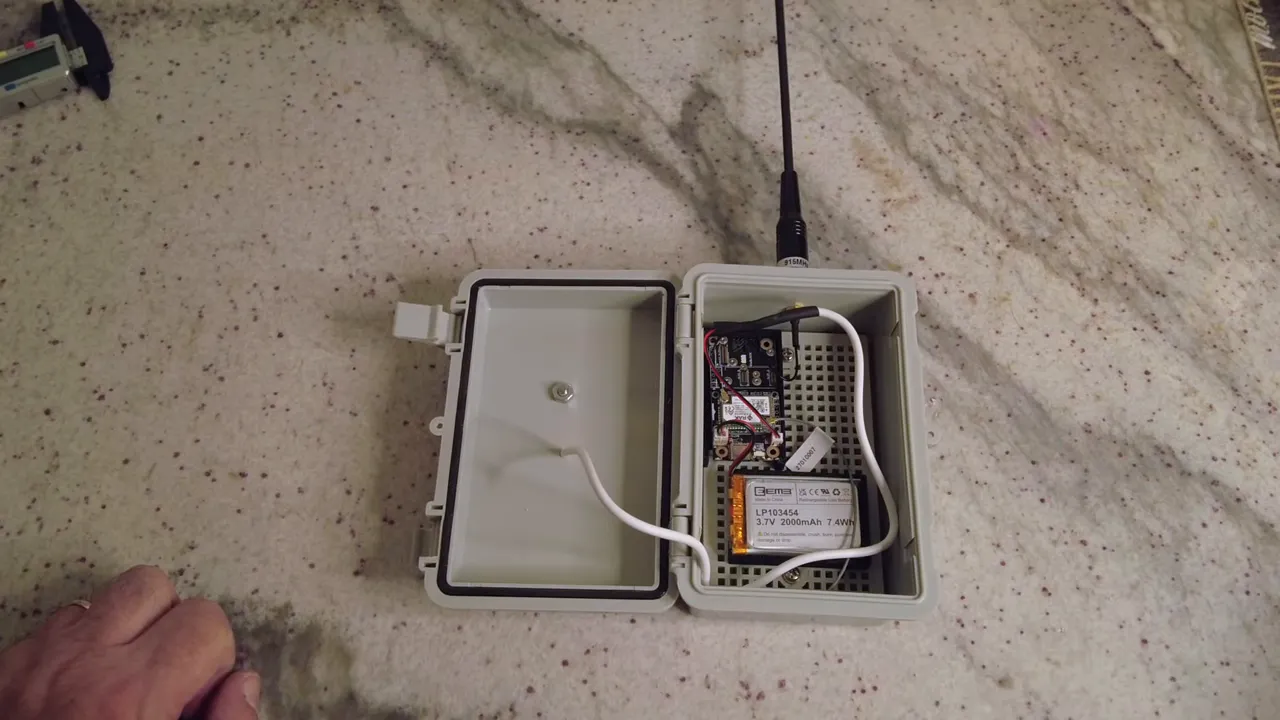
3. Solder the solar input
Solder the panel wires to the matching connector that plugs into the board. Use heat shrink tubing for each conductor and a larger sleeve over both joints for strain relief. Soldering is fiddly — take breaks, use good lighting, and keep the joint tidy to avoid cold solder joints.
4. Secure the battery and board
3D-printed holders or commercial battery holders make neat installations. Use double-sided tape sparingly to stick the battery into its holder, then slot the holder onto the enclosure pegboard. Mount the RAK Wireless wisblock into a snug holder so it sits clear of the case walls and provides access to the antenna ports.
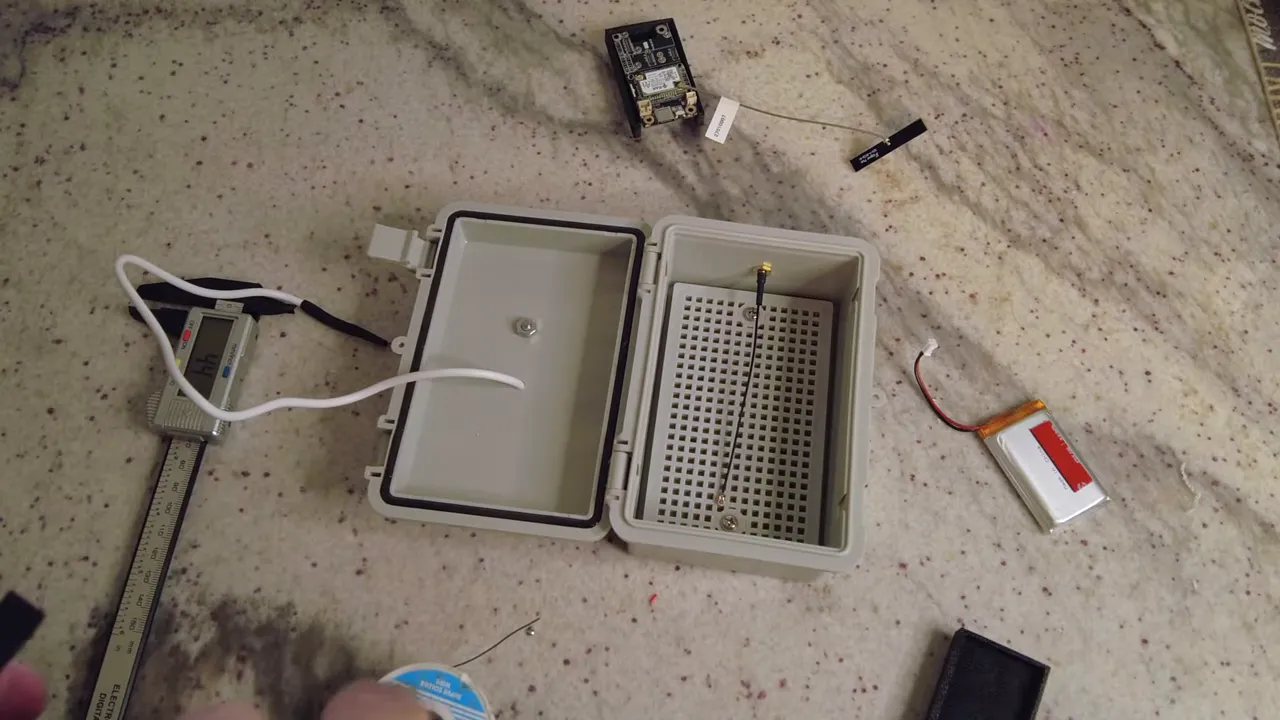
5. Connect antennas and final wiring
Attach the LoRa SMA pigtail and the Bluetooth antenna. Do not power the board until at least one antenna is connected. Route the solar connector and battery leads so they do not pinch when the case closes. Use small cable ties to keep everything tidy.
6. Seal and finish
Apply silicone sealant around the SMA connector and the two drilled holes on the inside to prevent moisture ingress. Use a bead at the top antenna entry and around the solar cable entry. After the silicone cures, adjust the solar panel angle and mount the case in its final location.
Troubleshooting and practical tips
- Polarity matters: always check the red marker for positive. Reversing polarity can damage the board or battery.
- Antenna first: never power the node with a radio port empty; attach at least one antenna before powering up.
- Soldering tips: use appropriately sized solder, clean joints, and heat shrink for protection.
- Silicone timing: delay final sealing until all wiring is complete to avoid accidental contamination of sealant.
- Adjustable mount: the panel bracket allows you to tune angle seasonally for best charging performance.
Software and final setup
Load MeshTastic or MeshCore onto the RAK Wireless wisblock to enable LoRa mesh communications and GPS features. After powering up the node, confirm device boot and radio behavior — LED indicators or serial messages will show successful startup. Verify charging behavior in bright sunlight and monitor battery levels over several days to ensure the solar panel and battery capacity are adequate for the installation location.
FAQ
What size drill bits do I need for the antenna and solar mount?
Use a 6 mm (or 6.1–6.2 mm) bit for the SMA pigtail antenna and 4 mm bits for the solar panel mounting bolt and pigtail entry. Test-fit hardware before final drilling.
Can I use any battery with a RAK Wireless wisblock?
Use a compatible 18650-style lithium battery rated for the board’s charging circuitry. A 2000 mAh cell is a practical choice for low-power solar nodes, but verify charge/discharge specs and board compatibility.
Do I need both LoRa and Bluetooth antennas installed?
Bluetooth improves local configuration and diagnostics while LoRa handles long-range mesh communications. At least one antenna should be connected before powering the node to protect the radio output stage.
How should I seal drilled holes in the enclosure?
Apply silicone sealant on the inside around antenna and solar cable entry points, then a final external bead if needed. Let the silicone cure fully before long-term exposure.
Final thoughts
Building a solar node with a RAK Wireless wisblock is a rewarding weekend project. The combination of NRF-based low-power radio, dedicated solar input, and external antenna support produces a reliable, field-ready node. Keep wiring neat, mind polarity, and seal properly for years of maintenance-free operation. With MeshTastic or MeshCore loaded, the node becomes part of a resilient mesh network ready for GPS and IoT applications.