
DIY Waterproof Meshtastic Node for Paddle Boarding With Wireless Charging
Published by Vivian van Zyl in Meshtastic the 07/28/2026 at 04:11 pm

A waterproof Meshtastic node is a great little project for paddle boarding, kayaking, hiking, and any outdoor trip where ordinary electronics are likely to get wet. The goal here was simple: build a self-contained GPS-enabled Meshtastic node inside an IP67 enclosure, keep the case sealed, and still be able to recharge it without opening it or drilling holes for a USB port.
The result is a compact paddle board tracker built around a RAK4631 WisBlock, an 18650 battery, a GPS module, and an internal wireless charging receiver. A 2N7000 MOSFET lets the software power the GPS module on only when it needs a position, which is a big deal for extending battery life.
The Build Goal: Keep the IP67 Seal Intact
The main challenge with a water-ready Meshtastic build is not just putting electronics in a box. It is avoiding the weak points that turn a waterproof enclosure into a leaky one. Every drilled hole for a switch, charging port, or antenna connector is another place where water can eventually find its way in.
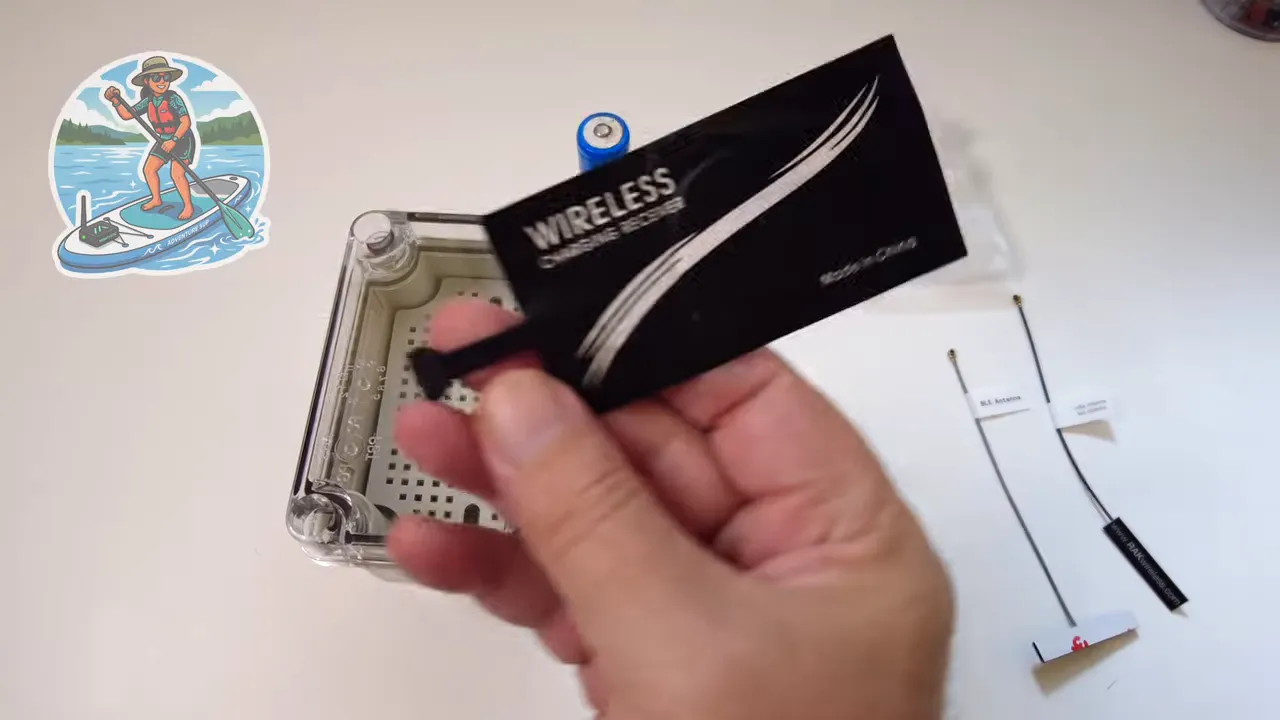
This build uses an IP67 case, meaning it is designed to handle dust and temporary submersion. Rather than adding an external USB-C port, the charging receiver sits inside the bottom of the enclosure. The node can then be placed on a wireless charging pad, allowing the battery to charge through the sealed case.
The first version deliberately keeps the standard small antenna inside the enclosure. An external antenna would be a useful later upgrade, but it needs to be properly waterproofed so it does not compromise the IP67 rating.
Parts Used in This Waterproof Meshtastic Node
- RAK4631 WisBlock: The Meshtastic radio and controller board. A RAK WisBlock Meshtastic starter kit provides the core hardware for this type of build.
- 18650 battery: The internal power source.
- IP67 waterproof enclosure: The rugged housing that keeps the electronics protected from water.
- GPS module: Used to report the node position. The project uses an ATGM336H-style GPS module.
- 2N7000 MOSFET: Used to switch GPS power under software control.
- Wireless charging receiver and charging pad: The receiver stays inside the case and supplies USB-C power to the RAK board.
- 3D-printed PETG standoff: A custom internal mount for positioning the RAK board above the charging receiver.
- 3M tape: Used to mount internal components without permanently modifying the case.
Plan the Internal Layout Before Wiring
The wireless charging receiver needs to sit at the bottom of the enclosure. Above that sits the printed standoff and the RAK4631 board. This layered layout lets the charging pad transfer power to the receiver while the receiver's USB-C output plugs directly into the RAK board.
That one decision makes the whole waterproof Meshtastic design work. There is no exposed charging connector, no rubber flap to maintain, and no need to reopen the box each time the battery needs a charge.
The case has a gasketed clear lid and fastening screws, so it is worth taking time to make sure no wires interfere with the seal. The enclosure should close cleanly and the internal components should be secured well enough that they cannot shift around during use on the water.
Print a PETG Standoff for the RAK4631
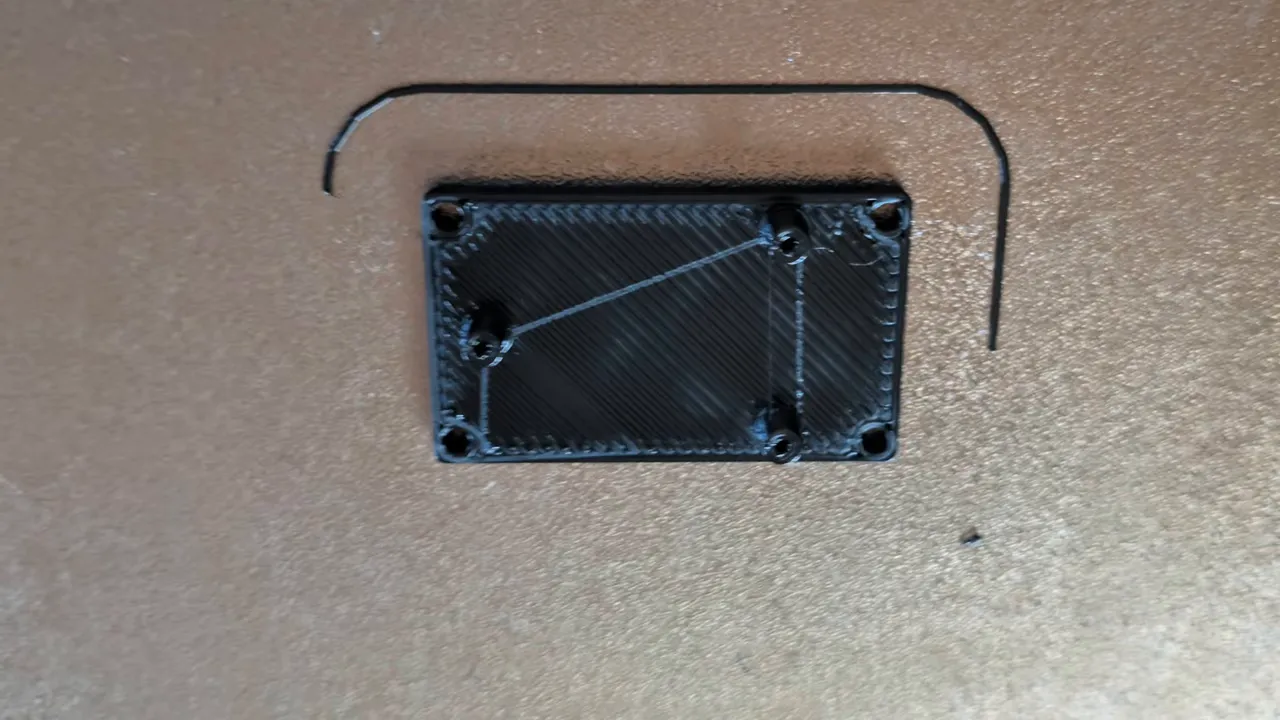
A simple standoff was designed and printed to mount the RAK board inside the enclosure. PETG was the material of choice because it is more suitable for an outdoor electronics enclosure than a basic PLA print.
The print does not have to be beautiful. It just needs to support the board, create clearance for the wireless charging receiver below it, and fit within the enclosure. Once the standoff fits, the RAK board can be mounted on top of it.
Prepare and Mount the Battery
The 18650 battery holder did not fit the enclosure, so the battery connections were welded directly to make a more compact pack. This allows the battery to fit in the available space alongside the Meshtastic board, GPS, wiring, and charging receiver.
Battery work deserves care. The objective is a compact, secure connection that fits the enclosure without putting stress on the wires. After preparing the battery, 3M tape was used to hold components in place. This keeps the installation tidy while still allowing future adjustments if needed.
At this stage, it is useful to lay everything out before permanently fixing anything down:
- Place the wireless receiver at the base of the enclosure.
- Check that the printed standoff fits above it.
- Confirm the battery fits without pinching wires.
- Leave enough room for the GPS module and its antenna lead.
- Make sure the clear lid can close without pressing on components.
Wire the GPS With Software-Controlled Power
The GPS connects to the RAK4631 using power, TX, RX, and ground wiring. The clever part is the GPS ground connection. Instead of connecting the GPS ground directly, it runs through a 2N7000 MOSFET so the Meshtastic software can switch the GPS module on and off.
That means the GPS does not need to draw power continuously. It can wake up, acquire a location, report it to the Meshtastic node, and then shut down until the next scheduled scan.
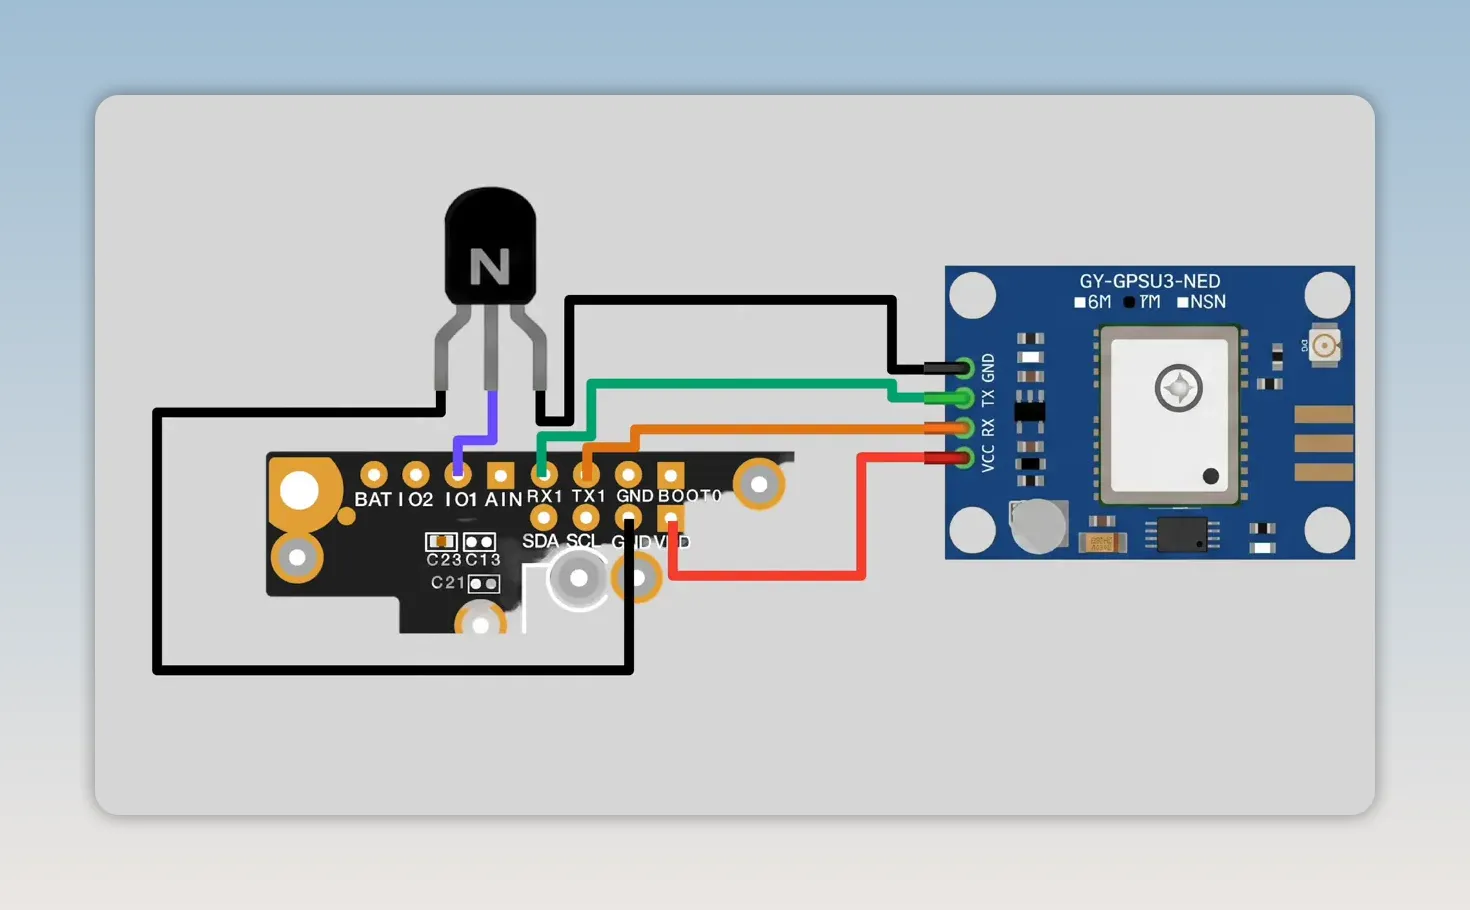
The wiring arrangement includes:
- GPS TX and RX: Connected to the appropriate RAK4631 serial pins.
- GPS power: Supplied from the board.
- GPS ground: Routed through the 2N7000 MOSFET.
- MOSFET control pin: Connected to a RAK4631 enable pin so software can turn the GPS on and off.
This is one of the most useful improvements for a mobile Meshtastic tracker. GPS modules can be a meaningful power draw, so there is no reason to leave one running all the time if a location update every few minutes is enough.
Close the Enclosure and Test Wireless Charging
Once everything is wired and mounted, the finished node fits entirely inside the waterproof case. The receiver is positioned at the bottom, where it can line up with the external charging pad. Its USB-C output plugs into the RAK4631, so charging power reaches the battery system without any cable passing through the enclosure.
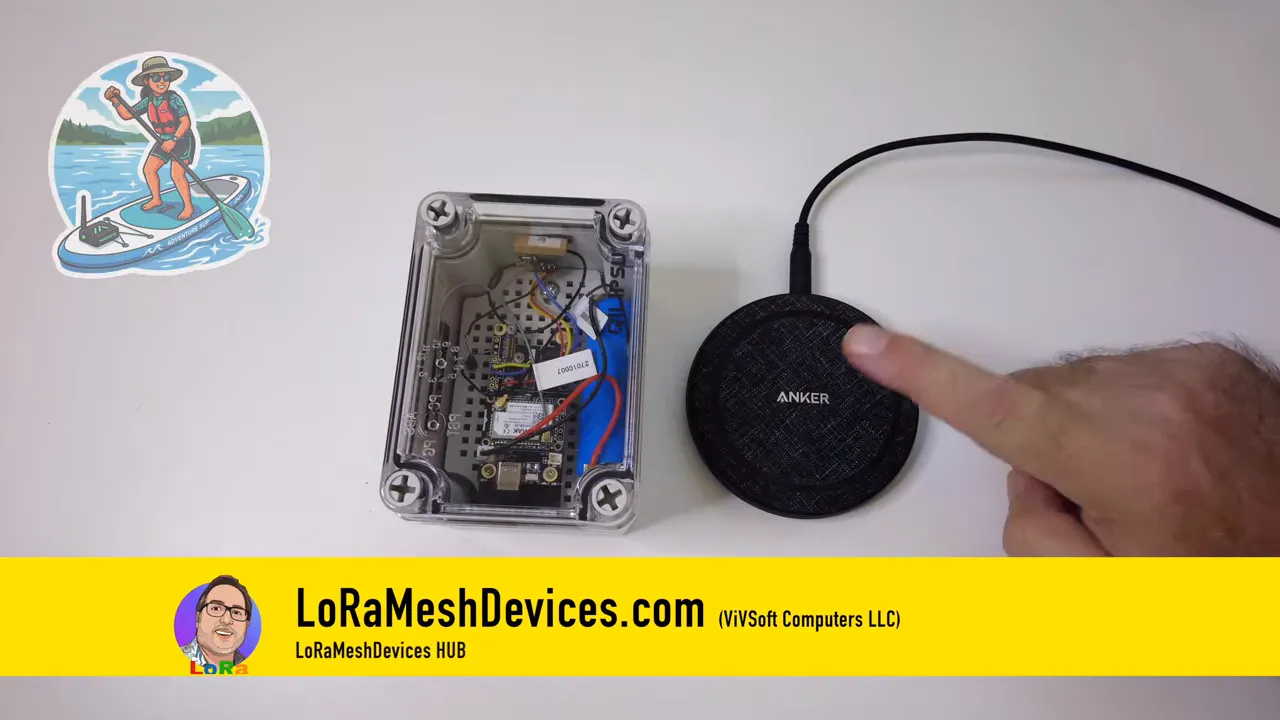
When the enclosure is placed on the charging pad, the charging indicator inside the case lights up. The charging speed in this setup is not especially fast, but it does work. For a device intended to stay sealed and live outdoors, that tradeoff is worthwhile.
Wireless charging also provides an unexpected convenience: it can be used as part of the power-on process. With no physical power switch on the case, placing the unit on the charging pad applies power and boots the board and GPS.
Use the Meshtastic App for Shutdown and Startup
The Meshtastic mobile app recognizes the node as a RAK WisBlock device and displays its position once the GPS has a valid fix. The app also makes it possible to use software shutdown instead of a physical switch.
Shutting the node down in the app completely turns it off. This is particularly useful while charging because the available charging power is not also being consumed by the radio and GPS. To bring it back on, place it on the wireless pad so it receives power and boots again.
That creates a very clean operating model:
- Use the node normally while it is mounted on a paddle board or carried outdoors.
- Use the Meshtastic app to shut it down when finished.
- Place the sealed enclosure on the wireless pad to recharge it.
- Use the charging pad to bring the device back to life when needed.
Configure GPS Position Scans for Better Battery Life
The node was configured with GPS enabled and a five-minute GPS scan interval. Smart Position was turned off in this setup. The node checks for a fresh GPS position every five minutes, rather than keeping the receiver continuously powered.
When the GPS first powers up, its LED remains solid while it searches for a fix. Once it gets a valid position, the indicator begins flashing. At that point, Meshtastic records the location and the software turns the GPS back off.
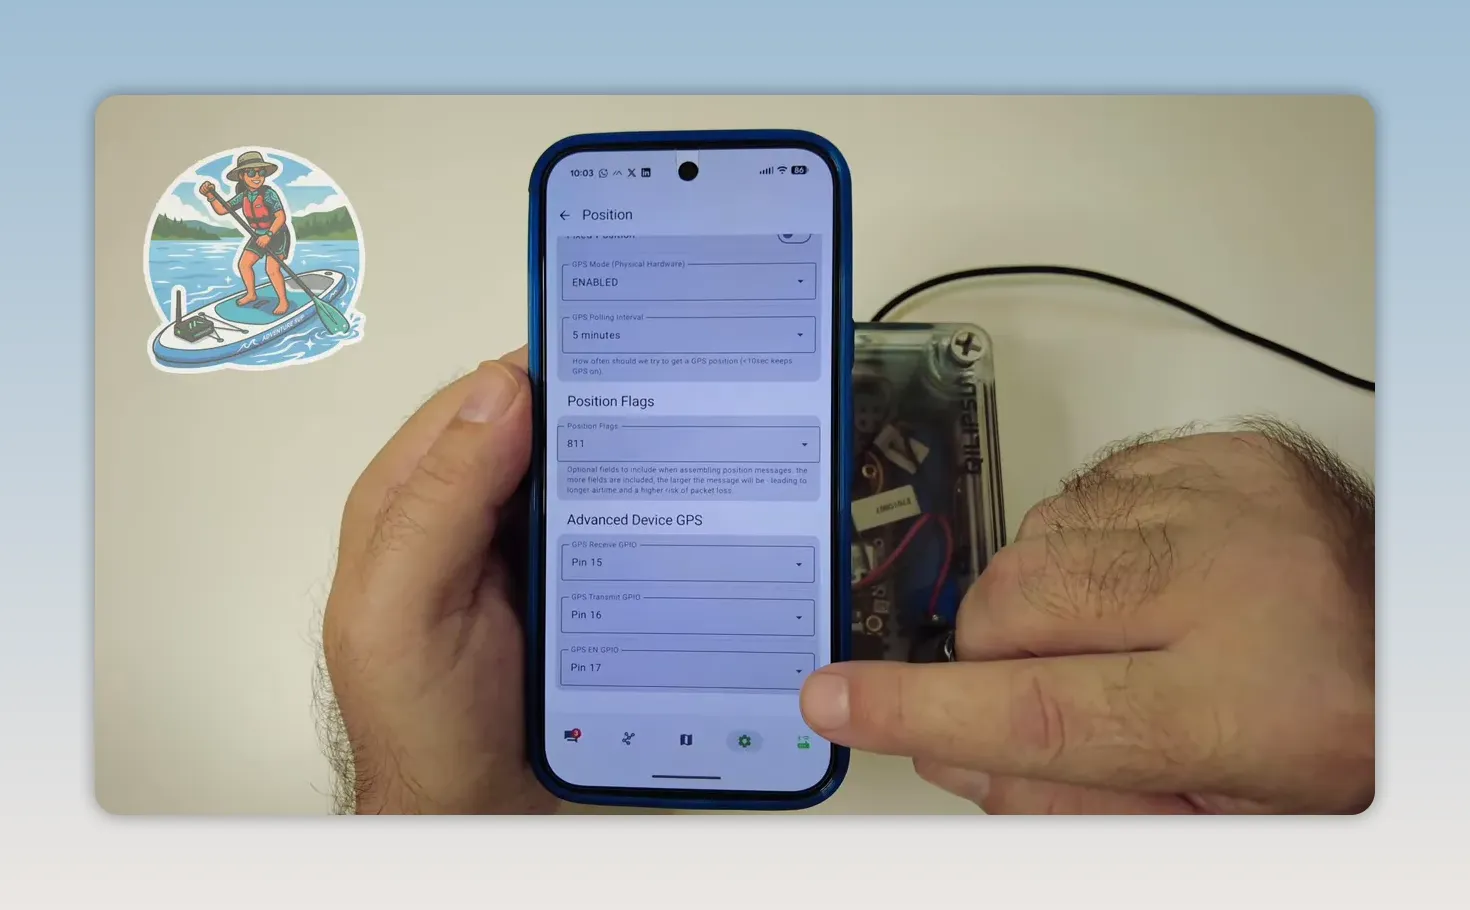
The relevant configuration approach is:
- Enable GPS support.
- Set the GPS update interval to five minutes.
- Assign the RAK4631 pins for GPS TX, GPS RX, and the MOSFET enable control.
- Allow the node to wake the GPS, obtain a fix, and then remove power from it.
After a position is available, the app can show the GPS readings and place the node on a map. This makes the waterproof Meshtastic node a neat way to keep track of a paddle board route or locate equipment while remaining part of the broader mesh.
Future Upgrades for This Meshtastic Paddle Board Node
The project works as it stands, but there are a couple of sensible upgrades for later.
- Add a breather plug: A breather plug may help manage pressure differences in the enclosure, but it requires drilling a hole. It was left out for now to avoid compromising the case.
- Add a waterproof external antenna: An external antenna would likely improve radio performance, but it needs a proper waterproof mounting method to preserve the enclosure rating.
- Improve charging speed: The existing wireless charging setup works, though a stronger or better matched charging setup could make recharge time more practical.
For now, the internal flat antenna from the kit keeps the design simple and the enclosure unmodified. That is a good place to start. Get the waterproof Meshtastic node working reliably first, then make changes only when they preserve the core objective: a sealed, self-contained tracker that is happy to go out on the water.
A Compact, Practical Waterproof Meshtastic Build
This project brings together a few small ideas that make a big difference: an IP67 enclosure, internal wireless charging, a compact battery installation, and software-controlled GPS power. The end result is a Meshtastic node that can report its position without needing a charging port, physical power switch, or open enclosure.
It is a seriously neat platform for paddle boarding and other outdoor adventures. Keep the case sealed, give the GPS only the power it needs, charge it from the outside, and let the mesh keep track of where it goes.