
Exploring the ESP32 S3 Solar Node: A 25-Hour Battery Test
Published by Vivian van Zyl in Meshtastic the 04/16/2025 at 09:29 pm

Welcome back to my channel! Today, I’m diving deeper into my experiment with the ESP32 S3 solar node. This project aims to create a solar-powered node using the ESP32 S3, which isn’t typically recommended, but experimentation is where innovation thrives!
Table of Contents
- Inside the Node
- The Test Setup
- Analyzing the Results
- Recovery Process
- Attempting Recovery
- Software Updates and Improvements
- Final Thoughts
- FAQs
Inside the Node
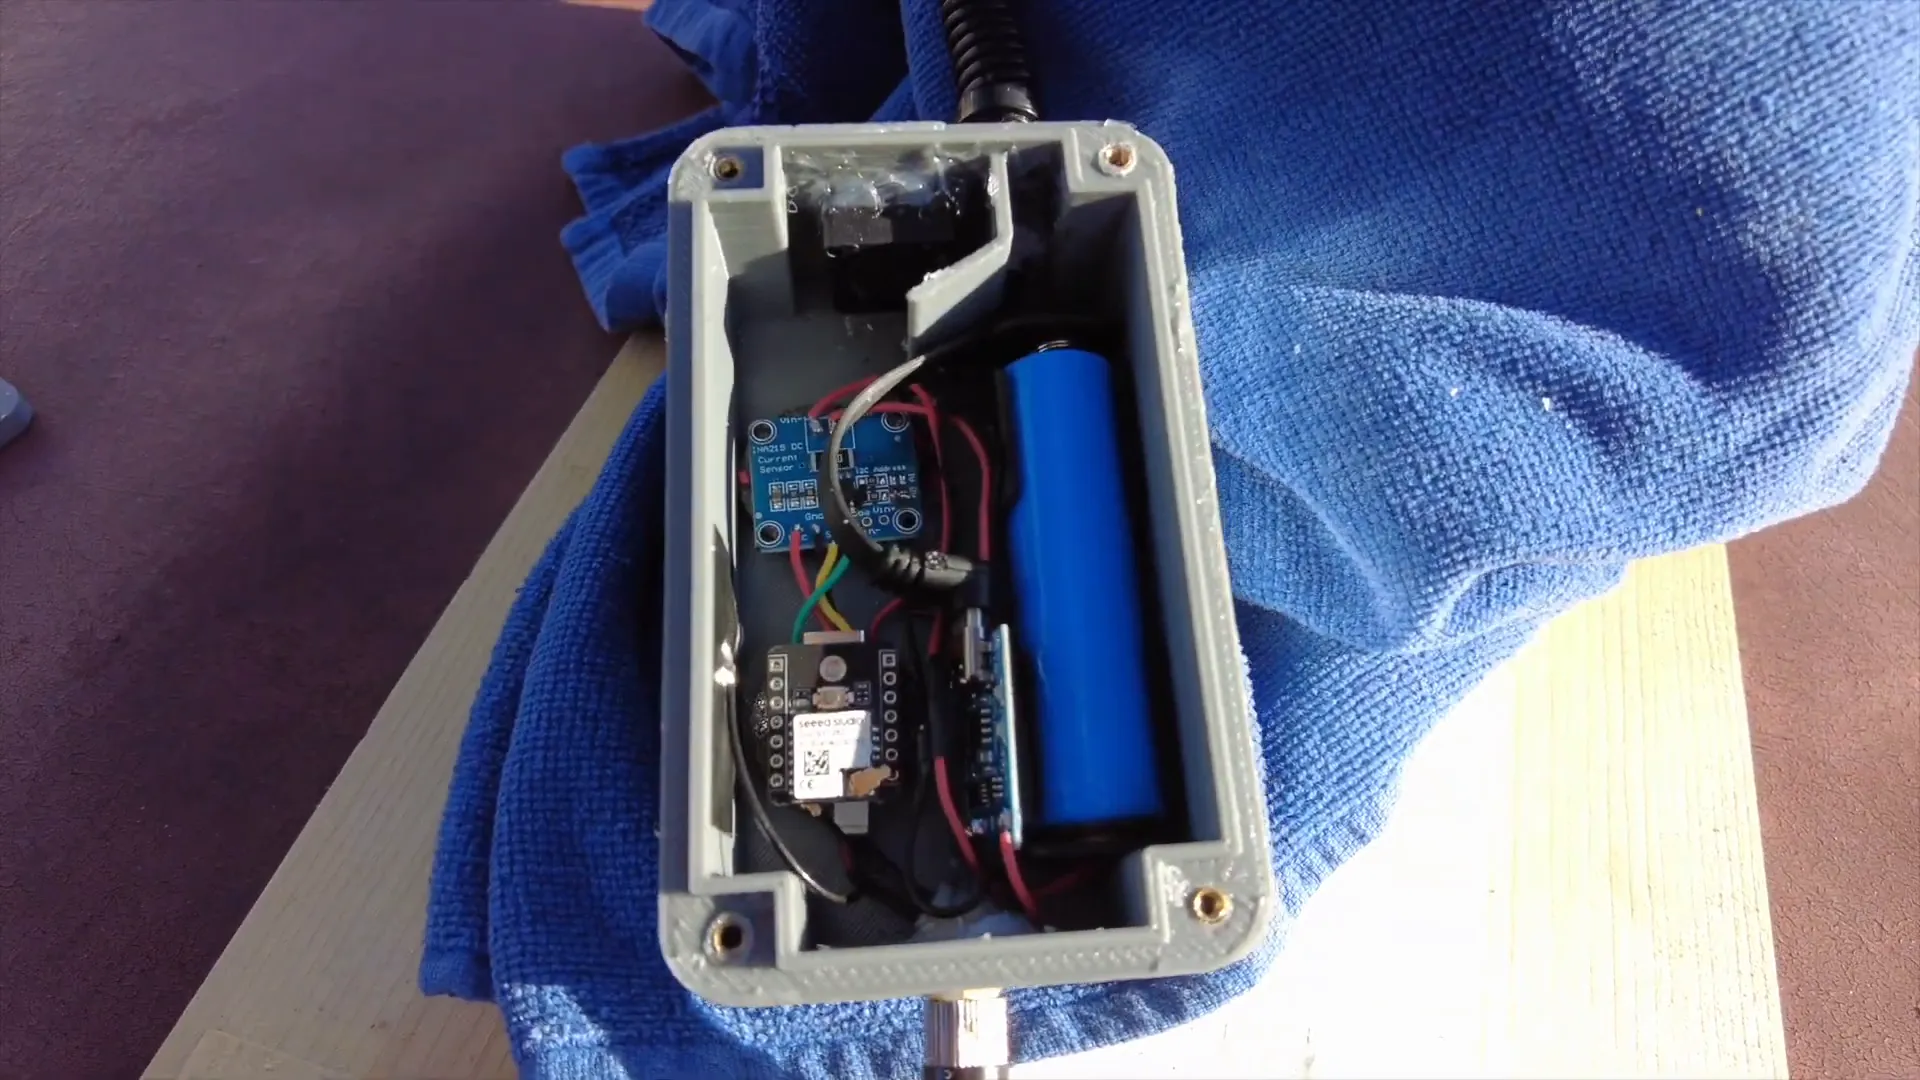
Let's take a closer look at what’s inside this tiny powerhouse. The main component is the Seed WIO Meshtastic node, specifically the Seeed SX1262 version. It's impressively compact—about the size of my thumbnail! In addition to this, we have the INA219 current sensor, which measures the current and battery levels, connected via I2C.
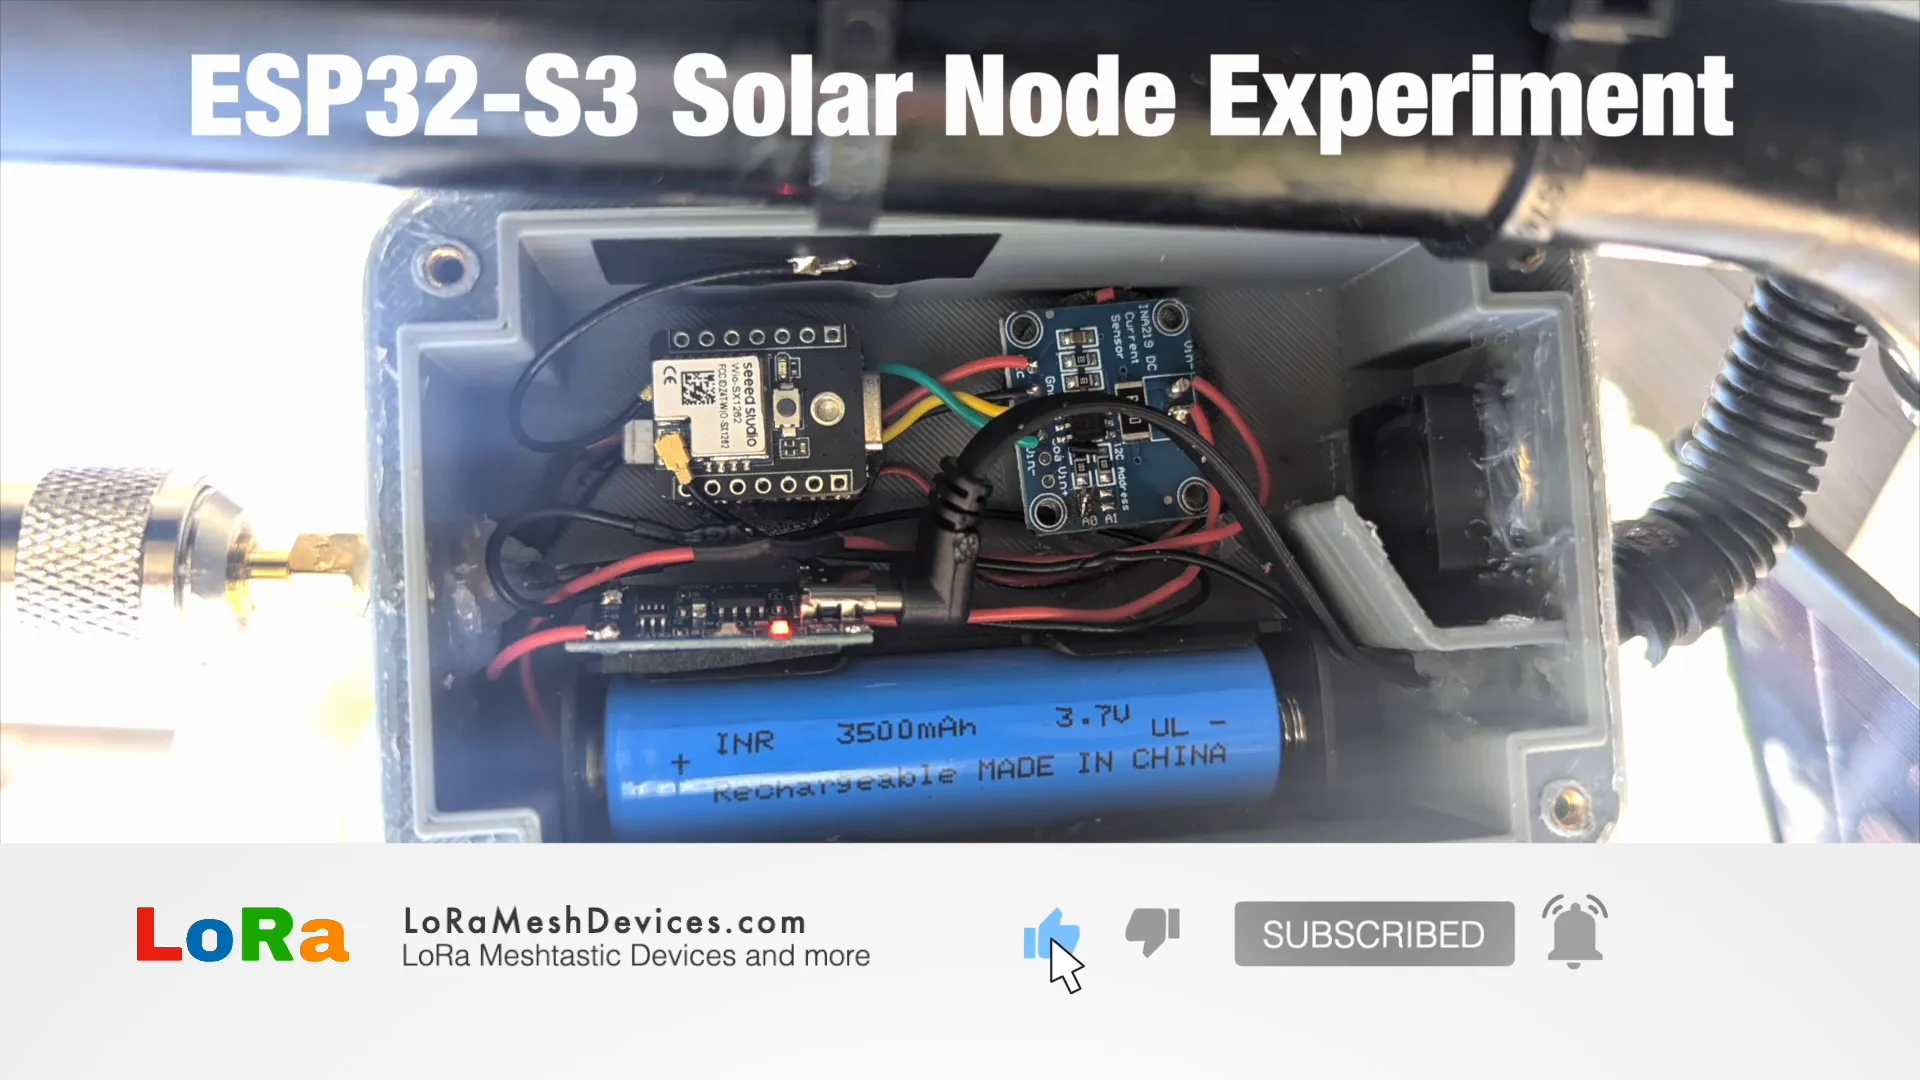
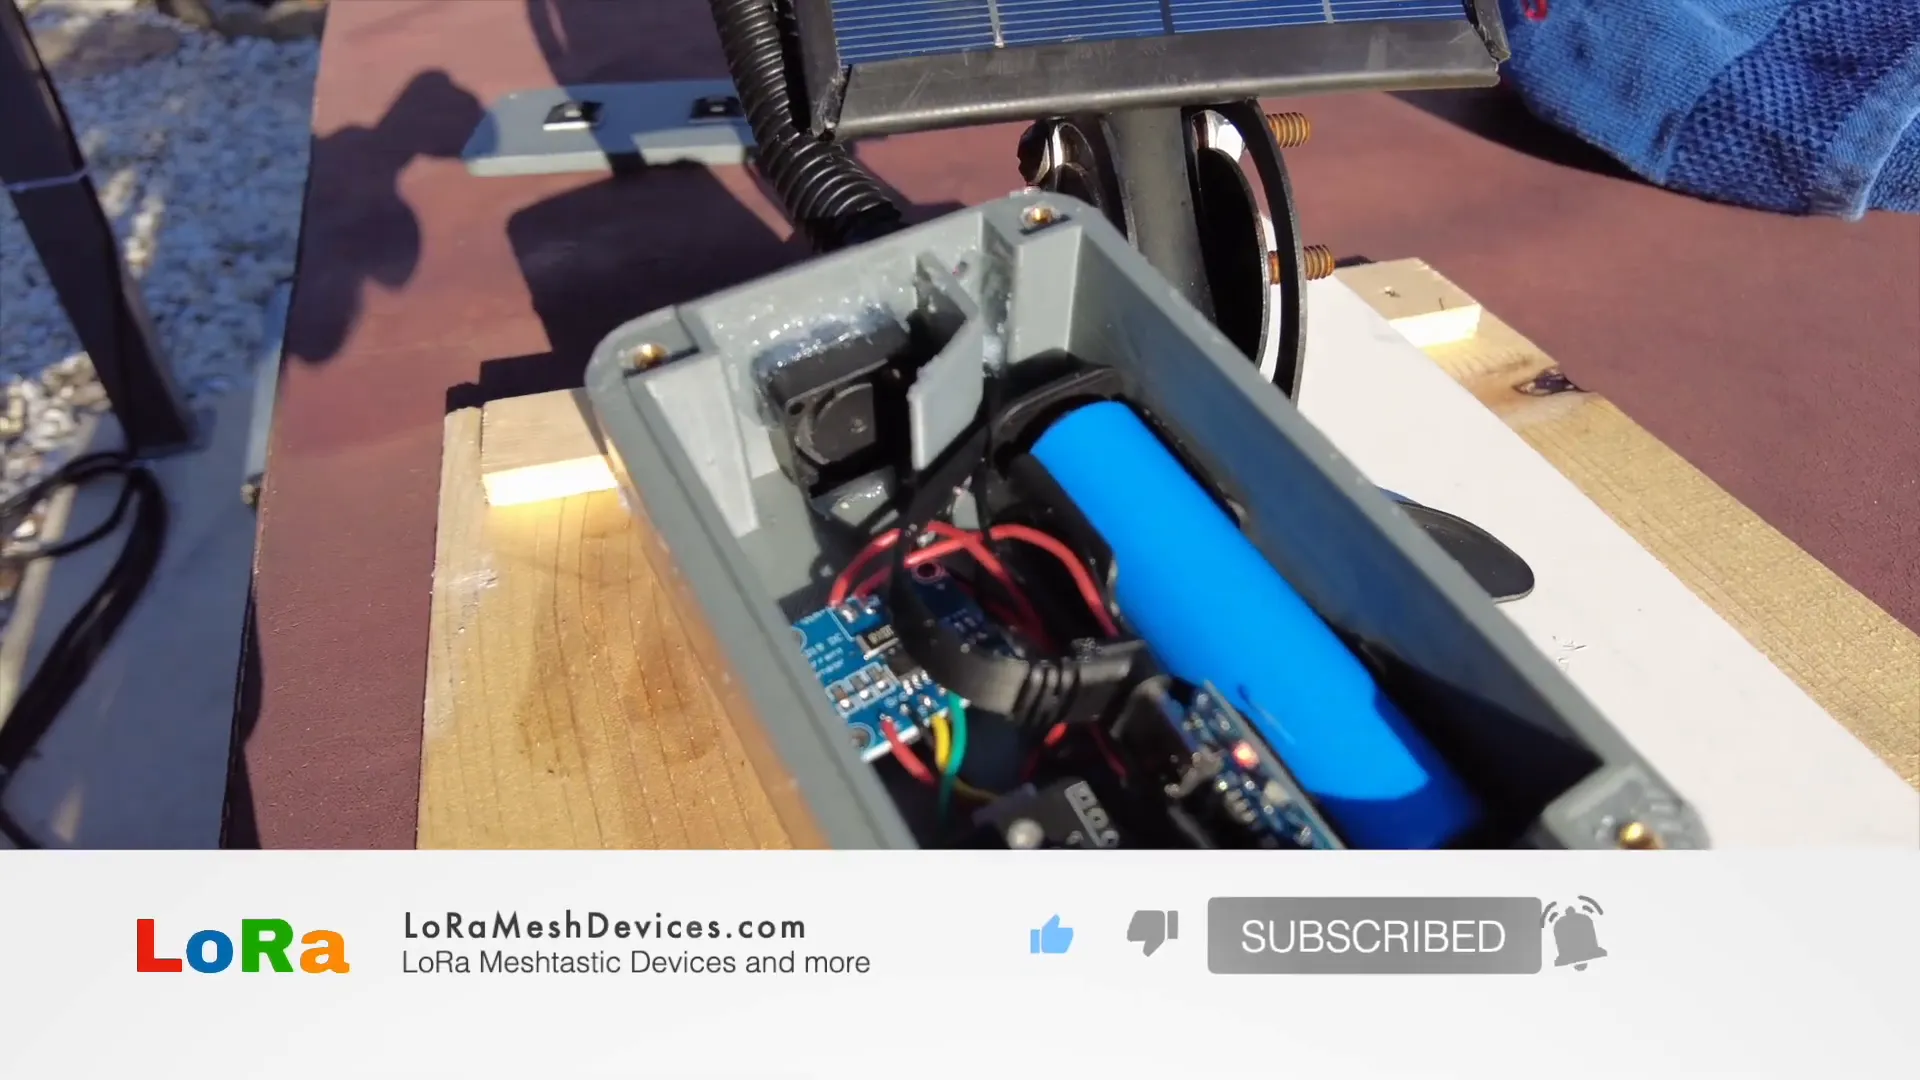
Powering everything is an 18650 lithium-ion battery with a capacity of 3500 mAh. To enhance performance, I added a charge controller, which allows for charging at a maximum of 1 amp, significantly better than the node's original controller that only charged at 100 mA. This is crucial because it enables faster charging, especially when sunlight is abundant.
The Test Setup
For the test, I monitored the voltage and current over a day and night cycle. The reddish-purple line on my graph represents the voltage measured by the INA219, while the blue line shows the current charging rate. Initially, the voltage was around 4.7 volts, dropping to about 4 volts by 7 PM when the sun set.

As night approached, the voltage gradually decreased, reaching 2.81 volts by the next morning. This drop is significant because the node consistently pulls around 100 mA, which is quite high for a solar node. The rapid voltage decline indicates that the battery struggles to keep up with the demand during nighttime.
Analyzing the Results
When the sun rose, the node began charging again. By 1 PM, it reached an 80% charge, at which point the charge controller throttled down the charging current. However, the voltage drop during the night was concerning. By the end of the test, the node operated for approximately 25 hours on a full charge before shutting down.
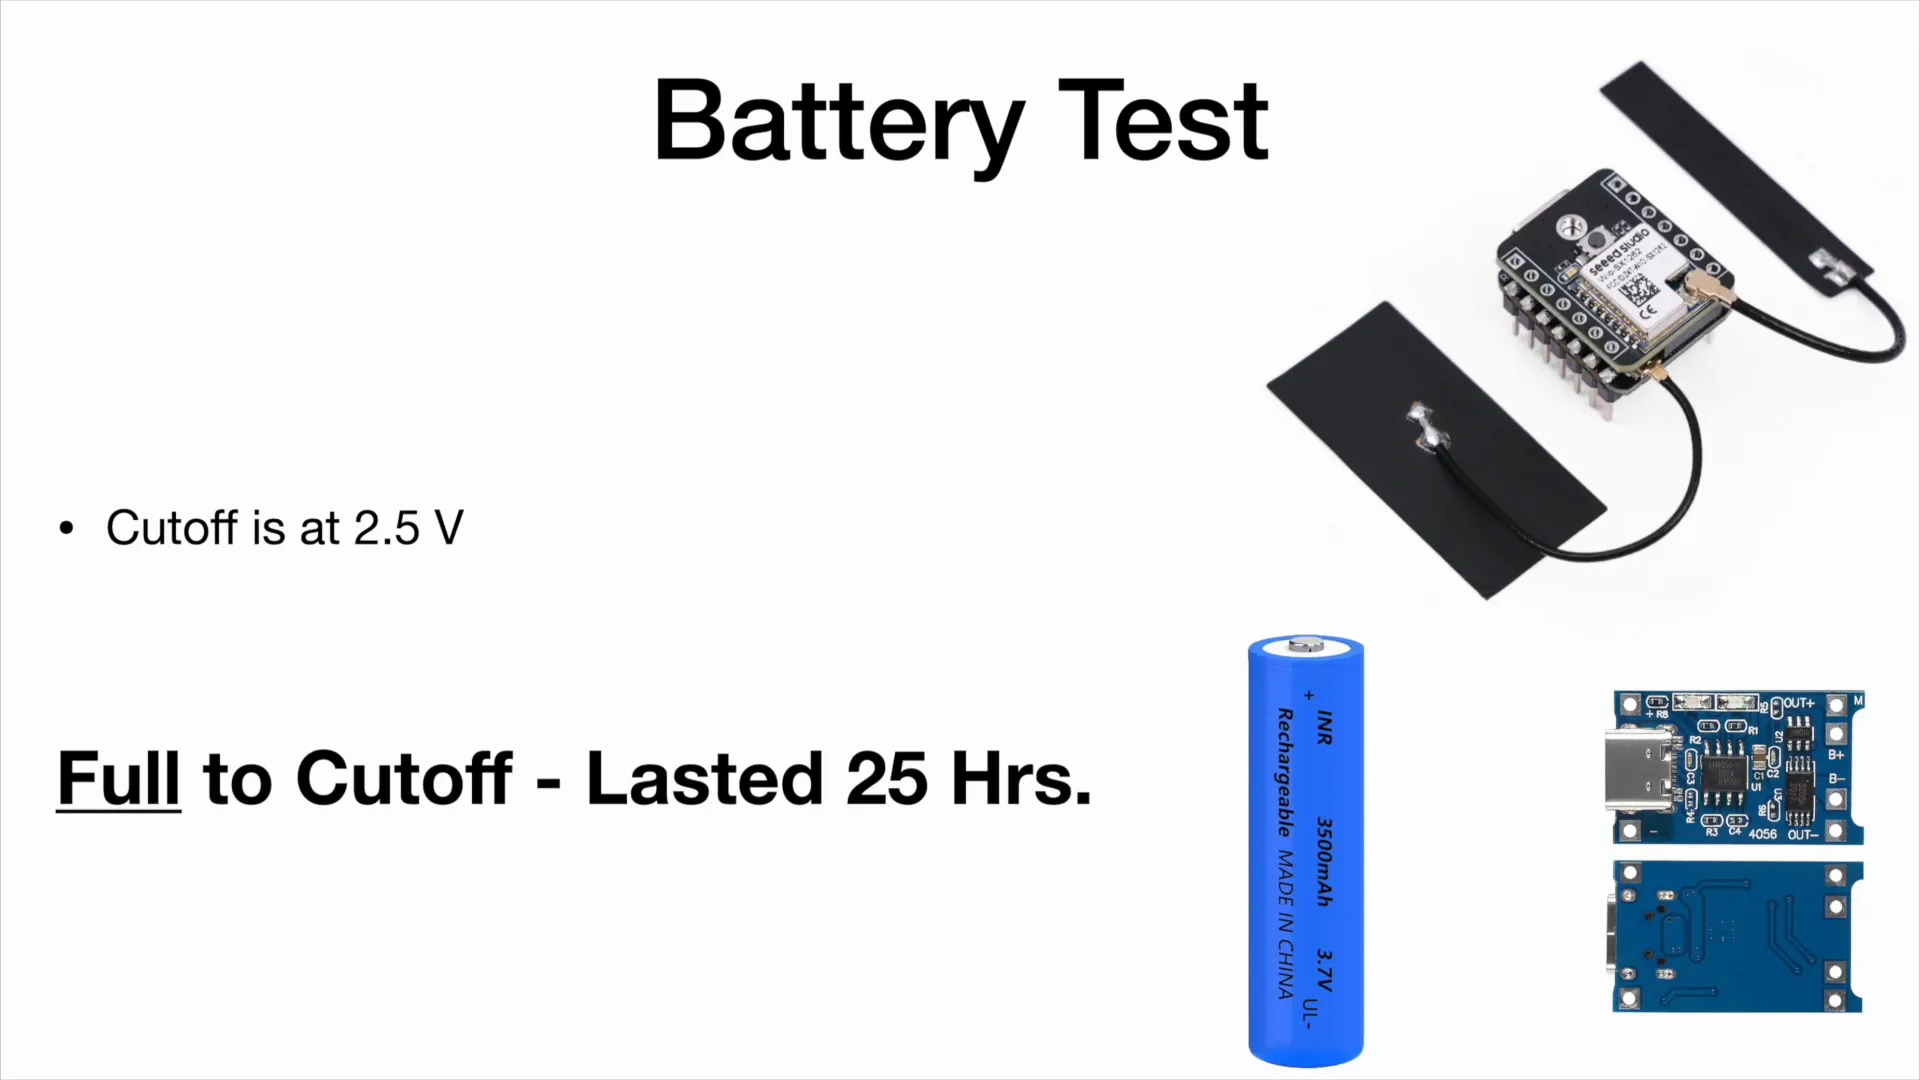
To further test the node's endurance, I wrapped the solar panel in a towel to see how long it could last without charging. After 25 hours of operation, it powered down, and I attempted to recover it.
Recovery Process
Upon checking the mobile app, I discovered that the node had not connected for the last ten hours. I tried tracing the route and connecting via Bluetooth, but the node was unresponsive. The LED indicator was also off, confirming it was dead.
Fortunately, I had installed a new charge chip with a cutoff feature at 2.5 volts, which prevents the battery from depleting too much and potentially damaging the system. This is a significant improvement over the previous setup, which allowed the voltage to drop to 1.8 volts, risking board corruption.
Attempting Recovery
I decided to test recovery by exposing the solar panel directly to sunlight. Miraculously, the node powered back on, and the indicator light turned green. I connected to it again through the app, and to my relief, it responded!
However, some configuration data was lost during the power outage, which is a drawback. The node had corrupted some settings, which is disheartening, but at least it was operational again.
Software Updates and Improvements
After the test, I upgraded the Meshtastic version from 2.5 to 2.6. This upgrade was crucial because version 2.5 did not display voltage readings or charge status properly. With the upgrade, the node began showing accurate voltage and percentage charge readings, indicating that the updates fixed previous bugs.
Despite the challenges, this experiment has been insightful. While the ESP32 S3 is not ideally suited for solar applications, I learned a lot about how to enhance its performance. Options for improvement include using a larger solar panel and adding more batteries to extend operating time significantly.
Final Thoughts
In conclusion, while the ESP32 S3 solar node has its limitations, it’s a fascinating project worth pursuing if you're willing to experiment. I plan to build a similar node using the Heltec T114, which is NRF52 based, to compare the voltage draw and performance. Stay tuned for that update!
FAQs
What is the maximum charging current for the ESP32 S3 solar node?
The charge controller I added allows for a maximum charging current of 1 amp, which is a significant improvement over the original 100 mA.
How long did the solar node run on a full charge?
The solar node operated for approximately 25 hours before it powered down.
What issues did you encounter during the test?
The primary issue was the significant voltage drop during the night due to the consistent 100 mA power draw. Additionally, some configuration data was lost when the node powered down.
Will you continue testing this setup?
Yes! I plan to continue testing and experimenting with this setup and will share updates as I learn more.
Where can I find the components used in this project?
You can find links to the components in the description, including the 18650 battery and charge controllers.
Thank you for joining me today! I hope this exploration of the ESP32 S3 solar node has inspired you to try your own projects. Don’t forget to subscribe for more updates and future comparisons!
