
Exploring the Meshtastic Health Tracker Feature
Published by Vivian van Zyl in Meshtastic the 01/07/2025 at 07:43 pm

In the realm of DIY health monitoring, the integration of a MAX30102 sensor with Meshtastic nodes opens up exciting possibilities. This blog post will delve into the process of enabling and using a health tracker feature within the Meshtastic firmware, showcasing how to monitor heart rate, blood oxygen levels, and temperature. Let’s dive into the details of this innovative integration.
Table of Contents
- Understanding the Components
- Setting Up the Hardware
- Installing the Meshtastic CLI
- Enabling the Health Monitoring Feature
- Monitoring Health Data
- Limitations and Considerations
- Conclusion
- FAQs
Understanding the Components
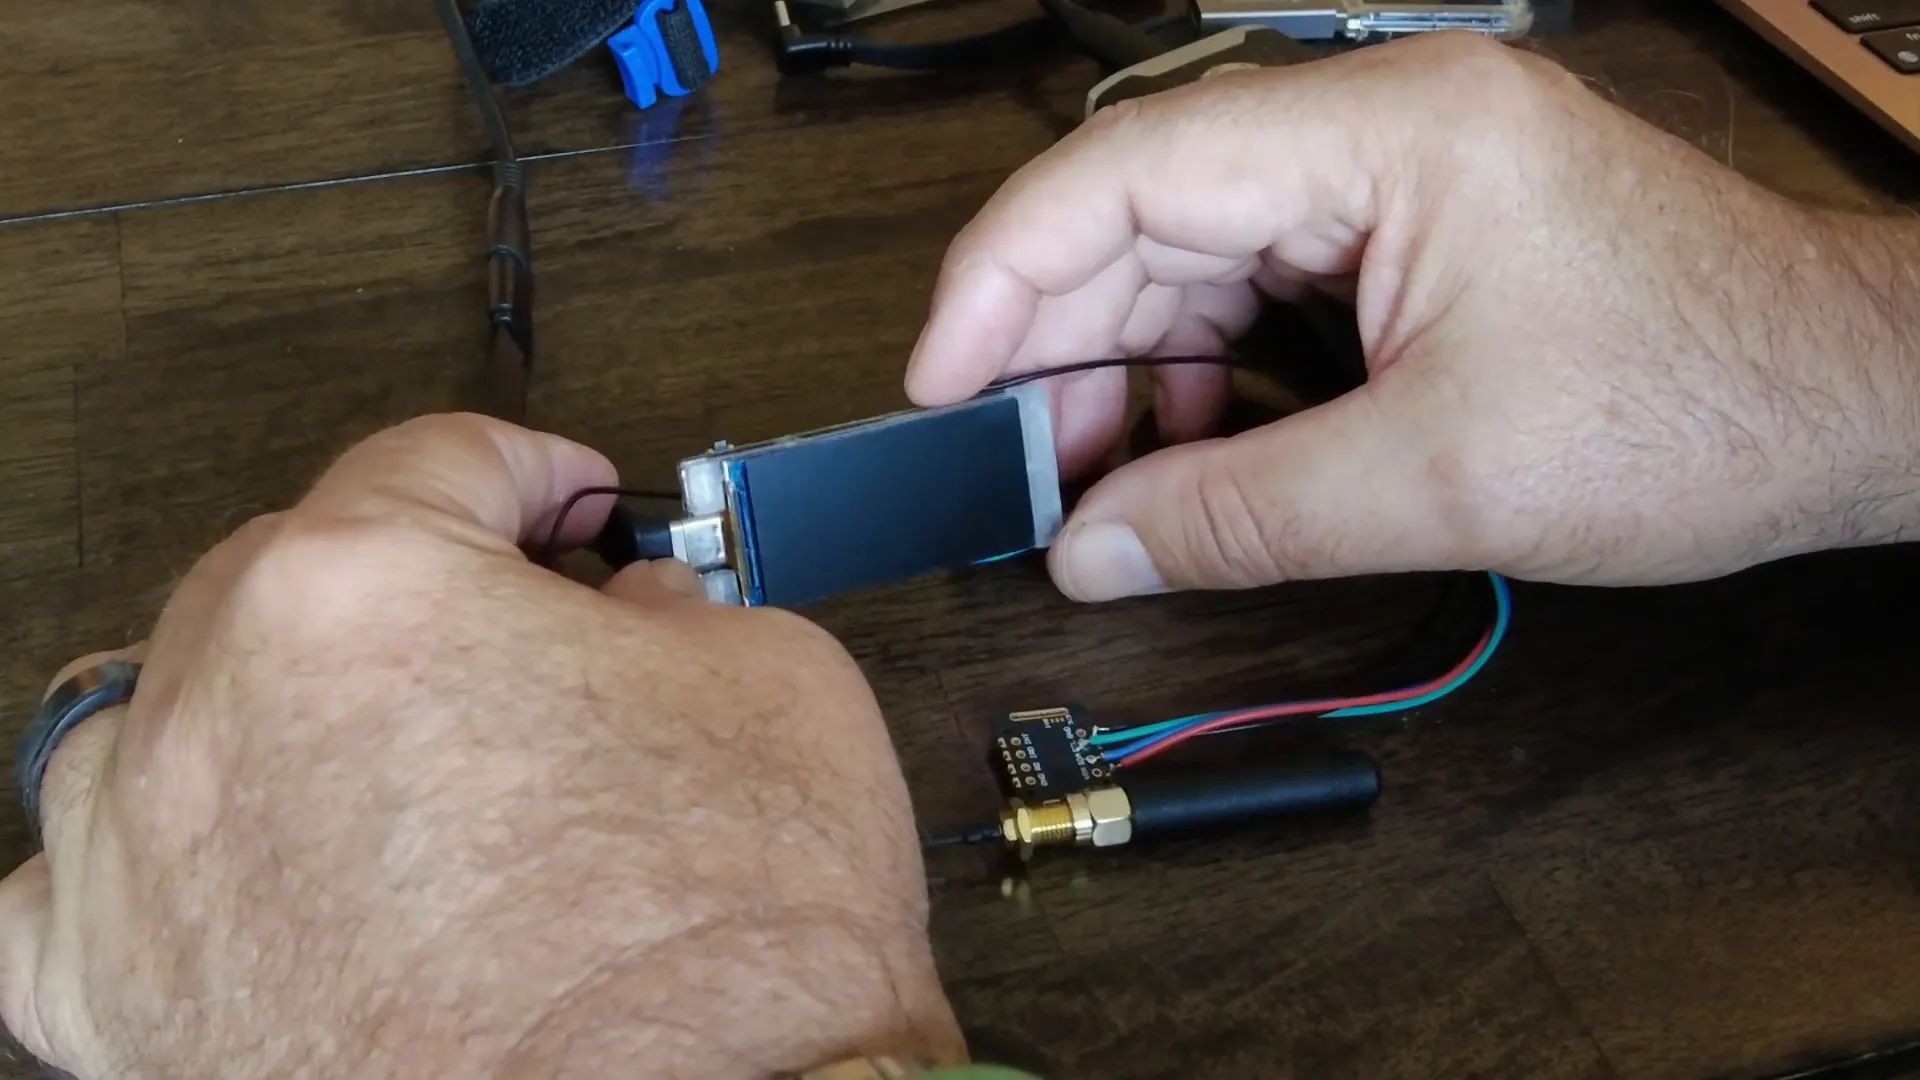
The heart of our setup is the Haltech VisionMaster T190, equipped with a LoRa antenna. This device acts as the main node for our health monitoring system. The MAX30102 sensor is a vital component that measures crucial health metrics, making it a perfect fit for our Meshtastic integration.

What is the MAX30102 Sensor?
The MAX30102 is an I2C device specifically designed for health monitoring. It can measure heart rate, blood oxygen saturation (SpO2), and temperature. This sensor is the only one currently supported by Meshtastic, showcasing the platform's capability to expand into health tech.
Setting Up the Hardware
To get started, we need to connect the MAX30102 sensor to the Haltech VisionMaster T190. This involves simple wiring to ensure proper communication between the sensor and the node. Once connected, the node should be flashed with the latest Meshtastic firmware to ensure compatibility and access to the latest features.
Installing the Meshtastic CLI
With the hardware in place, the next step is to install the Meshtastic Command Line Interface (CLI) on your computer. This tool is essential for monitoring the node's log output and configuring the health sensor settings. You can easily download the CLI and follow the installation instructions provided on the Meshtastic website.
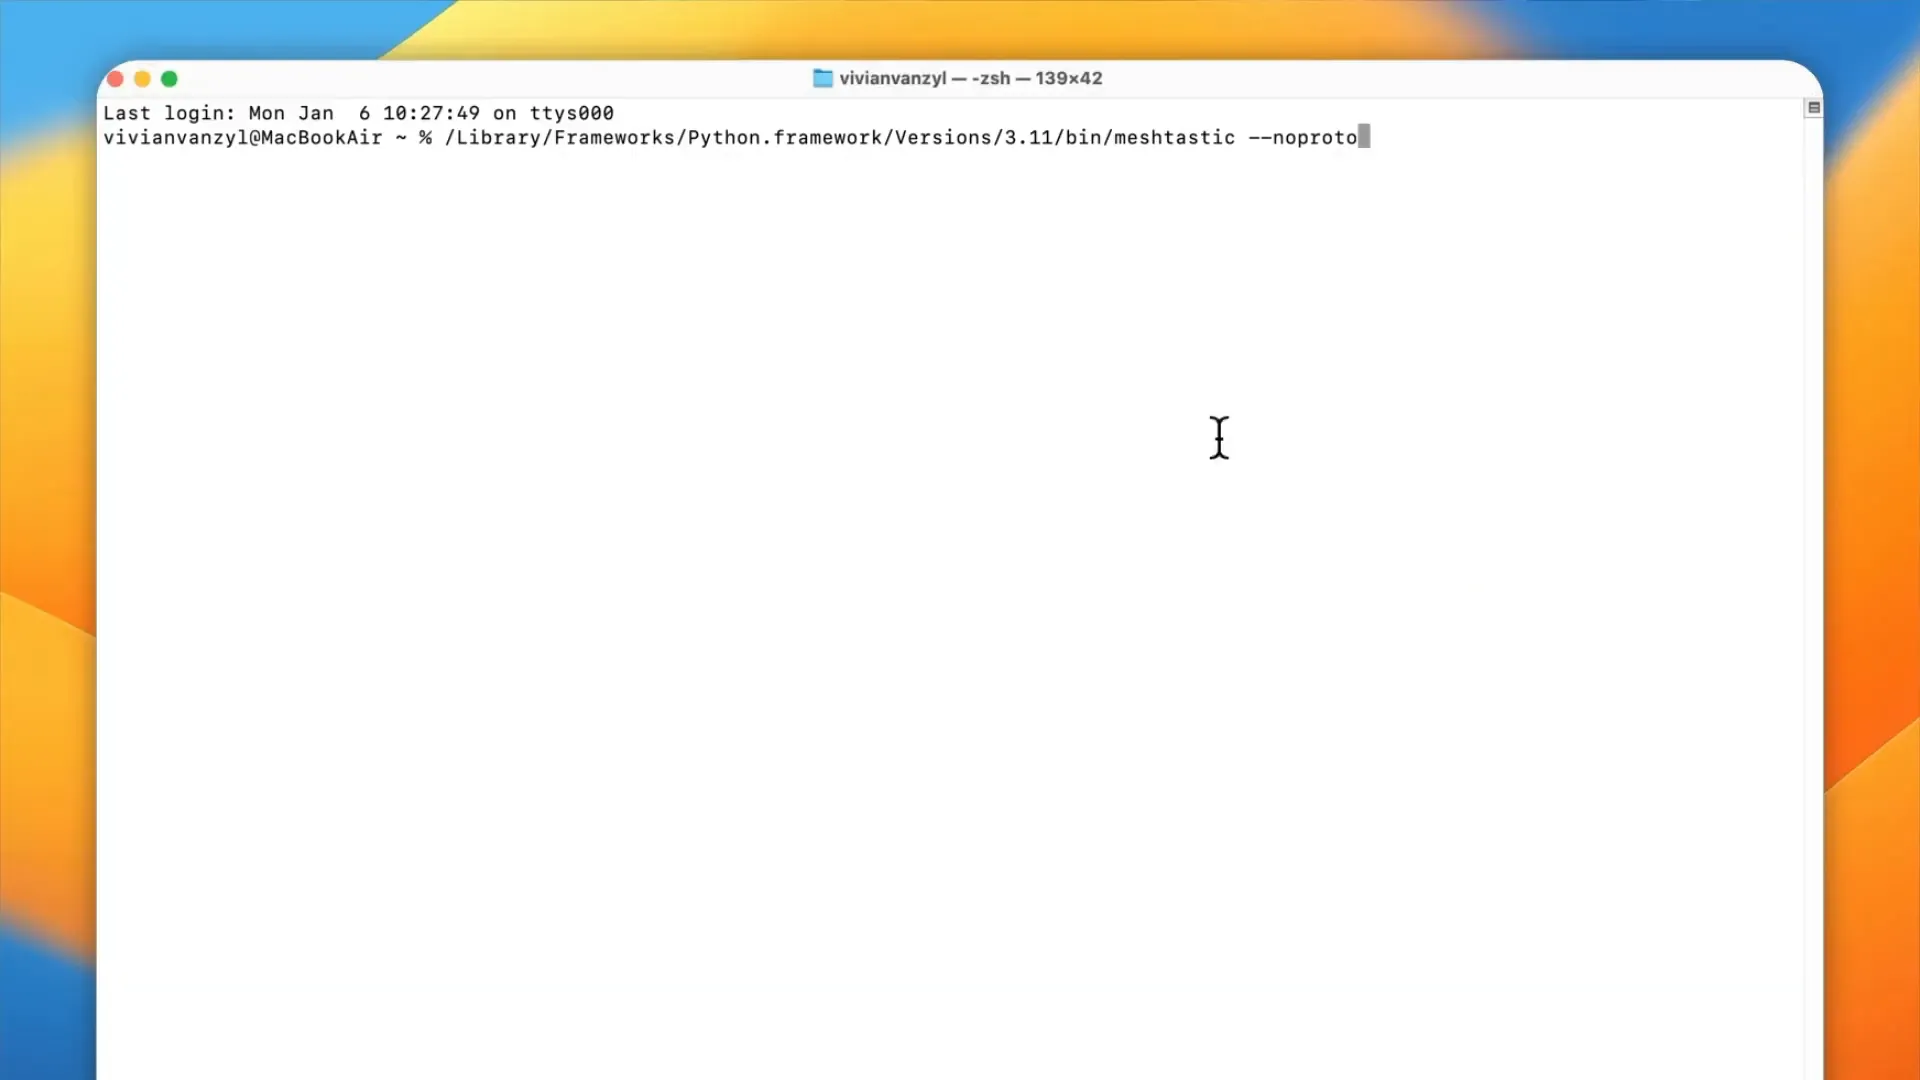
Enabling the Health Monitoring Feature
Once the CLI is set up, it’s time to enable the health monitoring feature. This is done by sending specific commands through the CLI. The command structure is as follows:
- set telemetry health measurement enabled true - This command activates the health measurement feature.
- set telemetry health screen on true - This command enables the health screen on the node.
- set health update interval to 60 - This sets the frequency of health updates.
After entering these commands, the node will reboot, and you should start seeing health data being logged.
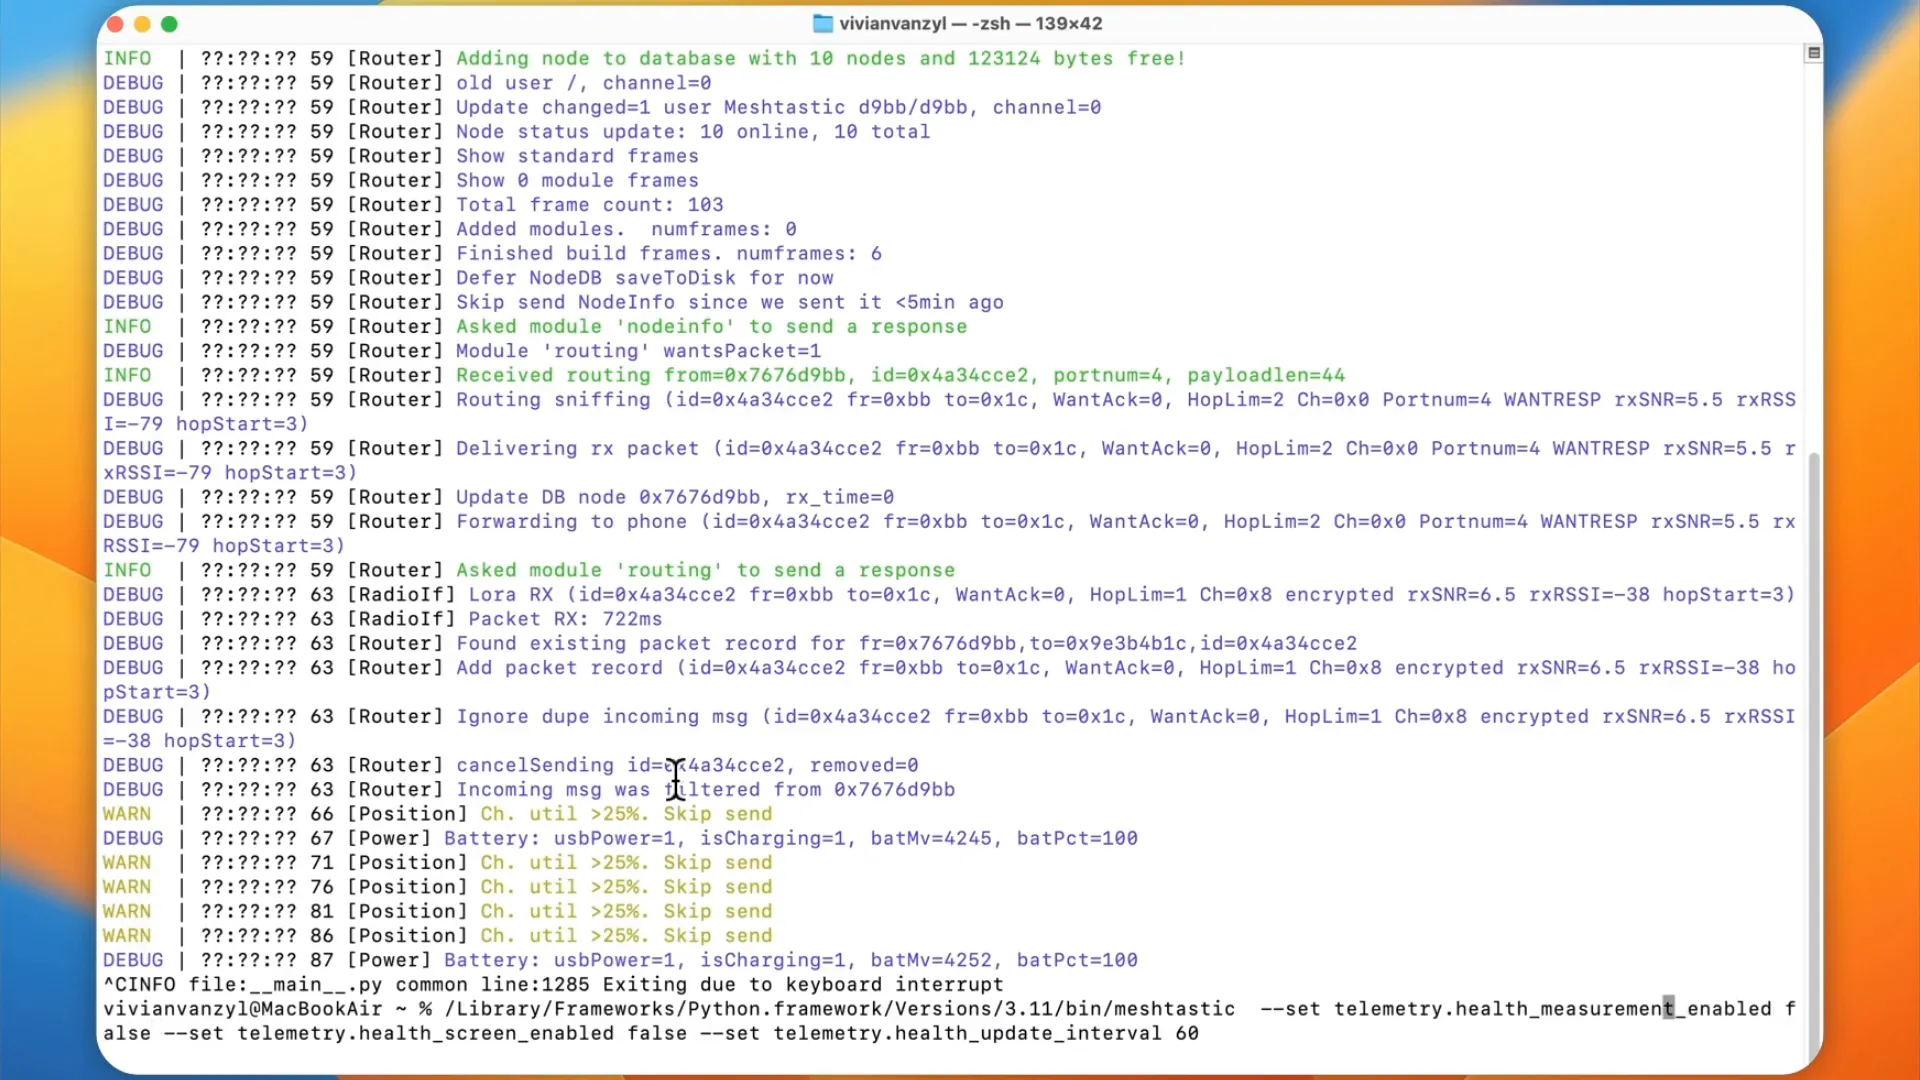
Monitoring Health Data
After enabling the health features, the logs will start displaying health measurements. Initially, you might see messages like "health measurement not measured," indicating that readings are yet to be taken. By pressing the reset button on the node, you can initiate the sensor readings.

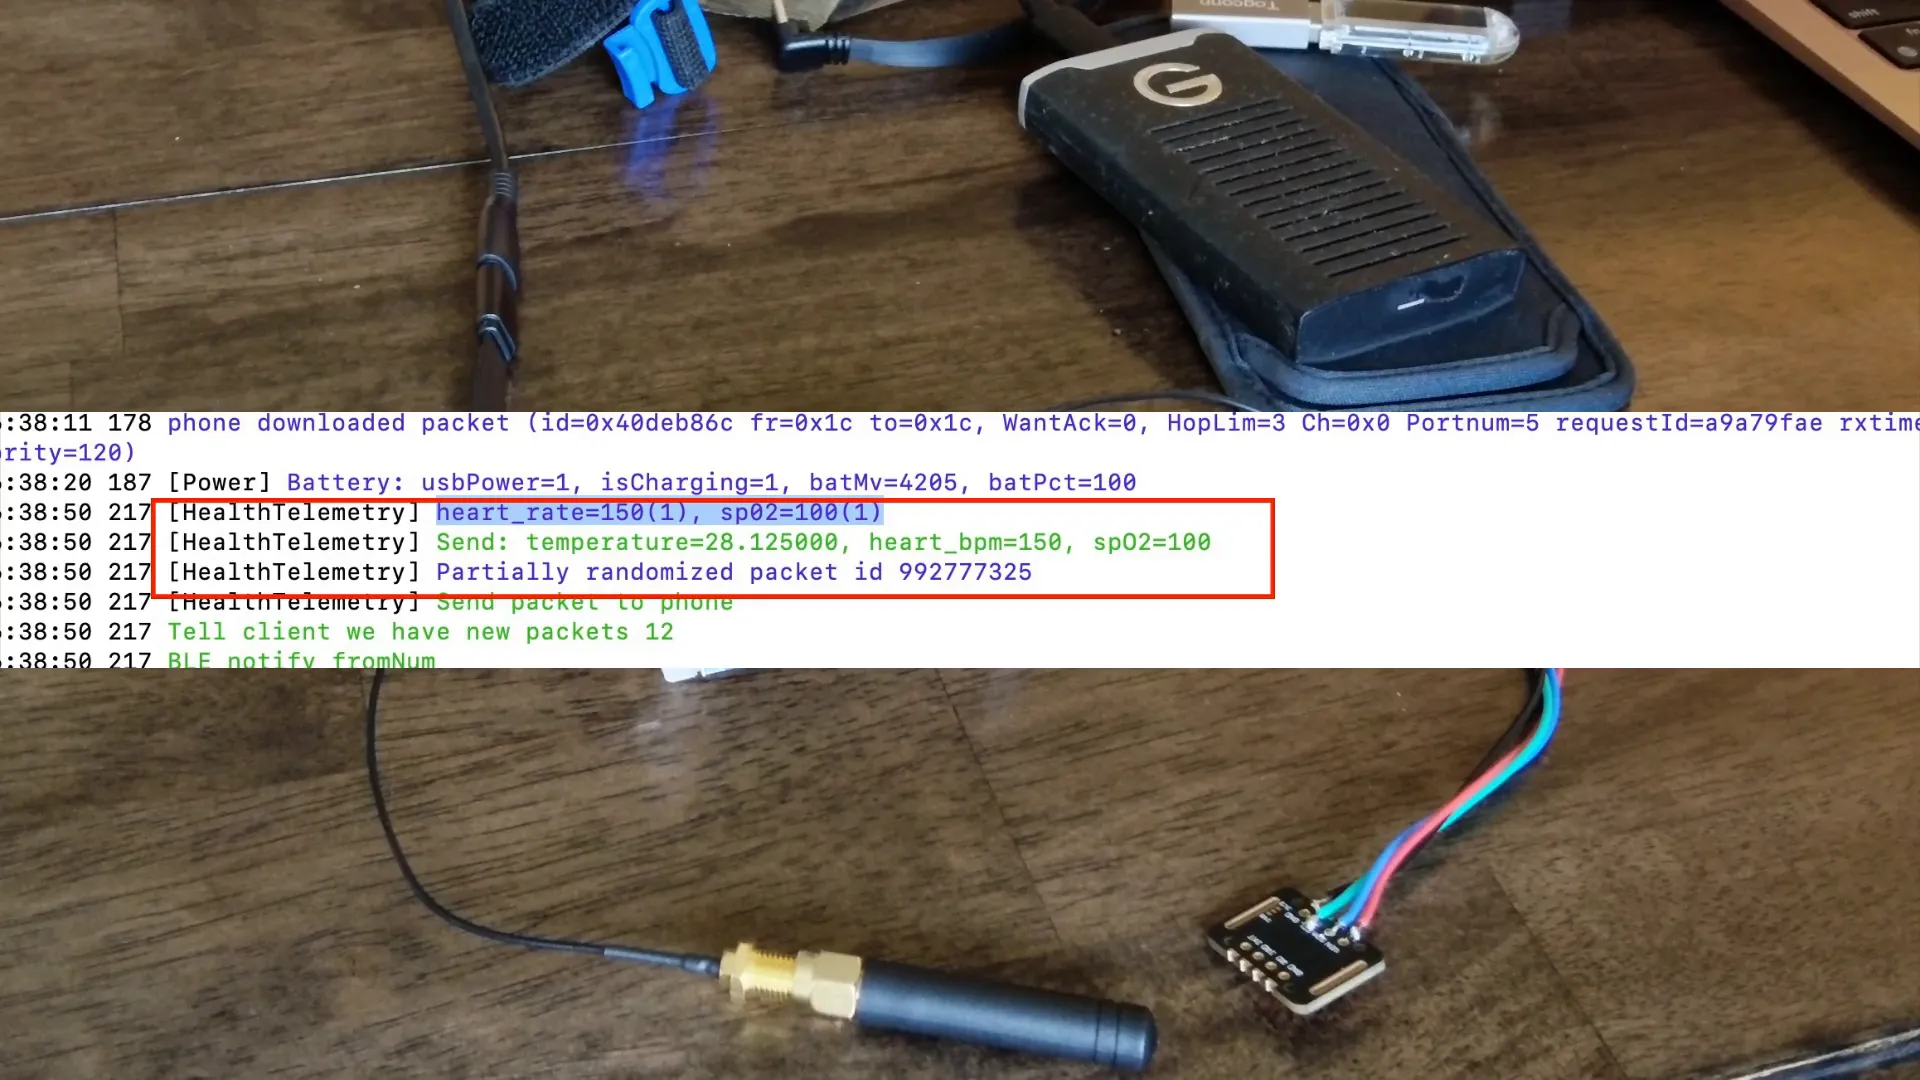
Reading the Health Measurements
As the sensor begins to take readings, you'll notice the updates on the health measurement screen. The display will show values for temperature, heart rate (BPM), and SpO2. Here’s a quick overview of what each measurement signifies:
- Heart Rate (BPM): The number of heartbeats per minute, indicating your current cardiovascular status.
- SpO2: The percentage of oxygen in the blood, crucial for assessing respiratory function.
- Temperature: Provides insight into body temperature, a vital sign in health monitoring.
Limitations and Considerations
While the integration of the MAX30102 sensor with Meshtastic is a fascinating demonstration of the platform's capabilities, it's essential to consider its limitations. The health measurements provided by this setup are not medical-grade accurate. Therefore, while it can be useful for general monitoring and DIY projects, it should not replace professional medical devices.
Conclusion
In conclusion, the Meshtastic platform showcases its potential for health monitoring through the integration of the MAX30102 sensor. This DIY health tracker can provide valuable insights into heart rate and oxygen levels, making it a fun and educational project for tech enthusiasts. If you're interested in experimenting with your own Meshtastic health tracking setup, this guide should serve as a helpful starting point.
FAQs
1. What is Meshtastic?
Meshtastic is an open-source project that allows users to create long-range, low-power mesh networks using LoRa technology. It’s designed for various applications, including remote communication and sensor data transmission.
2. Can I use other sensors with Meshtastic?
Currently, the MAX30102 is the only health sensor officially supported by Meshtastic. However, the platform is designed to be extensible, so other sensors may be integrated in the future.
3. Is the health data from Meshtastic accurate?
The health data provided by the MAX30102 sensor integrated with Meshtastic is not intended for medical use and may not be completely accurate. It's suitable for general monitoring and DIY projects.
4. How can I troubleshoot if the health sensor is not working?
Ensure that the sensor is correctly wired to the node, and verify that you have flashed the latest Meshtastic firmware. Additionally, check the CLI commands for enabling the health features to confirm they are entered correctly.
5. Where can I learn more about Meshtastic?
Visit the official Meshtastic website or their GitHub repository for documentation, community support, and project updates.