
Meshtastic Solar: DIY Solar Meshtastic Tree Node
Published by Vivian van Zyl in Meshtastic the 03/18/2026 at 02:22 pm

This Meshtastic Solar build is a compact, weatherproof LoRa node designed to hang high in a tree and keep itself charged no matter which way it spins in the wind. The idea is simple: wrap the node in multiple small solar cells, protect the electronics, use a simulated MPPT charge controller and a single 18650 cell, and run Meshtastic firmware for mesh networking. The result is a low-power, off-grid repeater or endpoint that can live in the canopy for weeks or months.
Table of Contents
- What this design solves
- Parts and tools (quick list)
- Design and enclosure notes
- Step-by-step assembly
- Meshtastic setup and configuration
- Deployment tips
- Common pitfalls and how to avoid them
- Why this is a good Meshtastic Solar approach
- FAQ
- Resources and files
What this design solves
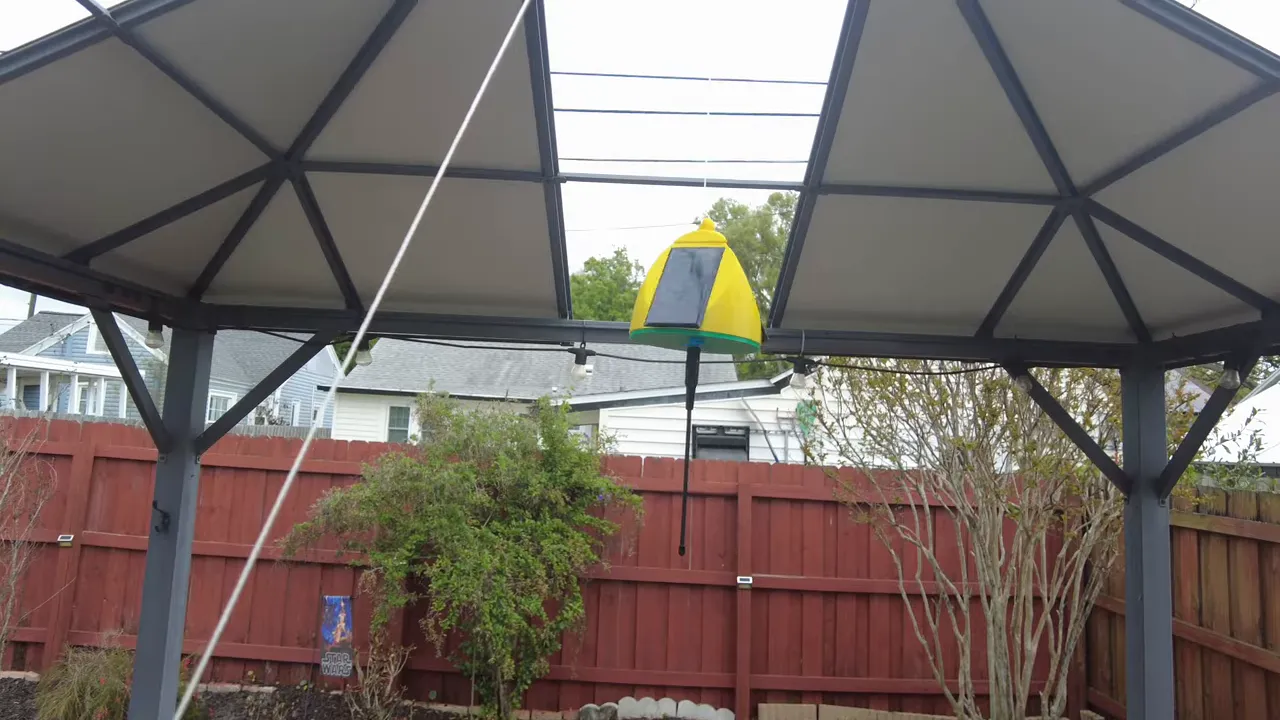
Traditional single-panel solar nodes are sensitive to orientation. A node that spins when hoisted into a tree can end up in a direction that receives little sun. This tree node uses three panels arranged around the body so at least one panel receives light regardless of orientation. It is also built slightly heavier so it does not constantly blow around, and the enclosure is designed to drain water downward and seal at the bottom.
Parts and tools (quick list)
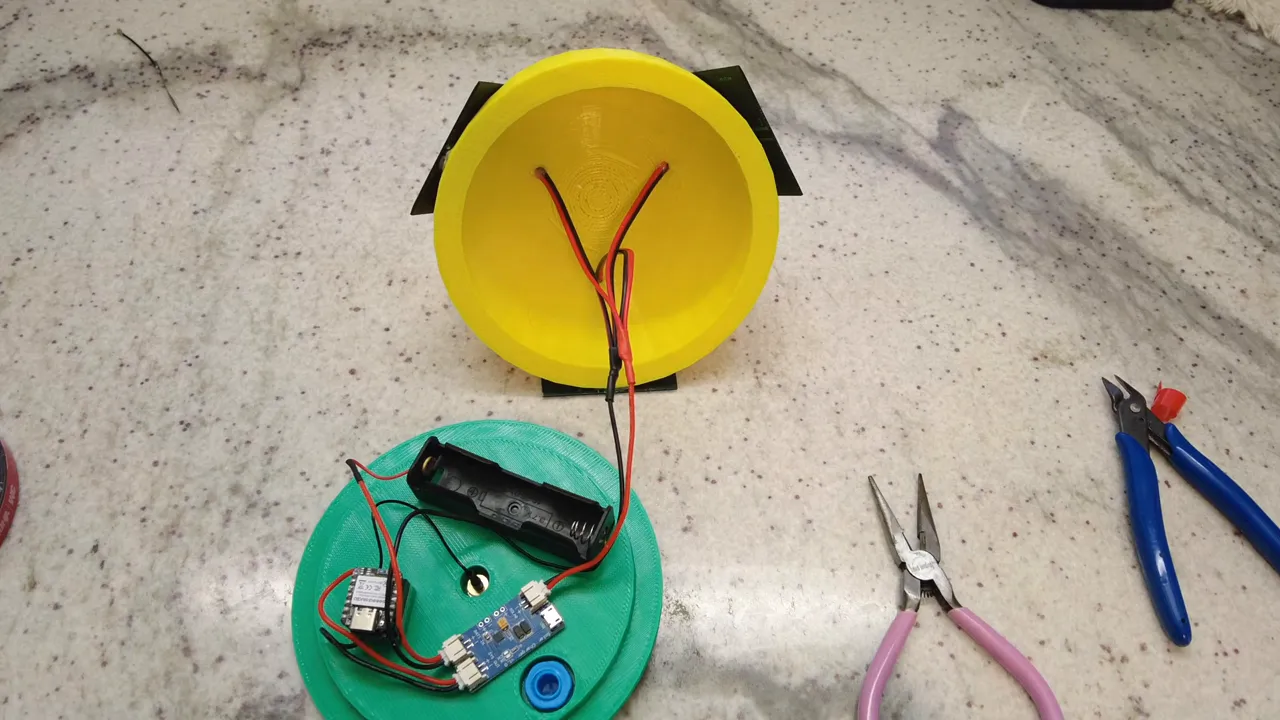
- Core board: Seeed nRF52840 with SX1262 (very power efficient for Meshtastic Solar).
- Alternative boards: Heltec V4, LoRa32/Heltec variants work too.
- Charge controller: Small simulated-MPPT TP4056-style step-up board (better than stock TP4056).
- Battery: 18650 (3500 mAh recommended).
- Solar: Small 5V micro-panels (three in parallel).
- Enclosure: 3D-printed body with drain design, or waterproof project box.
- Extras: SMA pigtail, breather plug, silicone sealant, 3M double-sided tape, small cable ties, hook for hoisting.
Design and enclosure notes
The enclosure is 3D-printed with a top hook and a bottom sealing plate so any water flows down and the bottom seals. I added indents for the solar panels and routed wires through small holes that are later sealed with silicone. There is a small breather plug at the bottom to help equalize pressure and reduce condensation inside the enclosure.
Step-by-step assembly
1. Prepare the LoRa board and antenna
Open the Seeed nRF52840 + SX1262 board, replace the default tiny antenna connector with a proper SMA pigtail, and identify the battery pads. The goal is to feed the board like it has a battery attached. The charge controller will simulate the battery connection rather than using the 5V pad.

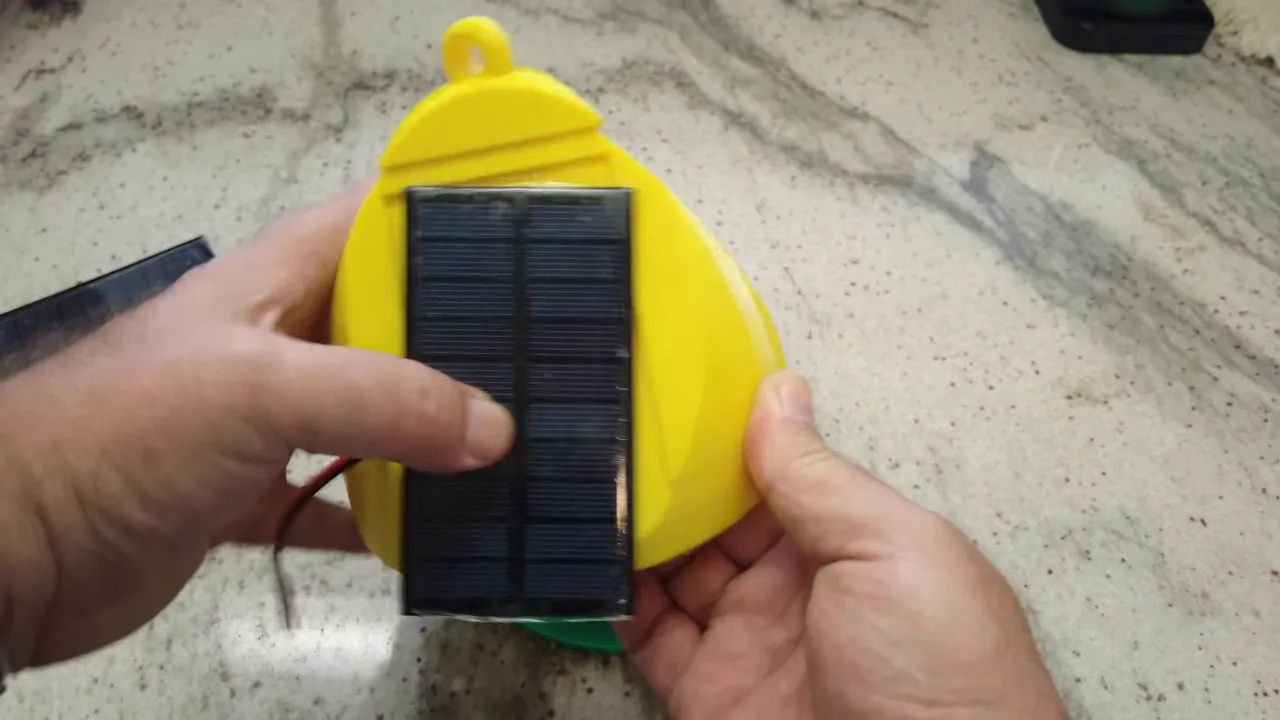
2. Mount and waterproof the solar panels
Use three small panels and glue them into the side slots with a small bead of silicone at the top and bottom to lock them in place. Feed the wires through the designed holes, then seal the inside where each wire enters so the enclosure remains waterproof.
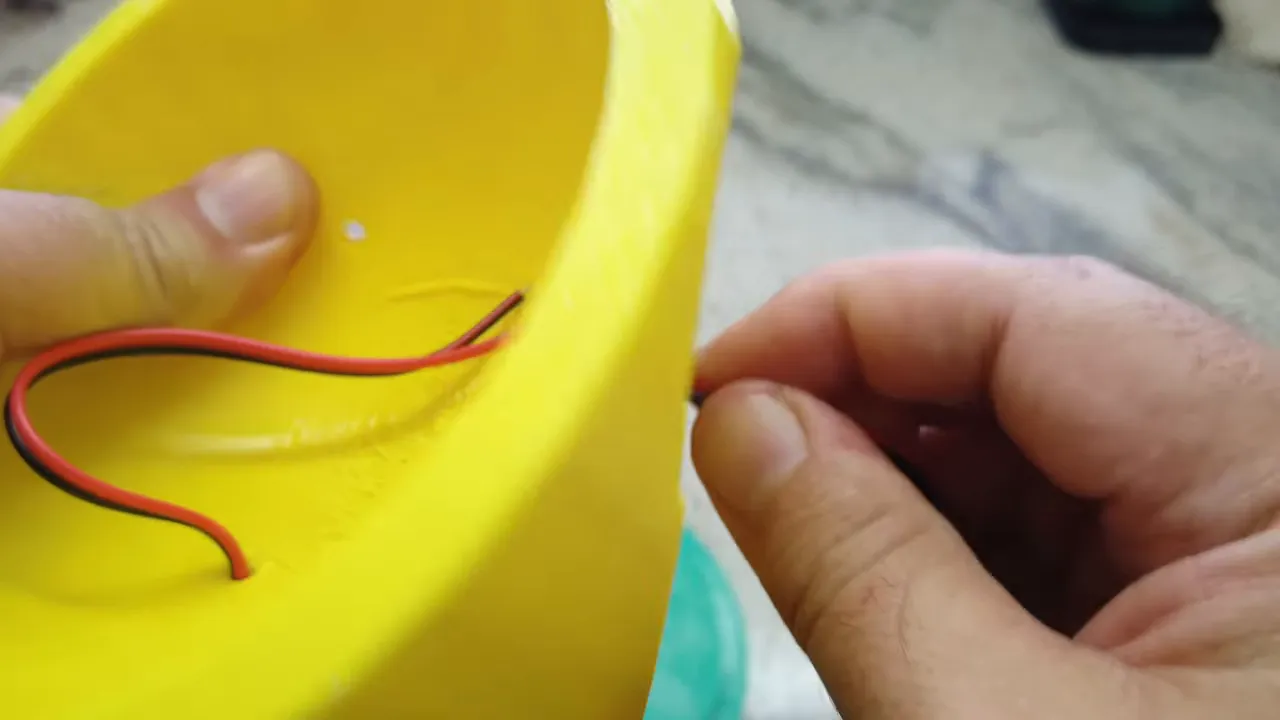
3. Wire panels in parallel and connect to charge controller
Join all positives together and all negatives together, then feed that pair to the solar input on the charge controller. Small panels should be paralleled for higher current while keeping voltage suitable for the charger. After wiring, verify the controller shows charging when exposed to light.
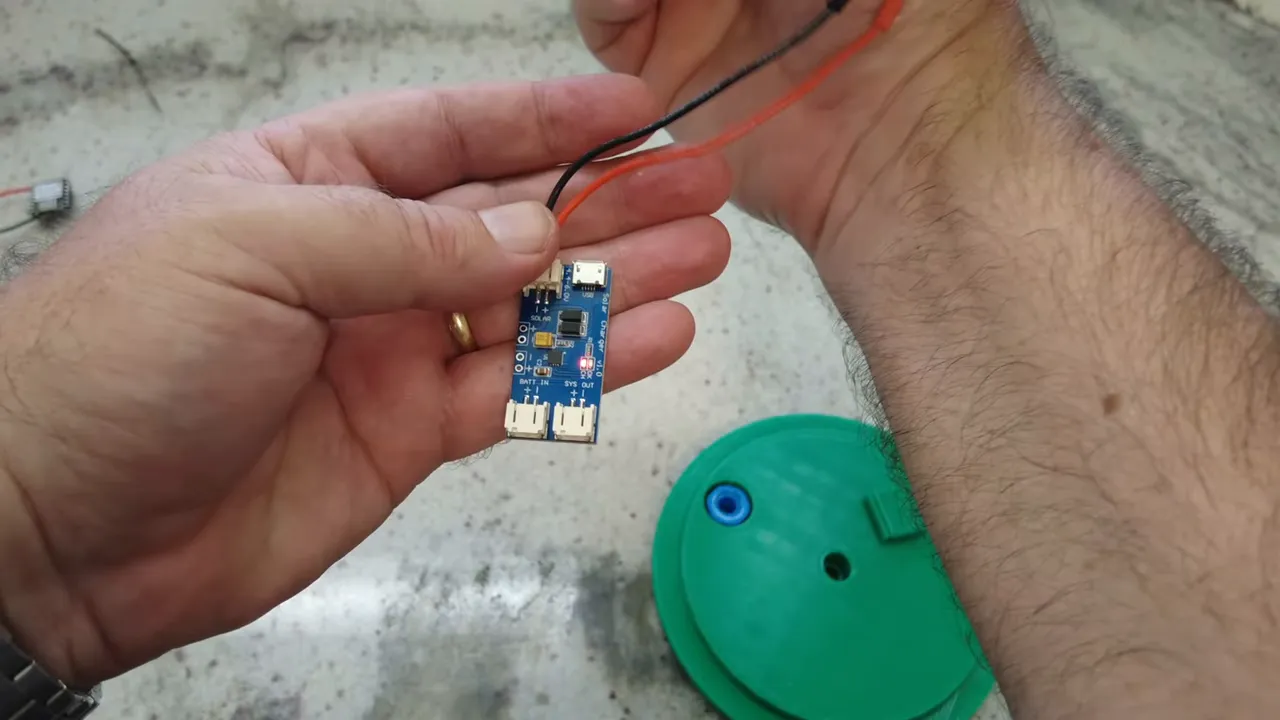
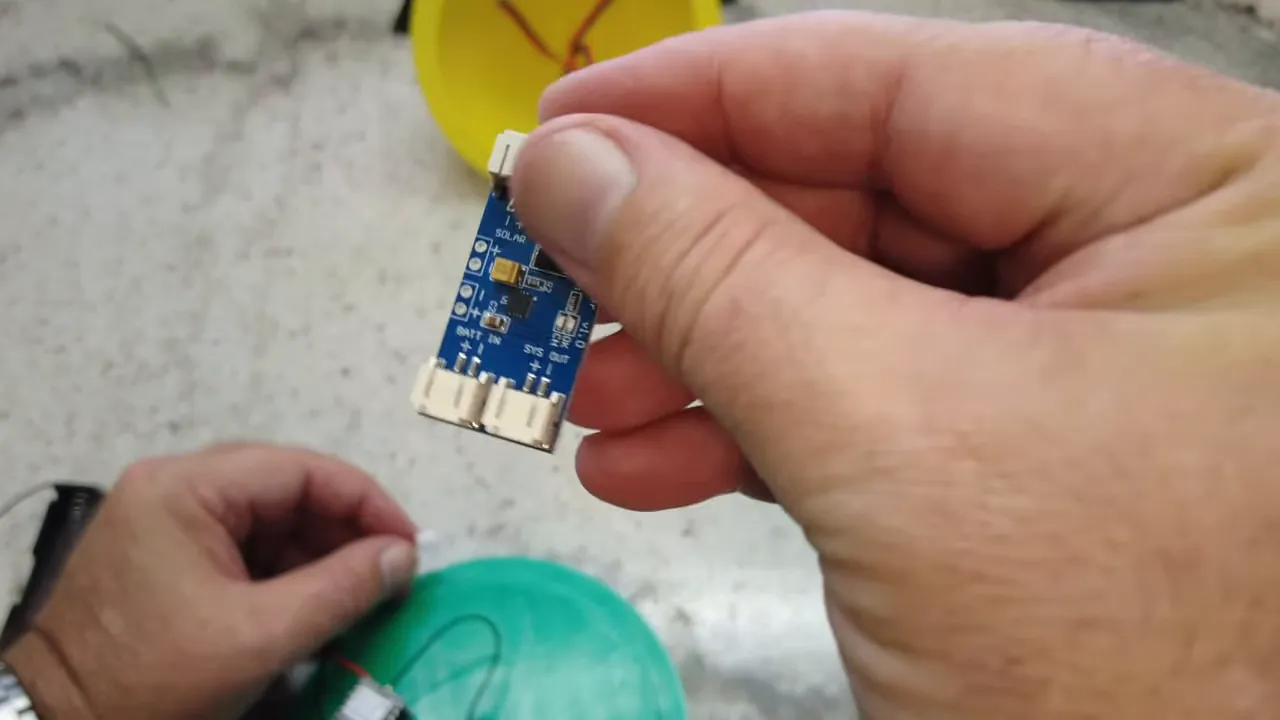
4. Mount the charge controller, battery holder and core board
Use 3M double-sided tape to secure the controller and the board to the inside of the enclosure; tape works well if placed carefully. Watch polarity on every connector—these small two-pin JST connectors are often wired inconsistently from suppliers, so confirm the board markings before plugging in.
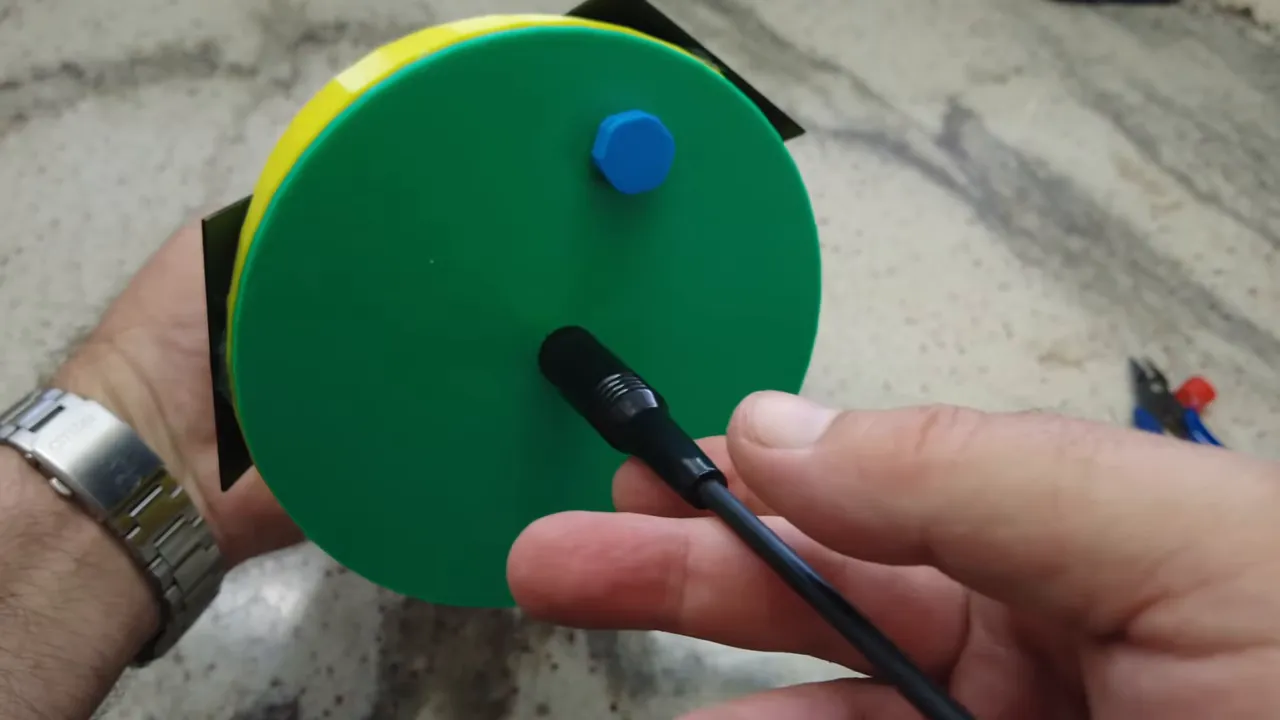
5. Install breather plug, antenna and final sealing
Fit the breather plug and SMA connector and tighten. Add silicone around the antenna feedthrough and the breather plug for extra protection. Do not insert the battery until the antenna is attached; powering a radio without an antenna can damage the transmitter.
6. Battery and first power-up
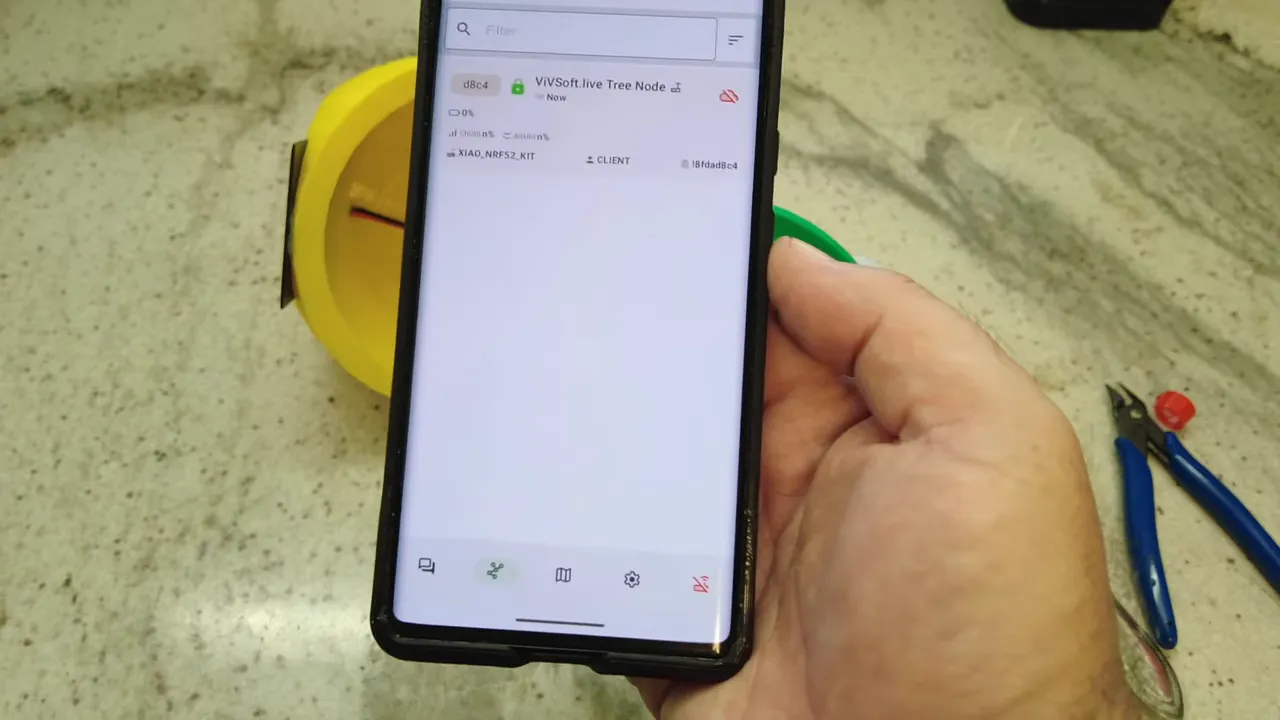
Install the 18650 and plug the battery into the controller. Double-check positive and negative wiring. On power-up you should see the Meshtastic module LED flash. If using Bluetooth for initial setup, it can be paired temporarily, but for permanent deployment it is better to disable Bluetooth and enable remote management.
Meshtastic setup and configuration
Flash the latest Meshtastic firmware to the board. When first connecting via the Meshtastic mobile app the default PIN for devices without a screen is 123456. Configure LoRa region and channel (for example US frequencies like 906.875 MHz if applicable), set hops, enable MQTT if you use a backend, and give the node a sensible name like "voft.live tree node".
Deployment tips
- Orientation: The multi-panel approach mitigates random rotation, but still tie the node so it does not spin freely. A secondary tie prevents constant orientation changes in wind.
- Weight: Make the node slightly heavier so it resists being blown around but not so heavy that hoisting is difficult.
- Antenna: Use an external SMA antenna mounted at the bottom so it clears foliage and has space to radiate.
- Monitoring: Configure remote management and telemetry so you can monitor battery voltage and charging remotely and disable Bluetooth in the field.
Common pitfalls and how to avoid them
- Wrong JST polarity: Double-check connector orientation. Many cheap connectors are wired backwards.
- Powering without antenna: Never transmit without an antenna attached—this can damage the RF stage.
- Insufficient charge controller: Small TP4056 boards are okay, but a simulated MPPT controller will keep the battery healthier and harvest more energy in variable light.
- Leak points: Seal solar wire entry holes and feedthroughs with silicone. Use the breather plug to reduce internal condensation rather than sealing completely airtight.
Why this is a good Meshtastic Solar approach
This tree node balances simplicity and reliability. The Seeed nRF52840 + SX1262 board is low-power and well-supported by Meshtastic. Multiple small panels reduce orientation risk and keep the node charging despite rotation. The design is modular: you can swap in other low-power LoRa boards and different solar sizes, and the 3D-printed enclosure means the project is reproducible.
FAQ
What is the recommended board for a Meshtastic Solar node?
The Seeed nRF52840 with SX1262 is recommended for its power efficiency and LoRa performance. Heltec V4 and similar LoRa ESP32 boards also work if you prefer an alternative.
How do I protect the electronics from moisture?
Design the enclosure so water drains away from electronics and seal any wire entry points with silicone. Use a breather plug to reduce internal condensation rather than making the case completely airtight.
Can I use a different battery than an 18650?
Yes, but 18650 cells are compact, widely available and provide a good capacity-to-size ratio. If you use a different chemistry or cell format, ensure the charge controller and connectors match and that you adjust the enclosure accordingly.
How long will the node run on battery alone?
Run time depends on board power draw, duty cycle, and sunlight. With a low-power board like the nRF52840 + SX1262, conservative TX intervals and a 3500 mAh 18650, the node can run for weeks without sun, and months with regular charging from the panels.
Resources and files
3D print files, project documentation, and assembly files are available for reproducible builds. Use the printable files to adapt the enclosure size and panel layout.
Seeed nRF52840 - https://www.seeedstudio.com/XIAO-nRF52840-Wio-SX1262-Kit-for-Meshtastic-p-6400.html?sensecap_affiliate=agiE1S0&referring_service=link
Heltec V4 (No Screen) - https://amzn.to/4dqVV4c
Charge Controller - https://amzn.to/4uynMFF
18650 Battery - https://amzn.to/4koPUqq
Battery Holder - https://amzn.to/4jZW9Pz
SMA Connector - https://amzn.to/4bvpuz8
915Mhz Antenna - https://amzn.to/3PmXJBi
Solar Panels - https://amzn.to/47xSvJe
3D Printable Files - https://www.printables.com/model/1640281-meshtastic-meshcore-tree-node
Project files - https://hub.lorameshdevices.com/projects/solar-tree-node-meshtastic-meshcore