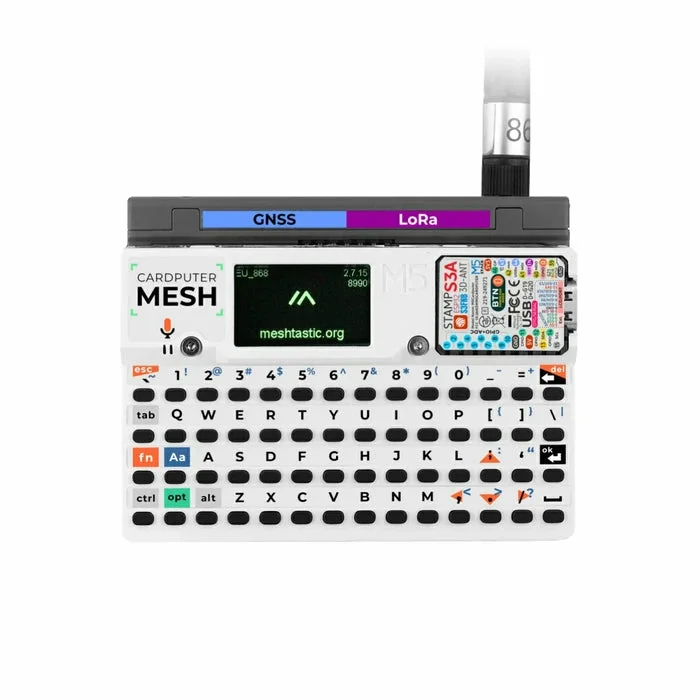
No PC Needed! Meshtastic Cardputer Setup and Review
Published by Vivian van Zyl in Meshtastic the 11/12/2026 at 04:01 pm

A little Meshtastic computer with its own keyboard, screen, battery, GPS, and LoRa radio is a pretty neat idea. What makes the M5Stack Cardputer Mesh Kit especially interesting is that you can configure the essentials right on the device. No computer, Bluetooth connection, or phone app is required for the initial setup.
I assembled the kit, explored the onboard menus, connected it to the Meshtastic app, and added a BME280 environmental sensor through a Grove port. Then I checked the sensor readings, sent a message from the keyboard, and tried a traceroute to a nearby node. There is quite a lot packed into this little device.
OpenELAB supplied this kit for testing. They bring together electronics and maker hardware from several brands, including equipment for Meshtastic, MeshCore, LoRaWAN, and M5Stack projects. The product link included here is an affiliate link, so I may earn from qualifying purchases.
Quick Summary
- The Cardputer supports essential Meshtastic configuration directly through its built-in keyboard and screen.
- An external BME280 supplied temperature, humidity, and pressure readings through the Grove connection.
- Local sensor feedback changed during testing, while LoRa telemetry broadcasts were configured for 30-minute intervals.
- Keyboard messaging and a nearby-node traceroute worked, but an indoor GPS fix was not obtained.
Table of Contents
- What Comes in the M5Stack Cardputer Mesh Kit?
- Setting Up Meshtastic Directly on the Cardputer
- Connecting to the Meshtastic App Is Still an Option
- Adding a BME280 Sensor Through the Grove Port
- Configuring Environmental Telemetry in Meshtastic
- Checking the Built-In GPS
- Sending Messages From the Keyboard
- Final Thoughts: A Useful All-in-One Meshtastic Device
What Comes in the M5Stack Cardputer Mesh Kit?
The Cardputer looks exactly like its name suggests: a small computer with a physical keyboard and a compact display. The mesh kit adds the radio hardware needed to turn it into a self-contained Meshtastic device.
The main hardware and expansion features include:
- ESP32-S3 processor
- 1500 mAh battery
- SX1262 LoRa radio module with an antenna
- Built-in keyboard and screen
- GPS
- USB port, microphone, and speaker
- Grove connectivity for external hardware
- Expansion connection and microSD card slot
The exposed ports are particularly useful. This is not just a messaging terminal with a keyboard attached. You can connect sensors and use it as an environmental telemetry node as well.
Assembling the LoRa Radio
The SX1262 radio comes as a separate module that fits onto the top of the Cardputer. Assembly is straightforward once you line up the locating features and connector.
- Connect the supplied antenna to the radio module.
- Align the module with the matching connection and mounting features on the Cardputer.
- Slide the assembly into place.
- Secure it with the supplied screws and Allen key.
The screws keep the module from working loose. Once assembled, you have a compact Meshtastic unit with a proper keyboard rather than a radio board that needs another device for everyday interaction.
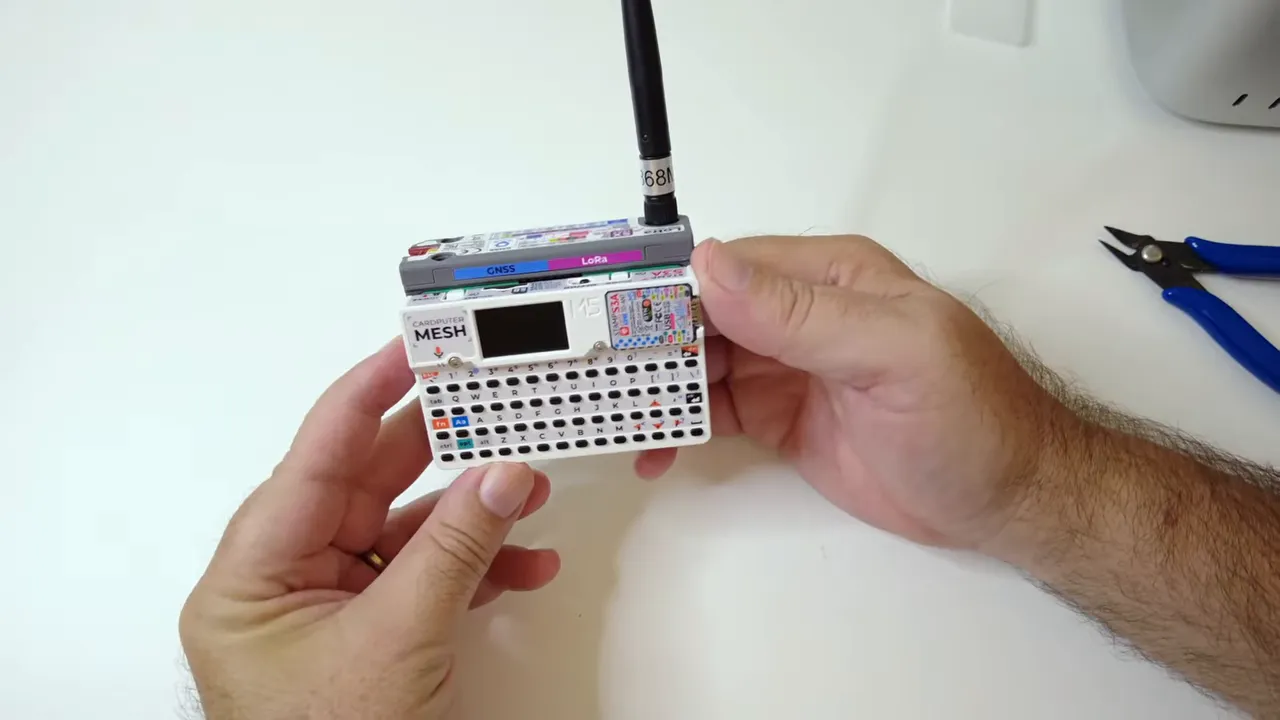
My unit booted directly into Meshtastic with firmware version 2.7.22 already installed. It also had enough charge to begin testing, with the battery display later showing 71 percent. There was no need to flash firmware before getting started.
Setting Up Meshtastic Directly on the Cardputer
This is the part I really liked: the keyboard is useful for configuration, not just typing messages.
Holding Enter opens the context menu for the current screen. The directional controls move between screens and menu entries. During testing, I found I could navigate between the main screens without continually holding the Function key.
The interface was very responsive. Alongside the main operating screens, there were status details such as heap and flash information, plus controls for sleep and sending position.
Device Role, Radio Preset, and Region
On the radio status screen, my unit initially showed the Client role, Long Fast preset, and a frequency of 906.875 MHz. Opening that screen’s menu exposed the configuration options, including:
- Device role
- Radio preset
- Frequency slot
- Region
The role menu included choices such as Client, Client Mute, and Tracker. I could also open the radio preset menu and select Long Fast directly on the device.
That means the important radio settings are accessible without connecting to a computer or opening the Meshtastic app. Check the region and radio configuration for your own location and mesh rather than assuming the supplied defaults are the ones you need.
Setting the Clock and Time Zone
The clock settings include the clock face, time format, and time zone. I selected US Eastern, and the displayed time immediately matched my local time.
For the setup tasks I tried, the Cardputer really did stand on its own. You can power it up, work through the menus, and make the basic changes using the keyboard. That is a very nice feature for a portable mesh device.
Connecting to the Meshtastic App Is Still an Option
Not needing a phone does not mean you lose app support. I paired the Cardputer over Bluetooth to check its settings and use the larger interface for the sensor configuration.
- Scan for Bluetooth devices in the Meshtastic app.
- Select the Cardputer. My unit appeared with the identifier ending in 0048.
- Enter the pairing code shown on the Cardputer’s screen.
- Wait for the app to connect and load the device configuration.
The app confirmed that my unit was configured for the United States region, Long Fast, and frequency slot 20. I also changed the default node name to a custom name.
Saving the name caused the device to reboot. The app temporarily disconnected, then reconnected when the Cardputer came back online with its updated name. The name could also have been changed on the Cardputer itself, but this was a useful check that app-based configuration worked too.
Nearby nodes began appearing fairly quickly. Some initially showed up as unknown because their names had not resolved yet. That was already a useful sign that the radio was receiving mesh traffic.
A Note About Firmware Versions
The supplied firmware on my unit was 2.7.22. At the time of testing, 2.7.26 was available, with 2.8 versions also appearing. Those are the versions relevant to this test, not a recommendation to treat any of them as the latest release today.
I left the installed firmware in place for this initial setup. A firmware update and an experiment with MeshCore were planned as separate follow-up tests, so neither is part of the results here.
Adding a BME280 Sensor Through the Grove Port
Now for the fun part: connecting an external sensor.
The assembled kit has a Grove connection on the Cardputer and another on the SX1262 extension. For this test, I used the connection on the radio extension and connected a BME280 environmental sensor.
The wiring path was:
- A Grove cable from the Cardputer’s radio extension
- A small Qwiic distribution hub
- A connection from the hub to the BME280 sensor board
The distribution hub was not essential to this single-sensor setup. A direct connection would also have been possible with suitable cabling. I like using a hub because it gives me somewhere to connect additional devices later.
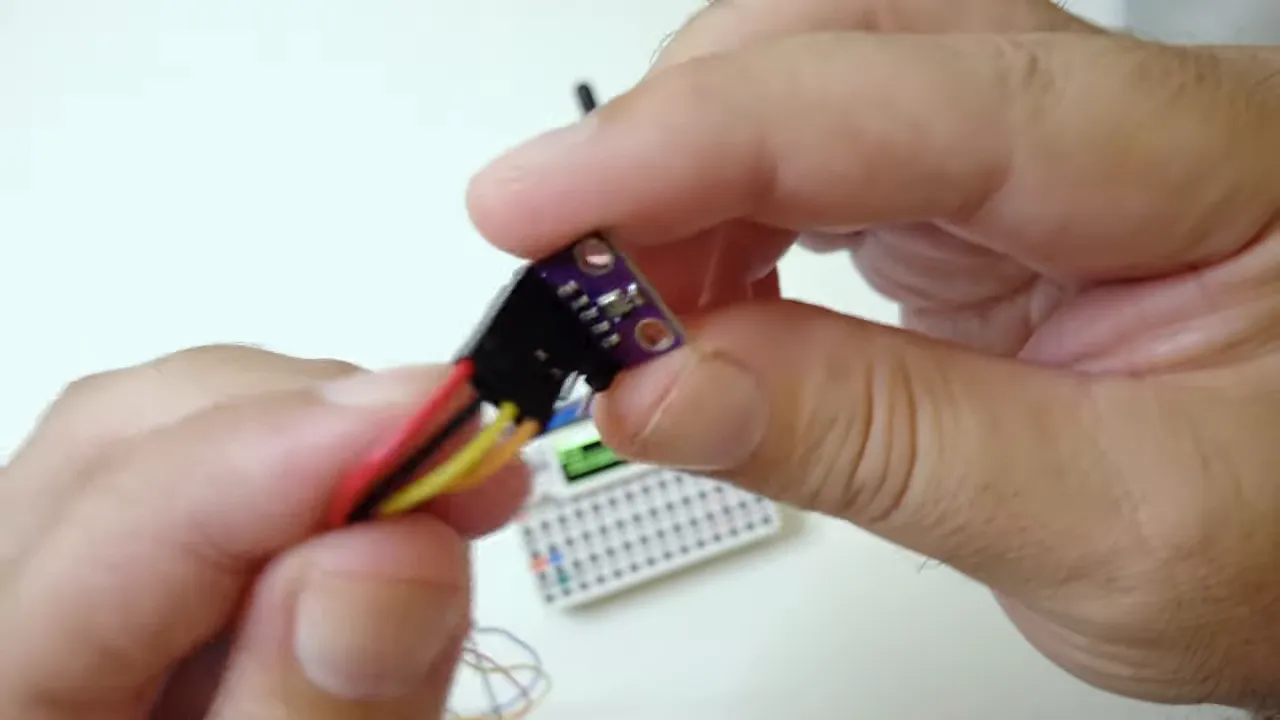
The sensor used here was a BME280, which supplied temperature, humidity, and barometric pressure readings. Meshtastic supports several environmental sensors, but the working example in this test is specifically the BME280.
Configuring Environmental Telemetry in Meshtastic
With the sensor connected, I used the phone app to enable telemetry. This part of the demonstration used the app even though the basic radio setup had already been completed on the Cardputer.
The menu path was Settings → Module Configuration → Telemetry.
I configured the environmental telemetry options as follows:
- Enable telemetry and environmental measurements.
- Set the relevant update intervals to 30 minutes.
- Enable the telemetry screen so readings could appear on the Cardputer.
- Select Fahrenheit for the temperature display.
- Leave power metrics out of this test. The focus was environmental data.
I also enabled the air-quality option while exploring the settings. However, the results demonstrated here are temperature, humidity, and pressure. Turning on an option in the app does not mean the attached BME280 provides an air-quality measurement.
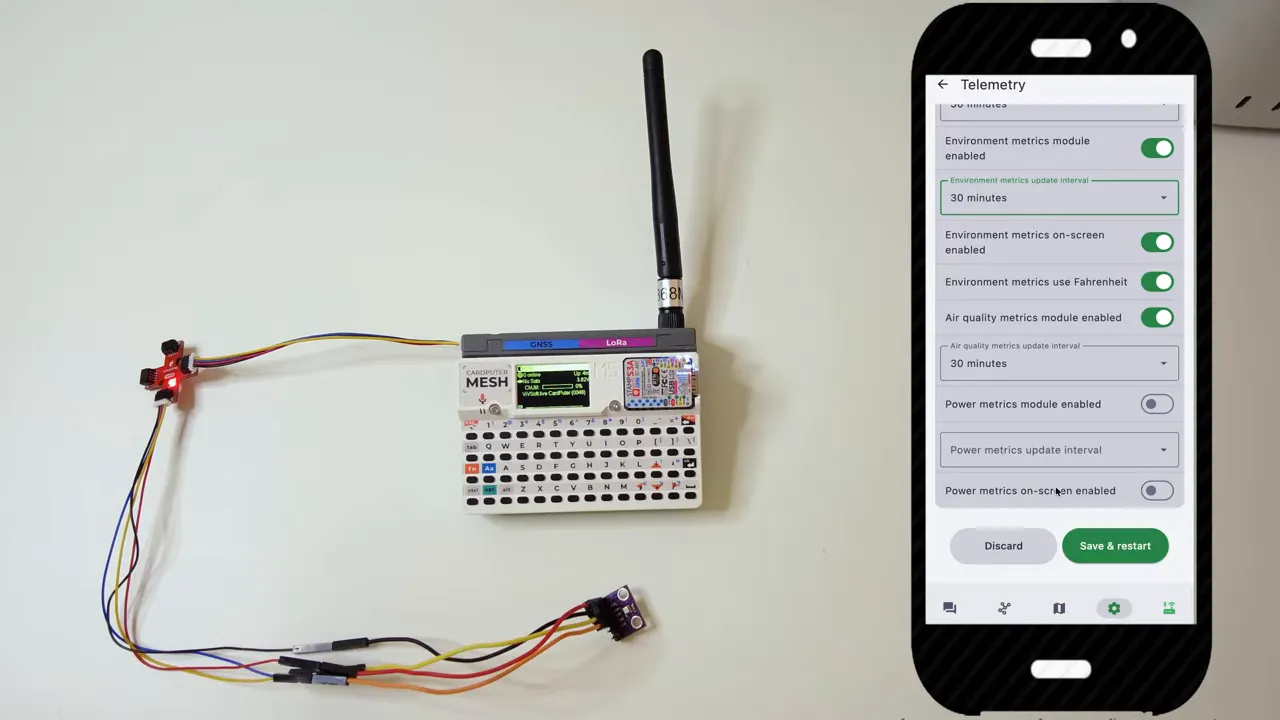
Saving the configuration restarted the Cardputer. After it finished booting, the telemetry screen initially showed no readings. A little later, sensor data began appearing in the app and on the device.
That initial blank screen did not mean the sensor connection had failed. In this test, it simply took a short wait and a refresh before the readings were visible.
Checking the Sensor Readings
The Cardputer’s telemetry screen displayed temperature, humidity, and barometric pressure from the external BME280. One of the readings showed 84.2°F and 73 percent humidity, alongside the pressure reading. This is Florida, so that humidity certainly did not surprise me.
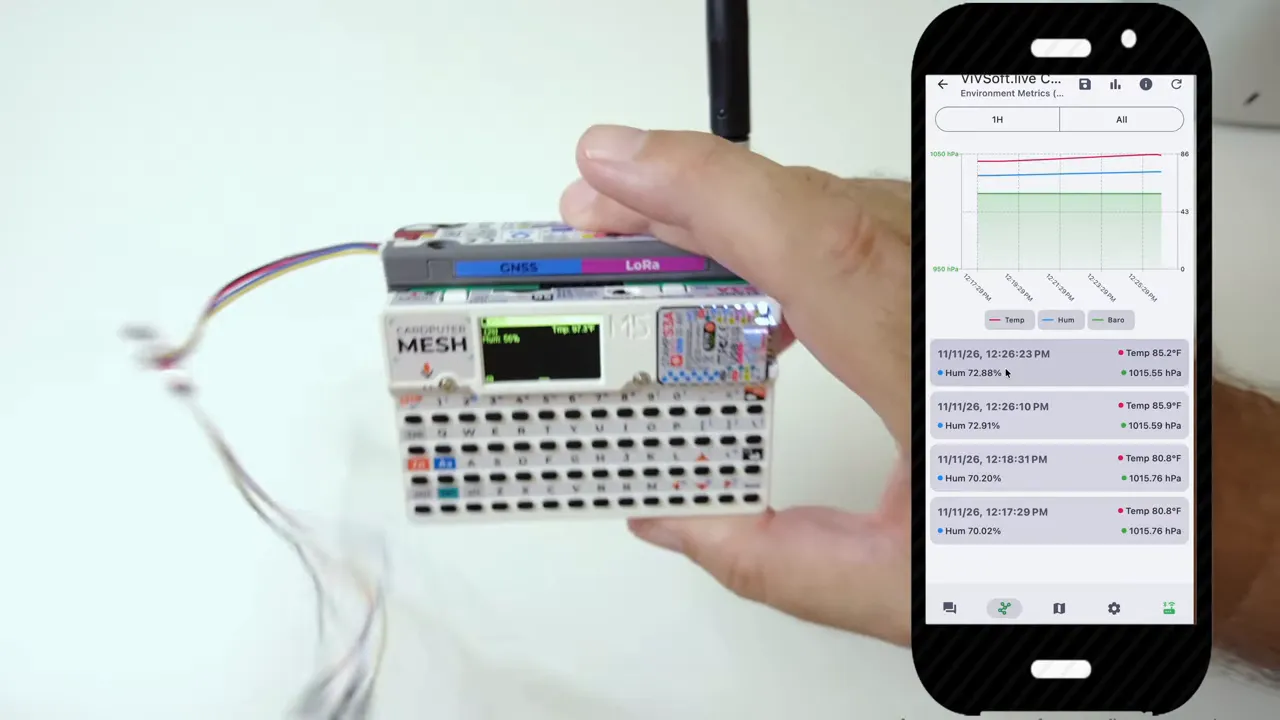
To check that the temperature reading was responding, I held the sensor with my fingers. The displayed temperature rose from about 84.2°F to 91.6°F. That gave a simple, visible confirmation that the attached sensor was producing changing data.
Local feedback and LoRa broadcasts are not the same thing. The app and device screen showed changing readings during the test, but the environmental telemetry was configured to go out over the LoRa network every 30 minutes. A changing number on the screen does not mean every change is being broadcast.
I left the device in the Client role. There was no need to switch it to Sensor for this demonstration: it could remain a messaging client while reporting environmental telemetry to the mesh.
Checking the Built-In GPS
The kit also includes GPS. In the app, I opened Settings → Device Configuration → Position and confirmed that position was enabled.
The device appeared to recognize the GPS, but it had not obtained a location fix during the indoor test. That is an important distinction: an enabled position setting is not the same as a confirmed GPS location.
The GPS check therefore confirmed the enabled configuration, not successful positioning outdoors. I would want a location fix before treating the GPS side of the setup as fully tested.
Sending Messages From the Keyboard
A self-contained Meshtastic device needs to do more than display settings. It needs to send a message without borrowing a phone.
I typed a short test message on the Cardputer keyboard and sent it. The screen confirmed that it had been sent over the LoRa network, and I could hear the notification from my other devices.
That is the appeal of having the keyboard built in. You can compose a message directly, read incoming messages, and reply on the same little unit.
I also ran a traceroute to a nearby node and received a response. Along with the growing node list, that confirmed useful local mesh communication. It was not a long-distance range test, but it did establish that the radio was communicating with another node.
Final Thoughts: A Useful All-in-One Meshtastic Device
The M5Stack Cardputer Mesh Kit brings together a lot of useful pieces: keyboard, screen, battery, GPS, SX1262 radio, and accessible sensor connections. More importantly, those pieces worked together well in this initial test.
The standout feature for me is the onboard setup. Being able to adjust the role, radio preset, region, and time zone without reaching for a computer makes this feel like a complete device rather than a board waiting for a companion app.
The external BME280 added another practical use. With a cable, a sensor board, and telemetry configuration, the Cardputer became both a messaging terminal and an environmental reporting node.
There is still more to explore, including updated firmware, additional sensors, and whether a MeshCore setup can be made to work. Battery runtime, outdoor GPS performance, and radio range were not established in this test. But for the features demonstrated here, this is a really neat little Meshtastic computer.
Thanks again to OpenELAB for supplying the kit. Their catalog includes a broad selection of maker hardware and mesh-related devices, and they also highlighted seasonal Black Friday offers at the time of testing.
|