
Solar Meshtastic and Meshcore cooling: practical builds for hot climates
Published by Vivian van Zyl in Meshtastic the 02/18/2026 at 10:20 pm

Running Solar Meshtastic and Meshcore nodes outdoors brings a unique set of thermal challenges. In hot climates the enclosure can easily reach 110–150°F (43–66°C) in direct sun, which is fine for many electronics but becomes risky for charging 18650 batteries. This guide walks through simple, effective steps—from moisture control to a smart active cooling system—that protect batteries and extend the life of off-grid nodes.
Table of Contents
- Why temperature control matters
- Start with moisture control (the minimum)
- Create an air gap: move the panel off the case
- Passive cooling: dedicate a panel to a fan
- Smart active cooling: one panel, on-demand fan
- How the ducted airflow works
- Practical tips and part suggestions
- Common setups summarized
- FAQ
- Final thoughts
Why temperature control matters
The rack and charge controller often tolerate high temperatures, but 18650 batteries are more sensitive while charging. Charging temperatures above roughly 110–113°F (about 43–45°C) start to enter unsafe territory for many cells. That is why Solar Meshtastic and Meshcore cooling is not just about component longevity; it is about battery safety.
Start with moisture control (the minimum)
Before you add fans or ducts, add a simple breather plug to manage condensation and moisture inside the enclosure. These are inexpensive, easy to install and prevent moisture buildup that leads to corrosion and shorts.
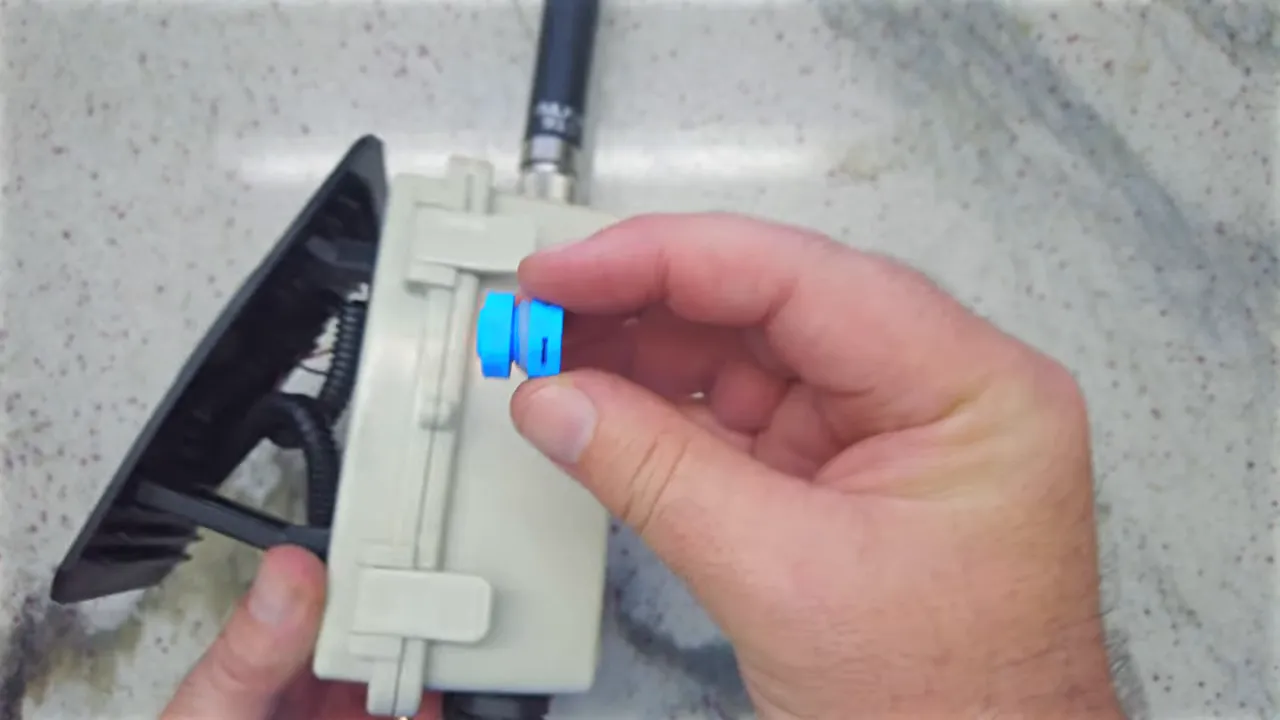
Install the breather low on the side of the case (not the top) so any trapped moisture can escape without letting rain in. The plug will not cool the enclosure, but it is the minimum requirement for outdoor nodes.
Create an air gap: move the panel off the case
Mounting the solar panel directly to the enclosure transfers heat straight into the box. A simple and highly effective improvement is to use standoffs or a small mounting frame so the panel sits above the case and the enclosure remains shaded.
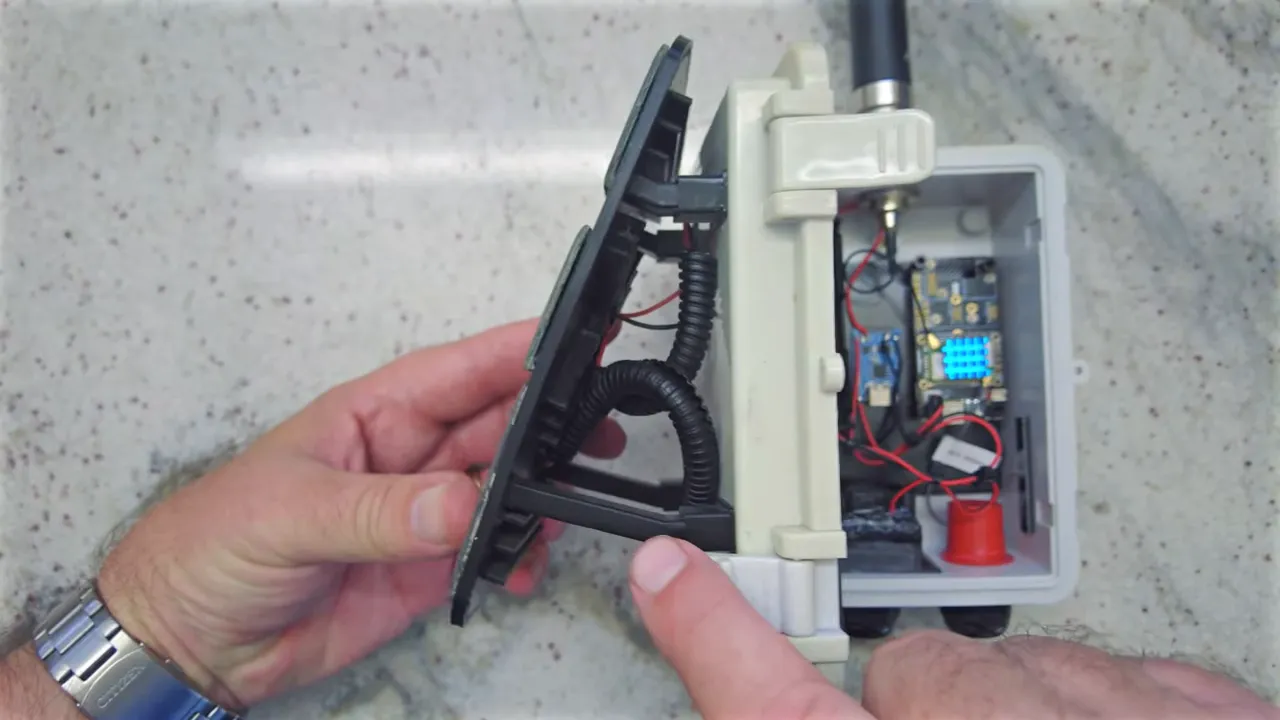
The sun hits the panel while the case sits in its shadow. Heat dissipates in the gap instead of conducting into the box. This low-effort change often solves much of the thermal problem for many climates.
Passive cooling: dedicate a panel to a fan
The next step is passive, always-on cooling that only draws power during the day: mount a small solar panel solely to run a low-power fan. Use a tiny 20–30 mm fan with good bearings (ceramic or hydraulic) and wire it directly to the panel so the fan spins only when the sun is shining.
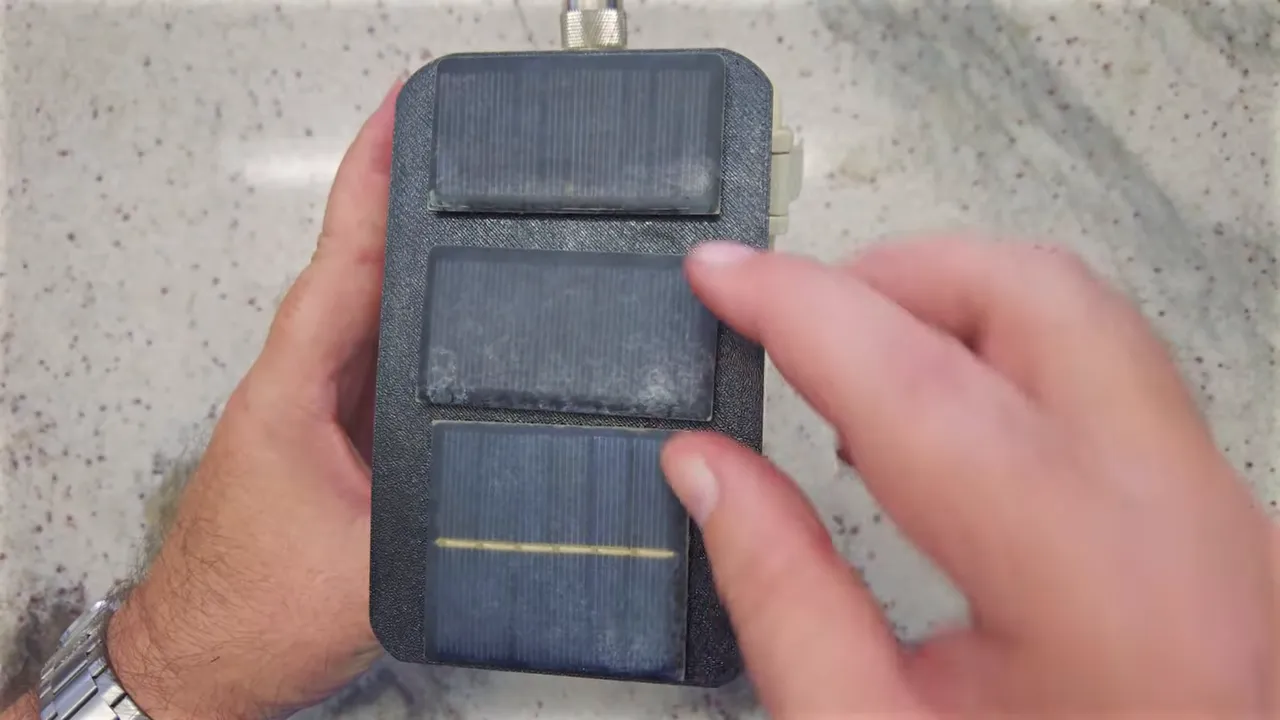
Typical setup:
- Top panels charge the battery and power the node.
- Small bottom panel directly drives the fan.
This approach is simple and reliable: when charging is happening and the enclosure is heating up, the fan moves air. At night the fan stops automatically and the battery isn't drained by a 24/7 load.
Smart active cooling: one panel, on-demand fan
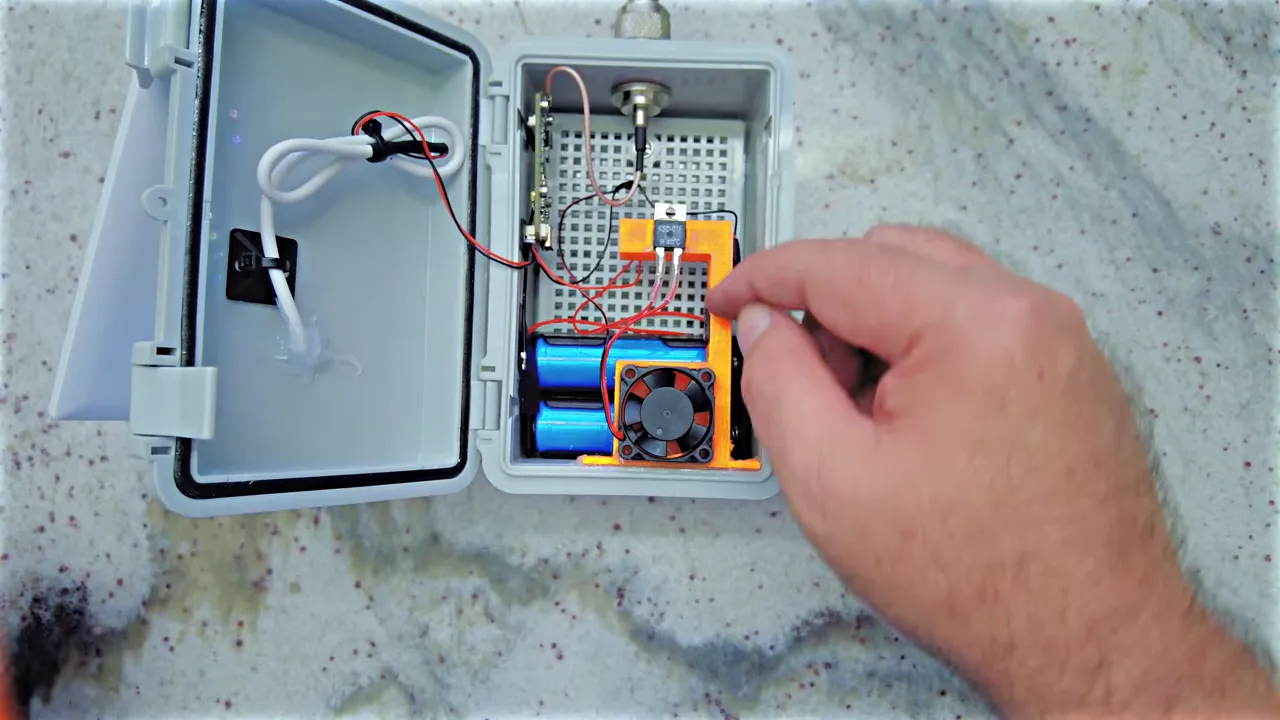
If you prefer a single-panel design, add a temperature-sensitive switch so the fan only runs when internal temperature exceeds your chosen threshold. This preserves battery power while still protecting the cells when they need it most.
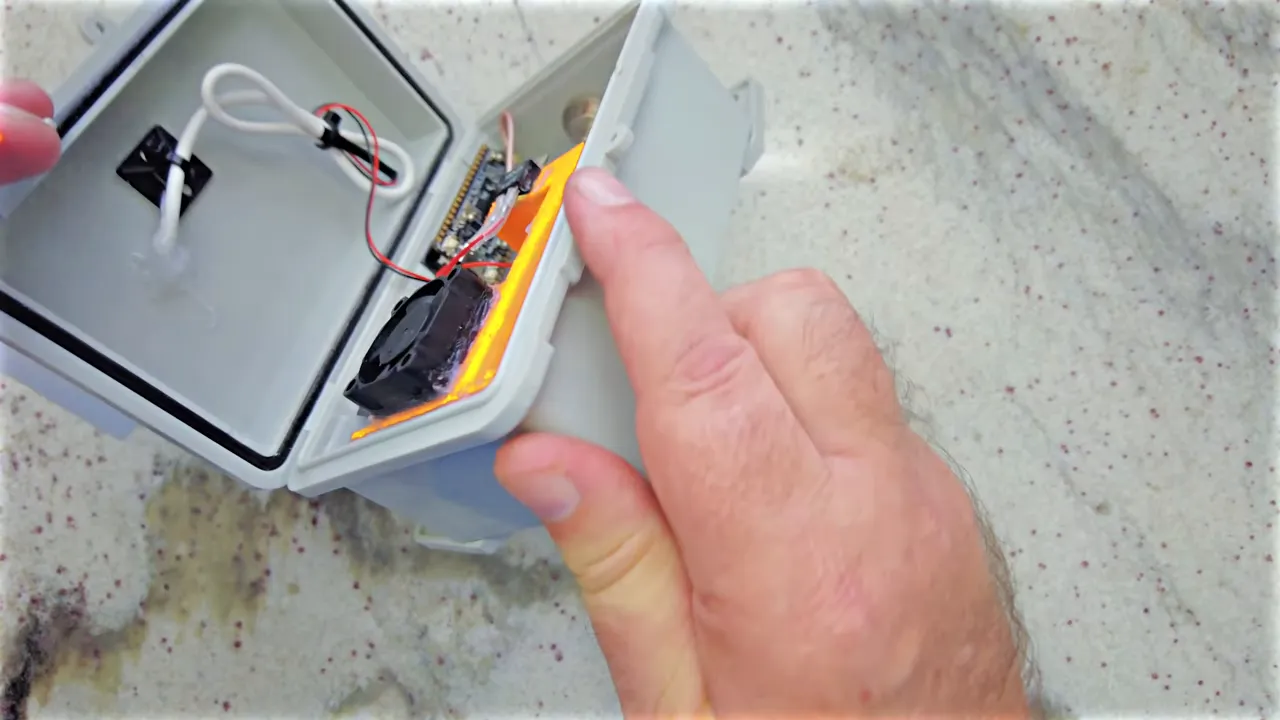
A common, inexpensive solution is a normally open thermal switch rated at your desired cut-in temperature (for example 40°C / 104°F or 50°C / 122°F). Wire the fan through the switch so the circuit closes and the fan runs only above the set temperature. Typical behavior:
- Switch closes at the chosen temperature and fan starts.
- Fan continues until the internal temperature falls to the switch's release point (often ~10°C lower).
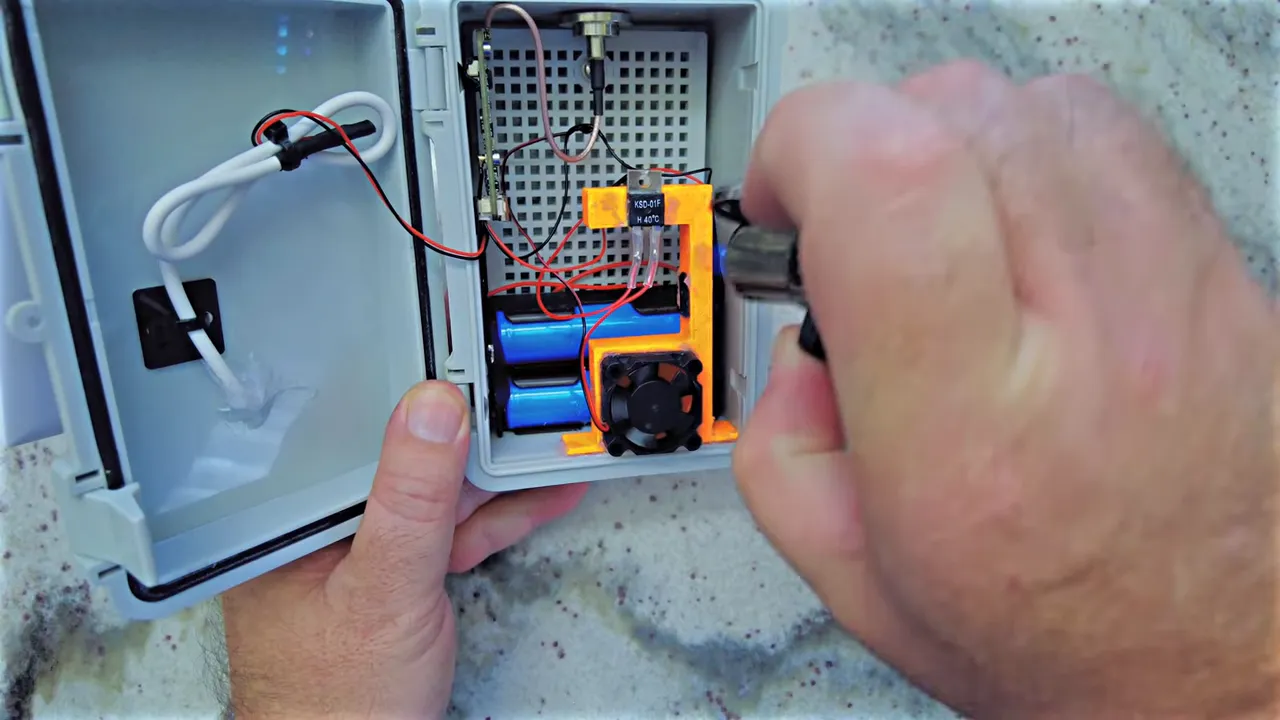
The most robust builds use small printed ducting or baffles to guide airflow from intake to exhaust. Drill intake and exhaust holes low on the case so any stray water does not fall into the enclosure.
How the ducted airflow works
A simple internal duct draws cooler air in and forces warm air out through a dedicated exhaust. One fan can be used to create circulation by placing it in the exhaust path. The design can include:
- Sealed intake channel pulling air past sensitive components.
- Top exhaust that lets hot air escape quickly.
- A thermal switch mounted near the hottest component or air path for reliable activation.
Proper ducting prevents short-circuiting of flow and increases cooling efficiency without wasting power.
Practical tips and part suggestions
- Mount breathers low to vent moisture without admitting rain.
- Keep the panel off the case—shade the enclosure and let heat dissipate in the gap.
- Use a small fan (20–30 mm) with quality bearings; they draw little current and last longer.
- If using one panel, add a normally open thermal switch rated for your desired cut-in temperature.
- Place ducts and holes at the bottom to prevent water ingress; design the internal path to move air past the battery and charge controller.
Common setups summarized
- Basic (minimum): Breather plug only for moisture control.
- Improved: Standoff-mounted solar panel to keep the enclosure shaded.
- Passive cooling: Dedicated small panel for an always-on daytime fan.
- Smart active cooling: Single panel + thermal switch + ducting for on-demand fan operation.
FAQ
Do I need Solar Meshtastic and Meshcore cooling for my node?
If you operate in a hot climate or your node sees direct sun, cooling is highly recommended. At minimum add a breather plug to prevent moisture buildup. If enclosure temperatures exceed ~110°F while charging, add shading and consider active cooling to protect 18650 batteries.
Will a fan drain my battery?
A fan can drain the battery if it runs 24/7. Use either a separate solar panel to power the fan during daylight, or a thermal switch so the fan only runs when needed. Both strategies minimize battery drain.
What temperature switch should I use?
Choose a normally open thermal switch rated for the temperature where you want cooling to start. Common choices are 40°C for aggressive protection or 50°C if you want less frequent fan operation. Match the switch to your battery and component limits.
Where should I place vent holes?
Drill intake and exhaust holes low on the enclosure and use internal ducting. Keep holes at the bottom so water is less likely to enter. Seal around fans and cables to prevent rain ingress while allowing airflow.
Will moving the panel off the case help?
Yes. Creating an air gap or standoffs between the panel and case keeps the enclosure in the panel's shadow and greatly reduces heat conduction into the box.
Final thoughts
Solar Meshtastic and Meshcore cooling does not have to be complicated. Start with moisture control, keep the panel off the case, and then decide between a small dedicated fan or a smart temperature-controlled fan depending on how many panels you want and how aggressively you want to manage power. A bit of planning and simple hardware can dramatically improve battery safety and node reliability in hot climates.
Links: (Note: As an affiliate, I earn from qualifying purchases)
- Blue Breather Plug M12x15 - https://amzn.to/4bXtsm3
- 30mm Fan - https://amzn.to/4aRbalg
- Normally Open Temperature Switch - https://amzn.to/3MMAlw7
- Waterproof Case - https://amzn.to/4koPUqq
- 18650 Battery - https://amzn.to/4koPUqq
- Battery Holder - https://amzn.to/4jZW9Pz
- Type N Connector - https://amzn.to/4r1aKP9
- 915Mhz Alfa Antenna - https://amzn.to/3TsSOxt
- 3W Solar Panel - https://amzn.to/4rlNmvB
- 3D Printables link - https://www.printables.com/model/1604657-meshtasticmeshcore-smart-active-cooling