
Solar Meshtastic Tree Node V2: A Stealthier Design With Smarter Solar and a Heltec V4 Power Experiment
Published by Vivian van Zyl in Meshtastic the 04/14/2026 at 05:13 pm

This version of the Solar Meshtastic tree node is all about fixing the real-world issues that showed up in the first build. The original worked, but it was bright yellow, very visible in a tree, and had a few practical limitations around heat, retrieval, and solar handling. Version 2 keeps the same overall idea but makes the node far more stealthy, more manageable once it is up in the canopy, and a lot more interesting electrically.
The other big twist is the chip choice. Instead of sticking with the lower power NRF-based setup from before, this build tries something people usually warn against: running a Heltec V4 from three very small solar panels. That may be a terrible idea, or it may work better than people expect once the settings are tuned correctly. Either way, it is worth testing.
If you are building a Solar Meshtastic node for off-grid coverage, elevated placement, or a semi-hidden relay point, these changes are the ones that matter.
Table of Contents
- What changed in version 2
- Why the enclosure color changed
- New loops for retrieval and stability
- Solar input upgrades: from simple diodes to ideal diode modules
- The Heltec V4 experiment
- Battery choice and charging approach
- Internal assembly and wiring layout
- Flashing firmware and first connection
- Early power optimization steps
- Set up remote management before disabling Bluetooth
- Power settings for a small solar node
- Enable telemetry so you can actually monitor the node
- Initial battery readings and what to expect
- Final assembly and deployment
- Why this version is a better Solar Meshtastic tree node
- FAQ
- Links
What changed in version 2
The short version is this:
- New army green enclosure for better concealment in a tree
- Air gap behind the solar panels to reduce heat buildup
- Three lower rope loops for retrieval and orientation control
- Ideal diode modules instead of simple diodes on each solar panel
- Heltec V4 no-screen board as the experimental radio platform
- Remote management setup so Bluetooth can be disabled after deployment
- Telemetry enabled remotely for checking battery state over LoRa
Why the enclosure color changed
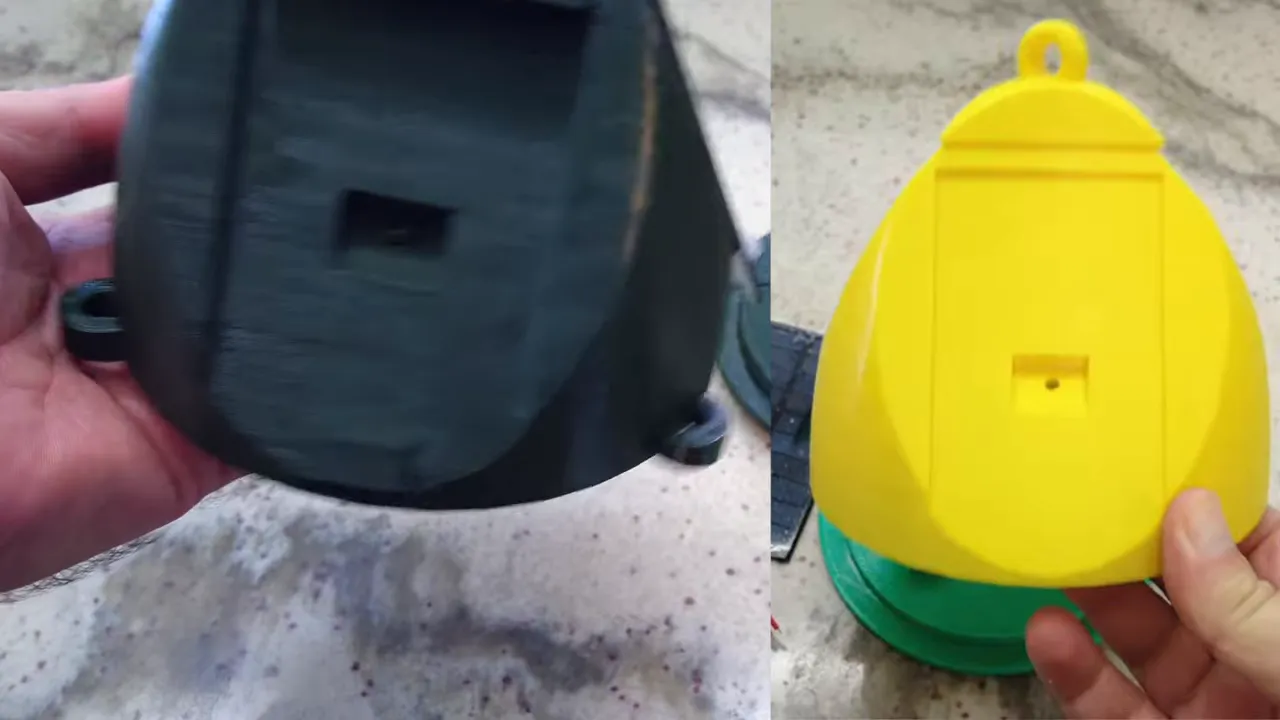
The first version was bright yellow. That had one obvious upside: yellow reflects a lot of heat from the sun. But it had one equally obvious downside: it stood out like crazy. You could spot it from a long way off once it was hanging in a tree.
For a Solar Meshtastic node intended to disappear into the canopy, that is not ideal.
Version 2 switches to army green. It blends into foliage much better, which is great for a stealth deployment. The tradeoff is heat. Dark colors absorb more solar energy, and if the panel sits directly against the body, the enclosure can get hotter than you want.
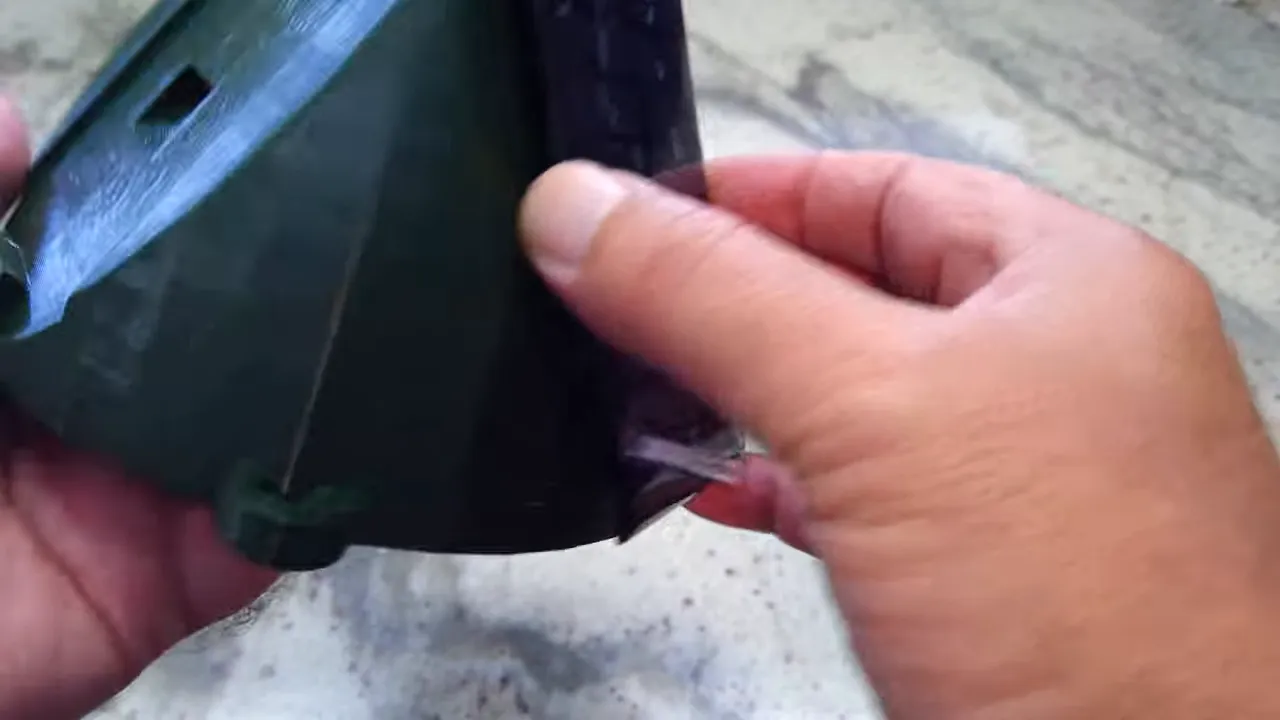
The heat fix: add an air gap
To deal with that, the solar panel is no longer mounted flush against the body. Small standoffs create a gap between the panel and the node itself. That gives heat at least some chance to dissipate instead of getting trapped between the panel and the enclosure.
It is a simple change, but this is exactly the kind of thing that matters on a permanently deployed Solar Meshtastic build. Small thermal improvements can make a big difference over time.
New loops for retrieval and stability
One of the best upgrades in this version came from feedback. The original had a top loop for pulling the node up into the tree, which works fine when everything goes perfectly. But gravity is not always enough to bring it back down.
So this version adds three lower hooks or loops.
These serve two very practical purposes:
- Retrieval: if the node gets hung up, you can attach another rope and pull it out instead of hoping it drops cleanly
- Orientation control: by tying an extra line to one of the lower loops, you can keep the unit from spinning freely
That second point matters more than it sounds. A tree node that spins around constantly is unpredictable. A more stable node is easier to position and more likely to keep the panel orientation you intended.
Solar input upgrades: from simple diodes to ideal diode modules
Electrically, one of the most important changes is how the three small solar panels are combined.
The setup still uses three panels, but the isolation method has been upgraded. In the earlier design, each panel used a simple diode on the positive lead. That was necessary because when one or two panels were lit and another was shaded, the shaded panel could start pulling power from the others. In other words, it became a parasitic load.
Simple diodes stopped reverse flow, but they came with some downside in the form of voltage drop and inefficiency.
Version 2 replaces those with ideal diode modules. Each panel feeds into its own module, and the outputs are then combined.
Why that matters
- Lower resistance than a basic diode approach
- Faster reaction to changing solar conditions
- Better isolation between panels when some are shaded and some are lit
- Less wasted power, which is important when your total harvest is tiny
When your entire charging budget is only a few hundred milliwatts, every bit of efficiency matters. That is especially true on a Solar Meshtastic node that may spend part of the day in partial shade, with different panels seeing different levels of light.
The Heltec V4 experiment
This is the part that makes the build interesting.
Instead of using the previous Seeed NRF-based board, this version tries a Heltec V4. A lot of people will tell you that is too power hungry for tiny panels like these, and to be fair, that concern is not crazy.
The three solar panels here are rated at about 200 mW each, so in total the system has around 600 mW of panel capacity. That is not much.
Meanwhile, the Heltec V4 can draw roughly:
- About 140 mA at idle
- Up to 1 amp when transmitting
That means this build is right on the edge. Maybe over the edge. The only honest answer is to test it.
Why try it anyway?
Because raw worst-case numbers do not tell the whole story.
On the Heltec V4, several things can be done to reduce power draw:
- Bluetooth can be turned off
- Wi-Fi can be turned off
- The no-screen version avoids display power draw
- Power saving mode can be enabled
With those settings, the current draw can drop dramatically. The expectation here is that it may come down to around 40 mA, and some people even report 10 to 15 mA with aggressive power saving.
There is already a similar Heltec V4 running on a roof with a 2 watt panel, and that one has stayed very healthy. But this tree node is using a much smaller solar budget, so this is still a real experiment.
If it does not hold up, the fallback plan is simple: swap the Heltec V4 for a Heltec T114 or another NRF-based option.

Battery choice and charging approach
The node uses a standard 3500 mAh battery. That gives a decent buffer overnight or during bad weather.
One of the more interesting choices here is the charging setup. Instead of adding an external charge controller, the build relies on the onboard charger on the Heltec board. The onboard charger is rated for 500 mA, which is a good match for this kind of low-power solar input.
The battery plugs into the connector labeled BAT, and the combined solar feed goes into the connector labeled SOL.
The reasoning is practical: an existing roof-mounted Heltec setup using only the onboard charge controller has already been running for months and has remained near full charge. So for this Solar Meshtastic build, it makes sense to keep the wiring simple and try the same approach.
Internal assembly and wiring layout
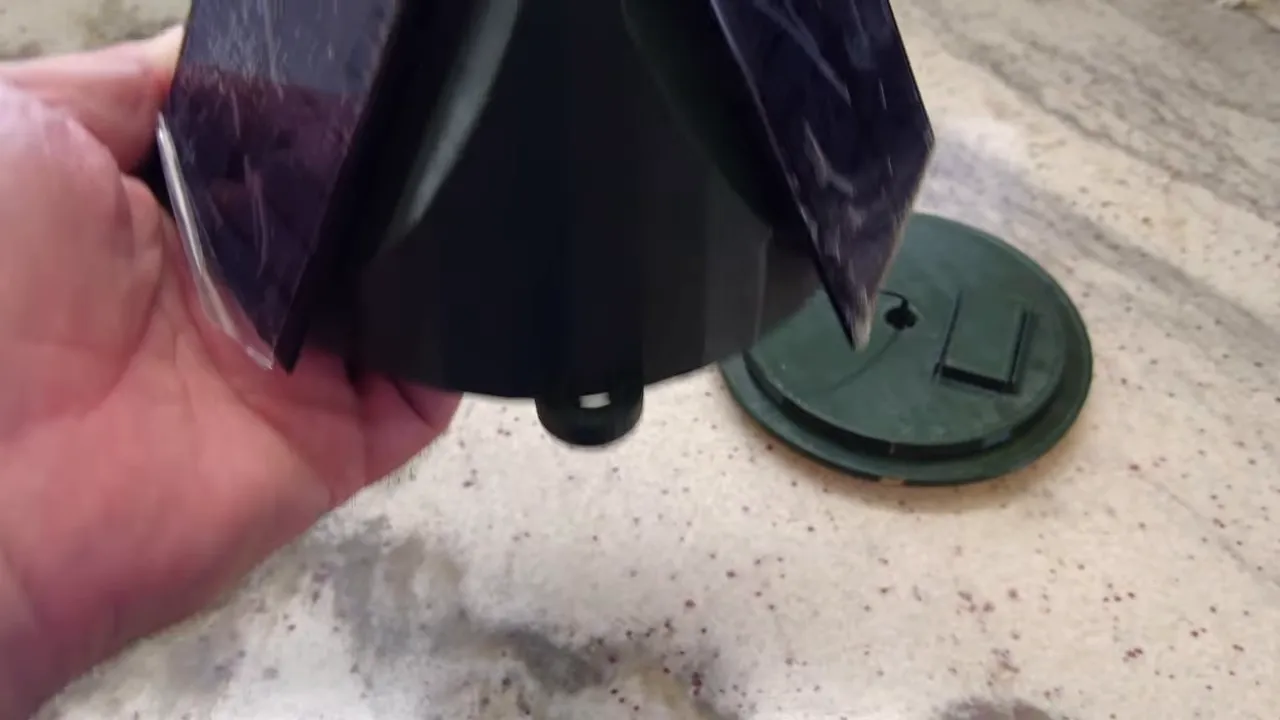
The internal assembly is straightforward, but there are a few details that should not be skipped.
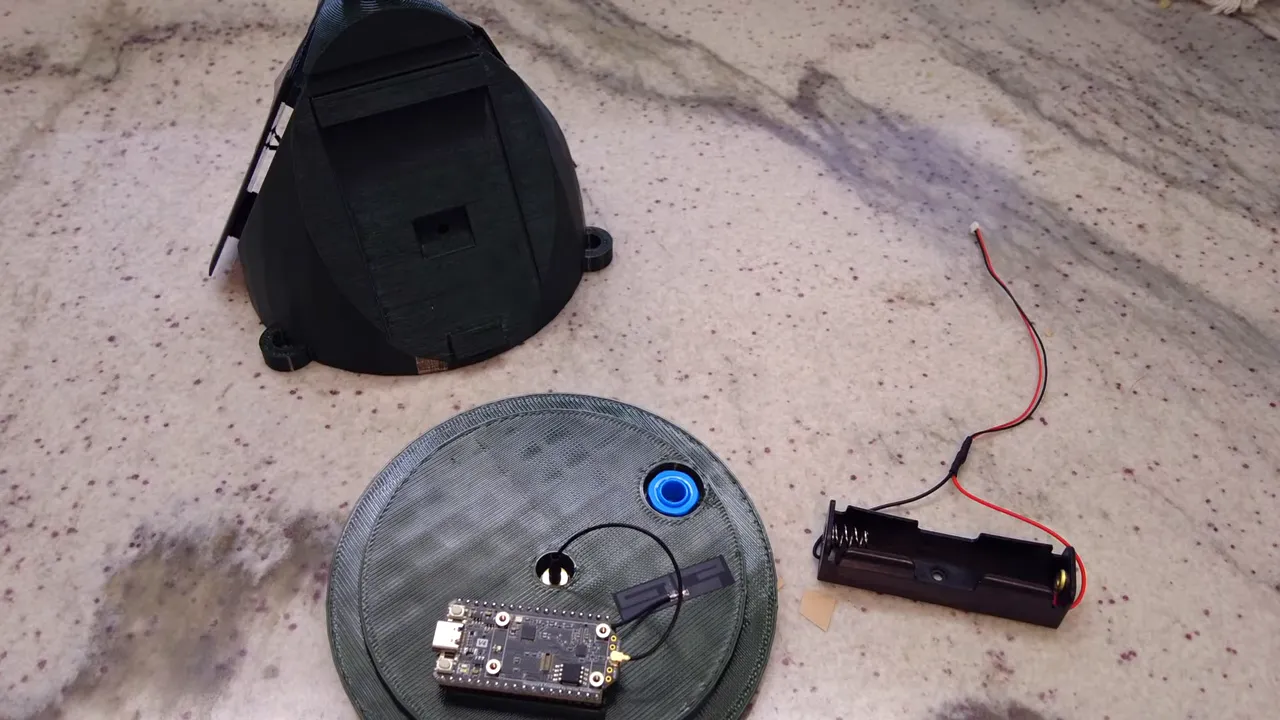
Core hardware inside the node
- Heltec V4 no-screen board
- 3500 mAh battery
- SMA pigtail for the external antenna
- Bluetooth antenna attached to the board, even though Bluetooth is only needed temporarily
- Three solar panels
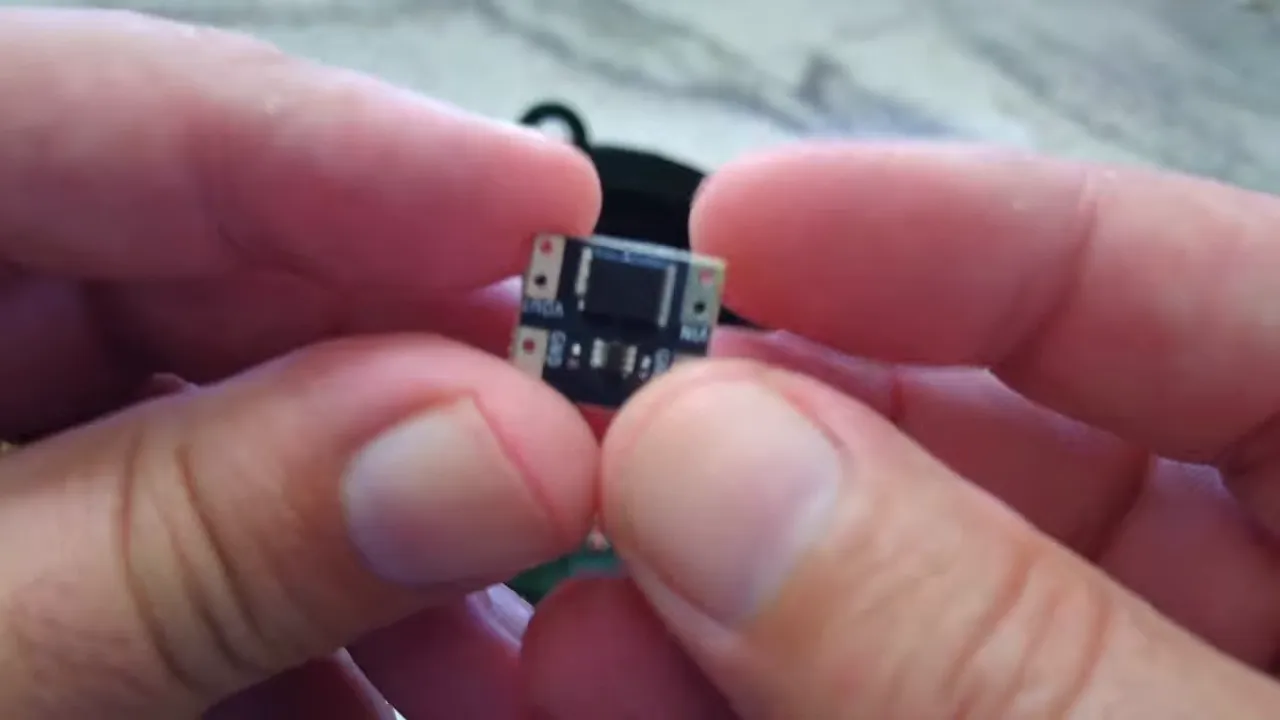
- Three ideal diode modules
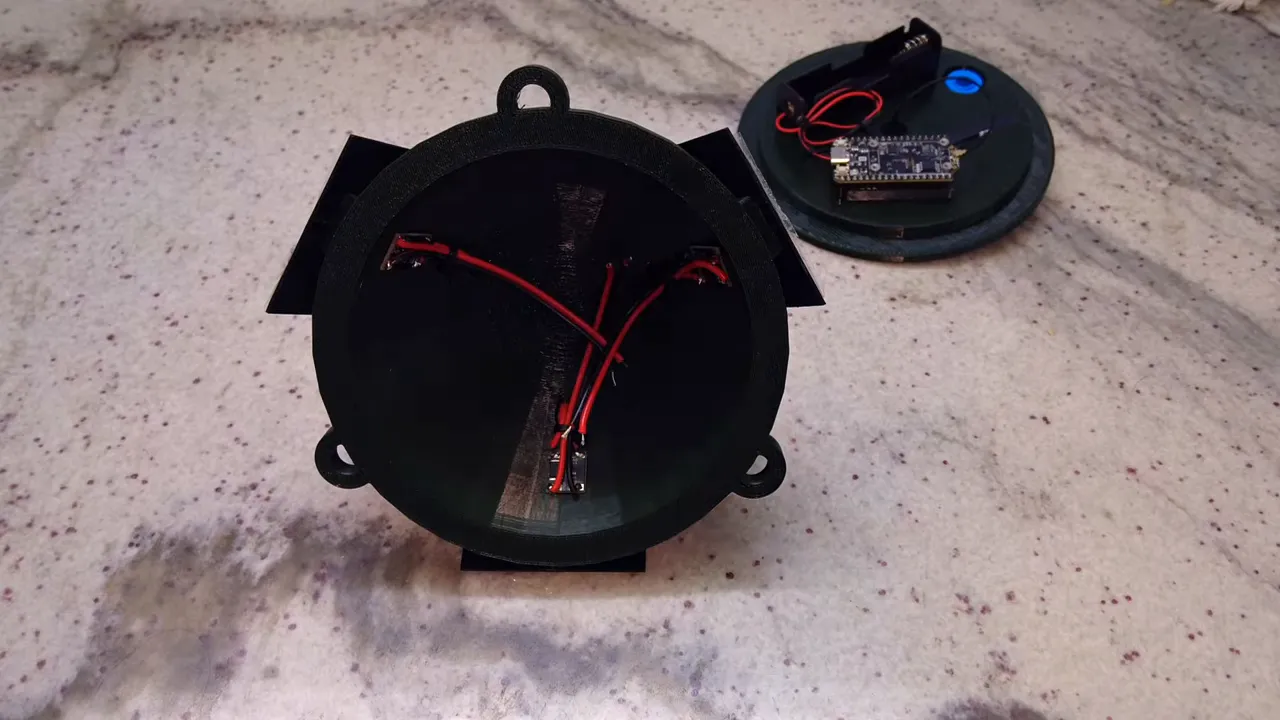
Wiring summary
- Each solar panel positive lead goes into its own diode module
- The diode module outputs are tied together on the positive side
- All solar negatives are tied together
- The combined solar connection goes to the board's SOL input
- The battery goes to the board's BAT input
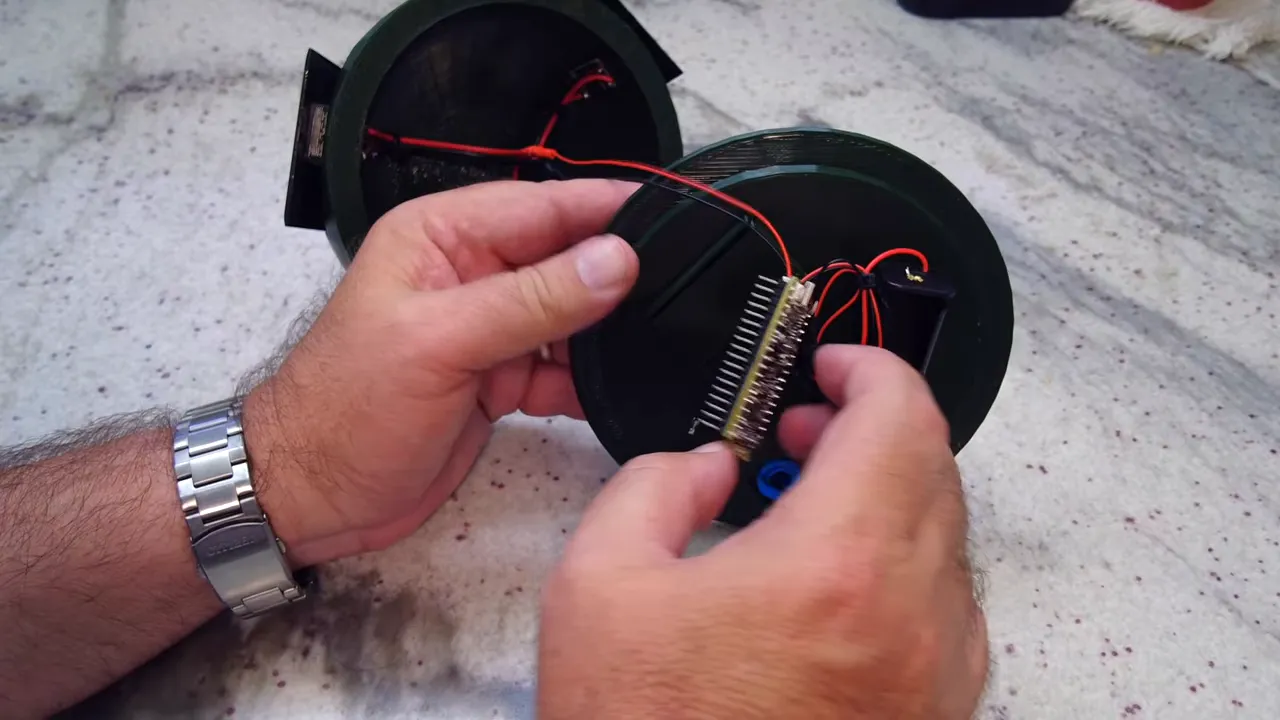
A small but important reminder from the build: always verify polarity on these connectors before plugging anything in. The plugs may fit, but that does not guarantee the wiring is correct.
Also, the board is secured inside the enclosure with adhesive tape so it cannot shift once the unit is closed and hoisted into place.
Do not power the radio without the antenna connected
One detail worth repeating: connect the antenna before powering the node. The SMA antenna gets attached first, then the board is powered. That is just good radio hygiene.
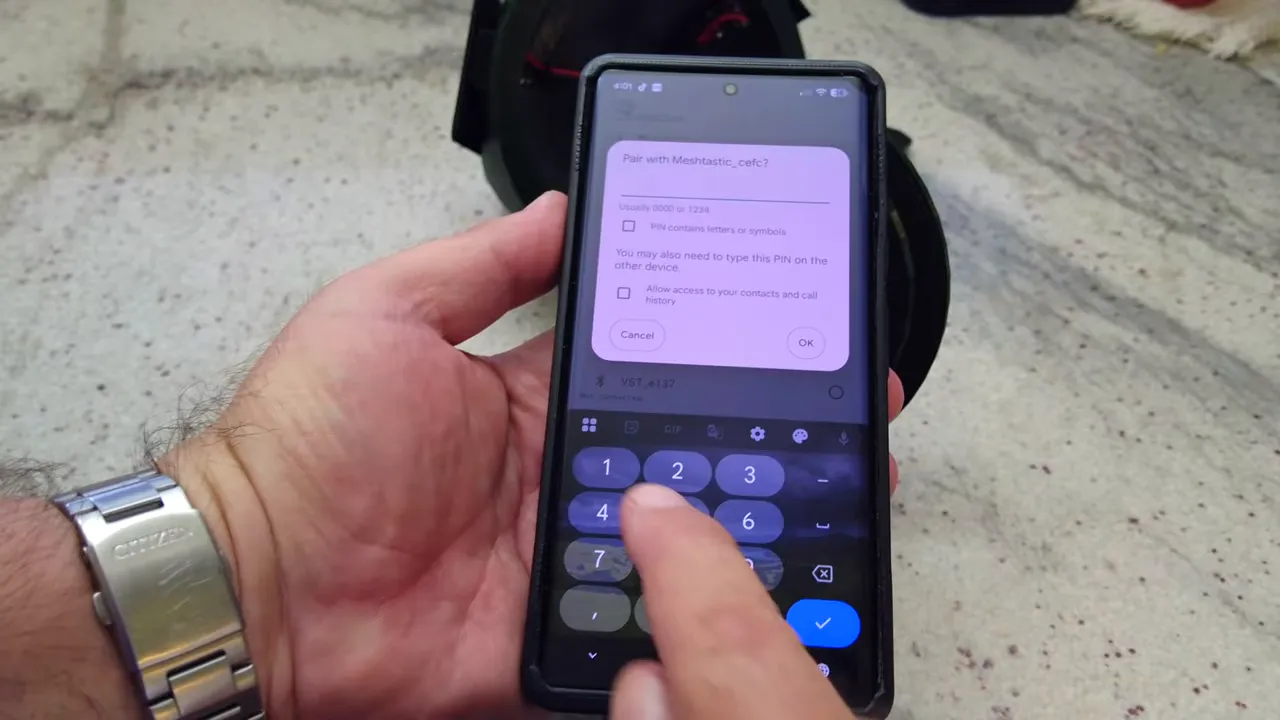
Flashing firmware and first connection
Once the hardware is assembled, the next step is flashing the latest firmware onto the Heltec V4.
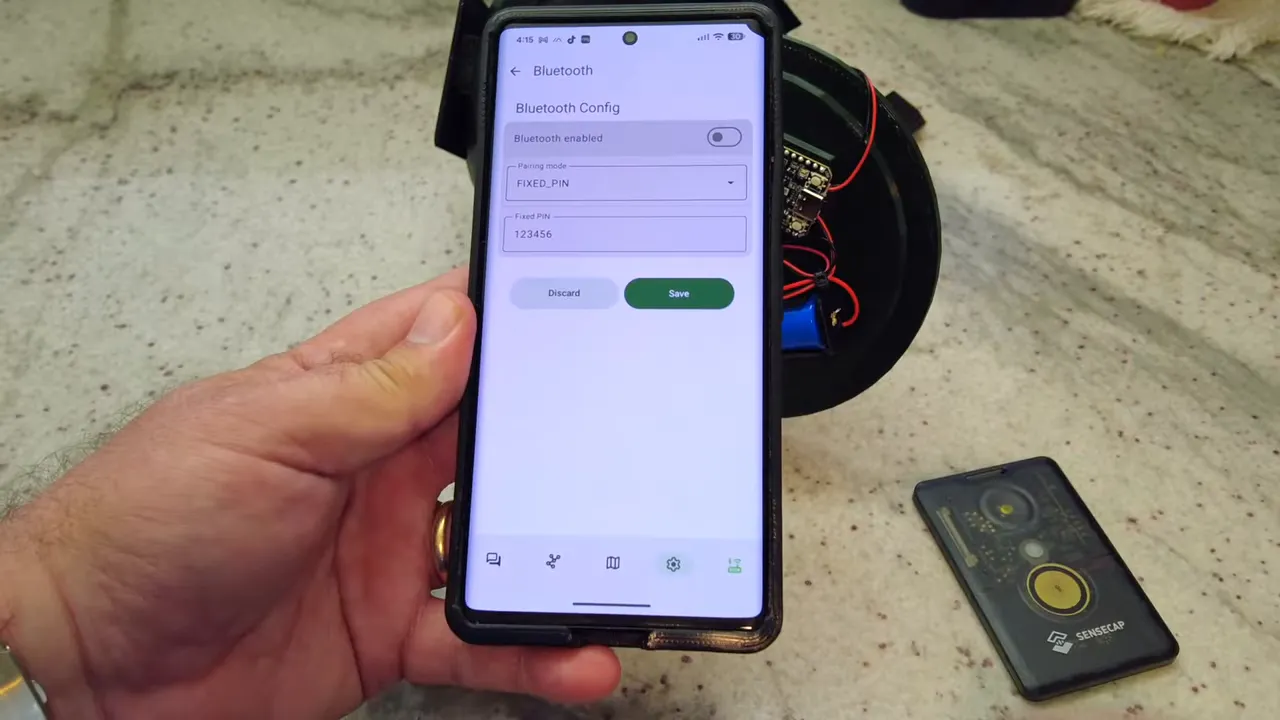
After flashing, the node is discovered in the Meshtastic app over Bluetooth using the default PIN:
123456Initial configuration includes:
- LoRa region: United States
- Preset: LongFast
- Device name: a custom name for the tree node
After the first save, the node reboots and starts picking up nearby nodes.
Early power optimization steps
Before the node goes into a tree, there are a few easy wins that immediately reduce wasted power.
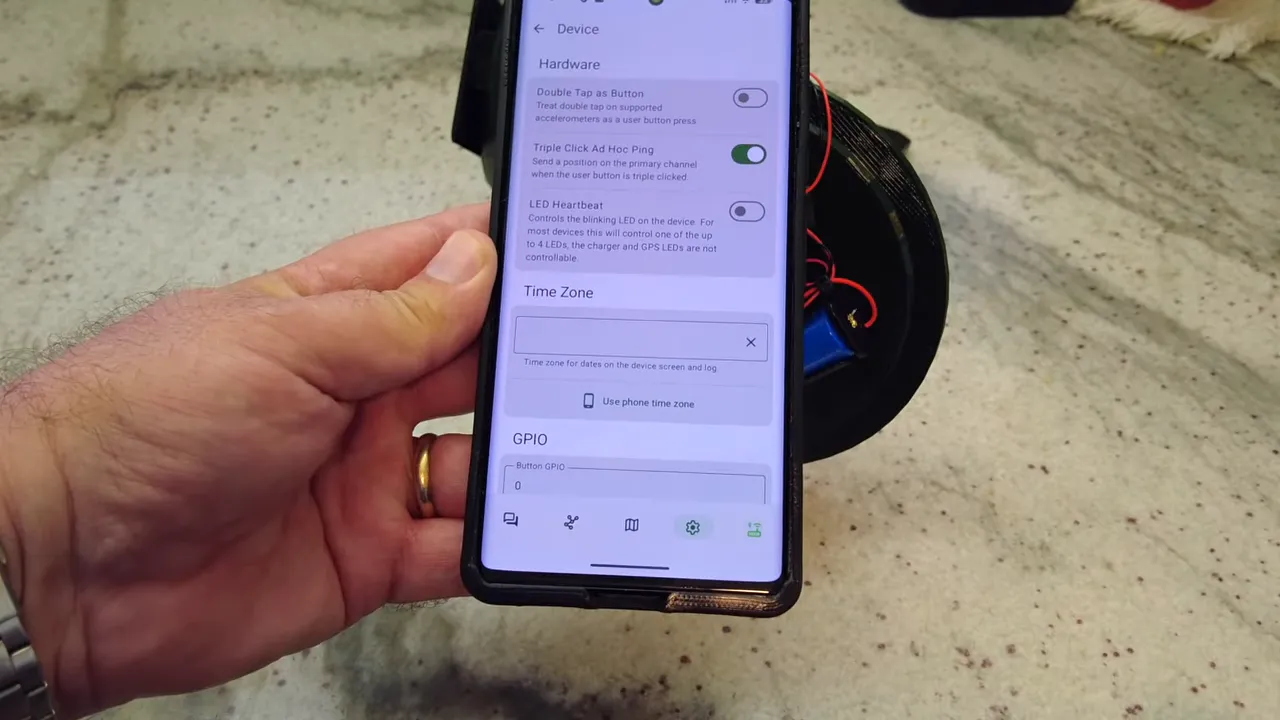
1. Turn off LED heartbeat
The heartbeat LED is useful on the bench, but once deployed it is just wasted battery. Disabling it also makes the node less visible at night.
2. Set the time zone from the phone
This is just a normal setup step, but it is done while still connected locally.
At this point, the LED heartbeat is off and the node stops that regular blink that serves no purpose in a finished field deployment.
Set up remote management before disabling Bluetooth
This is one of the smartest parts of the whole build.
If the node is going to live up in a tree, Bluetooth needs to be turned off to save power. But if you disable Bluetooth too early, managing the node becomes painful. The solution is to set up remote administration over LoRa first.
How the remote admin setup works
An existing node, in this case a SenseCAP T1000E used as an admin node, provides a public key. That public key gets copied into the Heltec tree node as an admin key under security settings.
Once the keys match:
- The admin node can discover the tree node over the mesh
- Metadata can be exchanged
- Remote management becomes available
Sometimes the tree node needs to be rebooted once so it sends a fresh discovery packet and appears in the admin node's list. After that, remote administration can be used to change settings on the tree node without a direct Bluetooth connection.
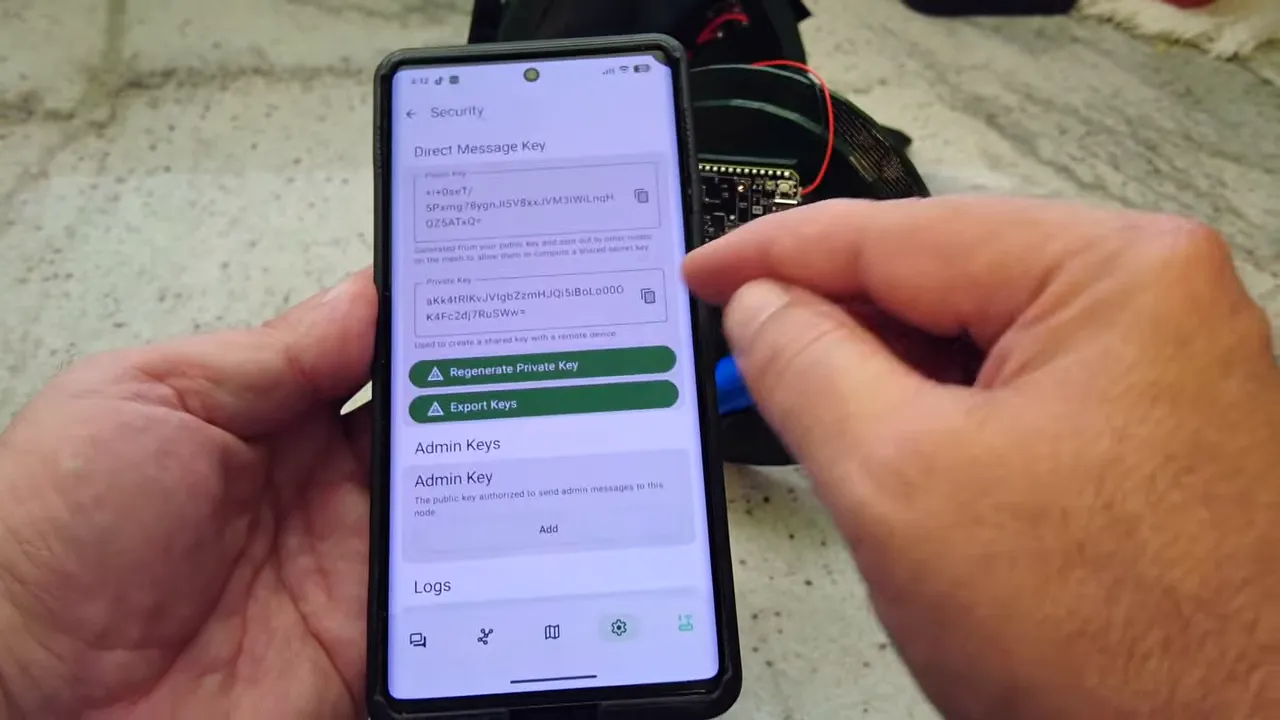
Then Bluetooth gets turned off
With remote administration working, Bluetooth can safely be disabled on the tree node. From that point on, the node is managed over LoRa rather than over a short-range local link.
That is exactly what you want for a Solar Meshtastic deployment that may be physically awkward to reach.
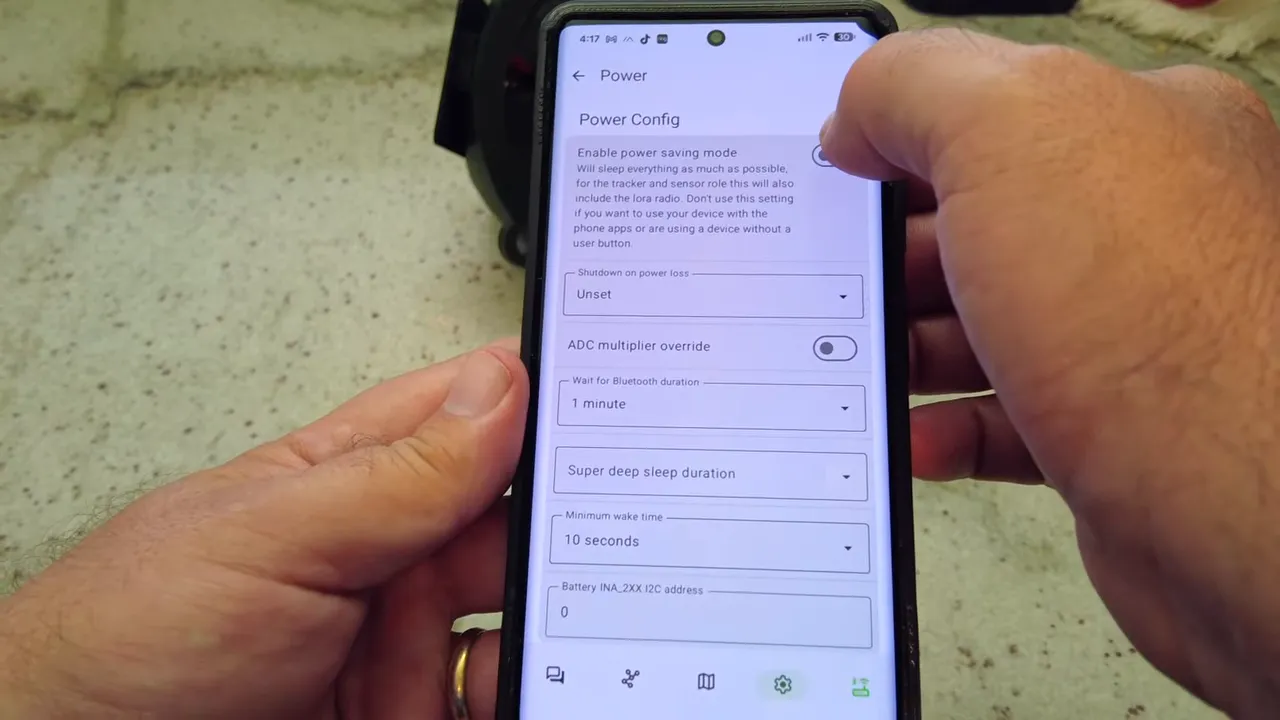
Power settings for a small solar node
Once remote admin is available, the next priority is squeezing the most life possible out of the Heltec V4.
The power configuration used here is intentionally conservative:
- Enable power saving: on
- Wait for Bluetooth: irrelevant once Bluetooth is off
- Super deep sleep: left off
- Minimum wake time: left at 10 seconds
That keeps the node functional without going all the way into a more aggressive sleep configuration. The basic approach is to remove obvious waste first, then monitor battery behavior before making deeper changes.
For this particular Solar Meshtastic test, the important changes are:
- Heartbeat LED off
- Bluetooth off
- Power saving on
- Remote administration enabled
Enable telemetry so you can actually monitor the node
After all that, there was one missing piece: device telemetry.
Without telemetry enabled, the admin node cannot read device metrics from the tree node. The fix is simple. Remote into the tree node again, go to telemetry settings, and turn on telemetry transmission. In this setup, temperature units are also set to Fahrenheit.
Once telemetry is enabled, the admin node can request and receive metrics such as:
- Battery percentage
- Battery voltage
- Uptime
- Air utilization
That is what makes a remote Solar Meshtastic experiment practical. You do not want to keep dragging the node down from a tree just to check whether your power budget is working.
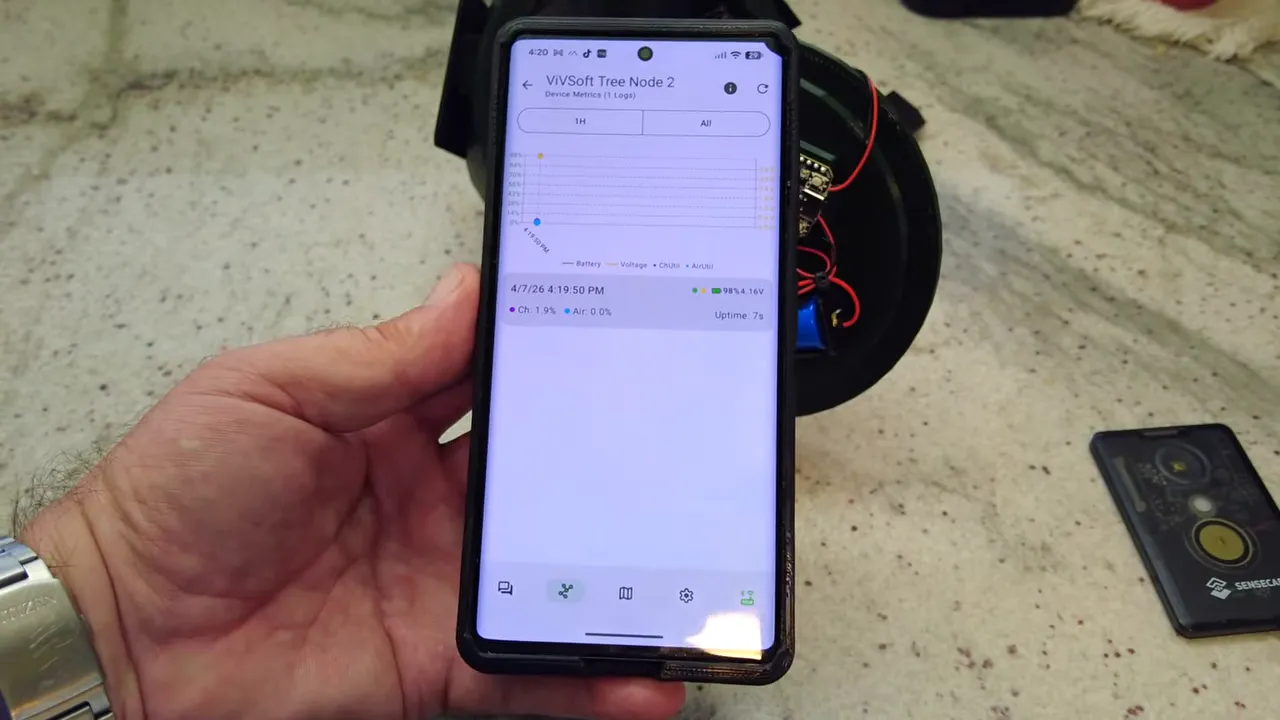
Initial battery readings and what to expect
Once telemetry was working, the initial battery state showed around 98%, and after repeated interaction and polling it dipped to 97%. That is not surprising. Any time you keep querying a remote node, you are spending some of the battery you are trying to conserve.
The important thing is that now the battery can be monitored over time, remotely, and under real operating conditions.
Based on the 3500 mAh battery alone, the expectation is roughly 24 to 36 hours without charging, depending on actual draw. With solar input contributing during the day, the node may remain comfortably afloat if the average current stays low enough.
That is the whole point of this test: to see whether a Heltec V4 can live on a tiny Solar Meshtastic power budget when configured carefully.
Final assembly and deployment
Once the internals are configured and telemetry is verified, the enclosure is closed up and sealed with a bit of silicone around the edge. Then the node is ready to go back up into the tree.
From there, the only thing left is to monitor the battery over the next few days and see whether the solar harvest is enough to support the Heltec V4 long term.
If it holds steady, great. If not, the enclosure and wiring approach are still solid, and the radio can be swapped for a lower-power board. Either way, version 2 is a meaningful improvement over the original design.
Why this version is a better Solar Meshtastic tree node
Even before the Heltec experiment proves itself one way or the other, version 2 improves the design in the ways that matter most in the field.
- It is harder to spot
- It handles heat better
- It is easier to retrieve
- It is easier to stabilize in a tree
- Its solar panel combining method is more efficient
- It can be managed remotely after deployment
- Its battery state can be checked over the mesh
That is exactly what a practical Solar Meshtastic node should do. It is not just about getting a radio to power on. It is about building something that can survive outside, stay useful, and remain manageable after it disappears into a tree canopy.
FAQ
Why change the node from yellow to army green?
The yellow enclosure reflected heat well, but it was highly visible in a tree. Army green is much more discreet and blends into foliage better, making the node more stealthy.
Does the darker color create heat problems?
It can, which is why version 2 adds standoffs behind the solar panel. That creates an air gap between the panel and the enclosure so heat can dissipate more easily.
What are the extra loops at the bottom for?
They let you attach additional ropes for retrieval and for stabilizing the node so it does not spin freely in the tree. That makes deployment and recovery much easier.
Why use ideal diode modules instead of basic diodes?
The ideal diode modules reduce losses and prevent one shaded panel from drawing power from the others. They are more efficient than simple diodes, which matters when the total solar input is very small.
Can a Heltec V4 really run from three tiny solar panels?
That is the experiment. It may work if Bluetooth and Wi-Fi are off and power saving is enabled, but it is definitely close to the edge. If it does not hold up, the fallback is to switch to a lower-power board like a T114 or another NRF-based option.
Why disable Bluetooth on the tree node?
Bluetooth uses extra power, and once the node is mounted high up, direct Bluetooth access is not practical anyway. The better approach is to enable remote administration first, then turn Bluetooth off.
How is the node managed after Bluetooth is disabled?
Remote administration is configured using admin keys. An admin node's public key is added to the tree node, allowing settings to be changed over the LoRa network instead of over Bluetooth.
How do you check battery status remotely?
Enable telemetry on the tree node. Once telemetry is turned on, another authorized node can read device metrics such as battery percentage, battery voltage, uptime, and air utilization over the mesh.
Links
Note: As an affiliate, I earn from qualifying purchases
-
Heltec V4 (No Screen) - https://amzn.to/4dqVV4c
-
18650 Battery - https://amzn.to/4m95HKQ
-
Battery Holder - https://amzn.to/4jZW9Pz
-
SMA Connector - https://amzn.to/4bvpuz8
-
915Mhz Antenna - https://amzn.to/3PmXJBi
-
XL0401 Ideal Diode Module - https://amzn.to/47PU5qd
-
Solar Panels - https://amzn.to/47xSvJe
-
3D Printable Files - https://www.printables.com/model/1640281-meshtastic-meshcore-tree-node
-
Project files and UPDATES - https://hub.lorameshdevices.com/projects/solar-tree-node-meshtastic-meshcore