
SenseCAP M2, Lorawan: Build a Local LoRaWAN Network with ChirpStack
Published by Vivian van Zyl in Raspberry PI and LoRaWAN the 04/02/2026 at 02:17 am

If you have been playing with long-range LoRa before, you have probably seen the other path too: decentralized mesh networks like Meshtastic. LoRaWAN takes a different approach. Instead of everyone passing packets through each other, LoRaWAN is a standardized protocol for low-power sensors sending data over long range to dedicated gateways, which then forward that data over the internet to applications.
This guide focuses on building a local LoRaWAN setup using the SenseCAP M2, Lorawan gateway and the built-in ChirpStack server. The goal is simple: receive sensor messages locally, keep your data closer to where it is collected, and be ready to add devices and profiles next.
Table of Contents
- Why LoRaWAN (and how it differs from mesh LoRa)
- Meet the SenseCAP M2: hardware and connectivity options
- The two key pieces of software: Lucy and local ChirpStack
- Step 1: Power on safely and enter hotspot mode
- Step 2: Connect to the gateway hotspot and open Lucy
- Step 3: Connect the gateway to your LAN/Wi-Fi (not just hotspot)
- Step 4: Set system time and timezone
- Step 5: Update firmware
- Step 6: Configure the LoRa network server to use local ChirpStack
- Where this leaves you (and what comes next)
- FAQ
- Links
Why LoRaWAN (and how it differs from mesh LoRa)
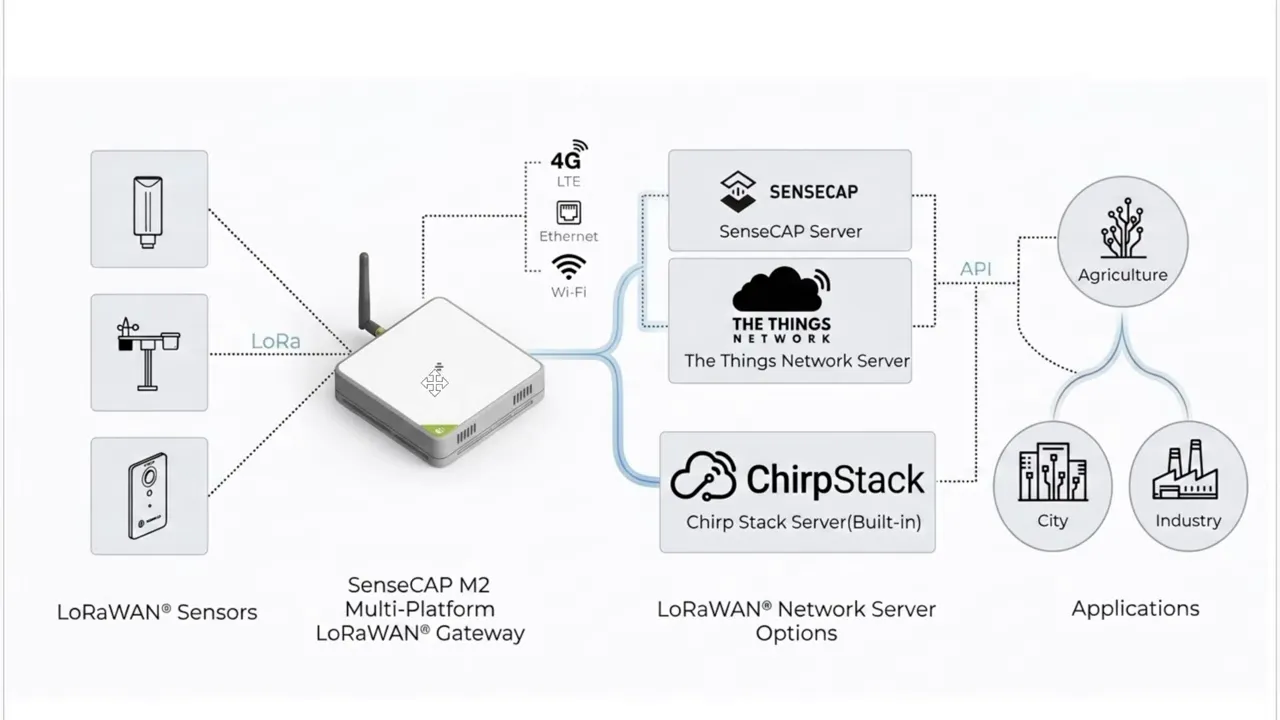
LoRaWAN is designed for devices that run on batteries for a long time. Typical use cases include smart cities, agriculture, asset tracking, and industrial IoT. In practice, sensors transmit over LoRa to a gateway, and the gateway forwards received packets to a network server, which then makes the data available to applications via APIs.
A key mental model:
- LoRa is the long-range radio link between sensors and the gateway.
- LoRaWAN is the standardized network protocol managing how messages are sent, received, and interpreted.
- Network server (often ChirpStack) is where you define devices and where received messages become usable data.
Instead of relying on an online cloud platform, the SenseCAP M2 can run a built-in local network server.
Meet the SenseCAP M2: hardware and connectivity options
The unit used here is the Seeed Studio SenseCAP M2 indoor multi-platform LoRaWAN gateway. It is not weather sealed, so it is meant for indoor setups.
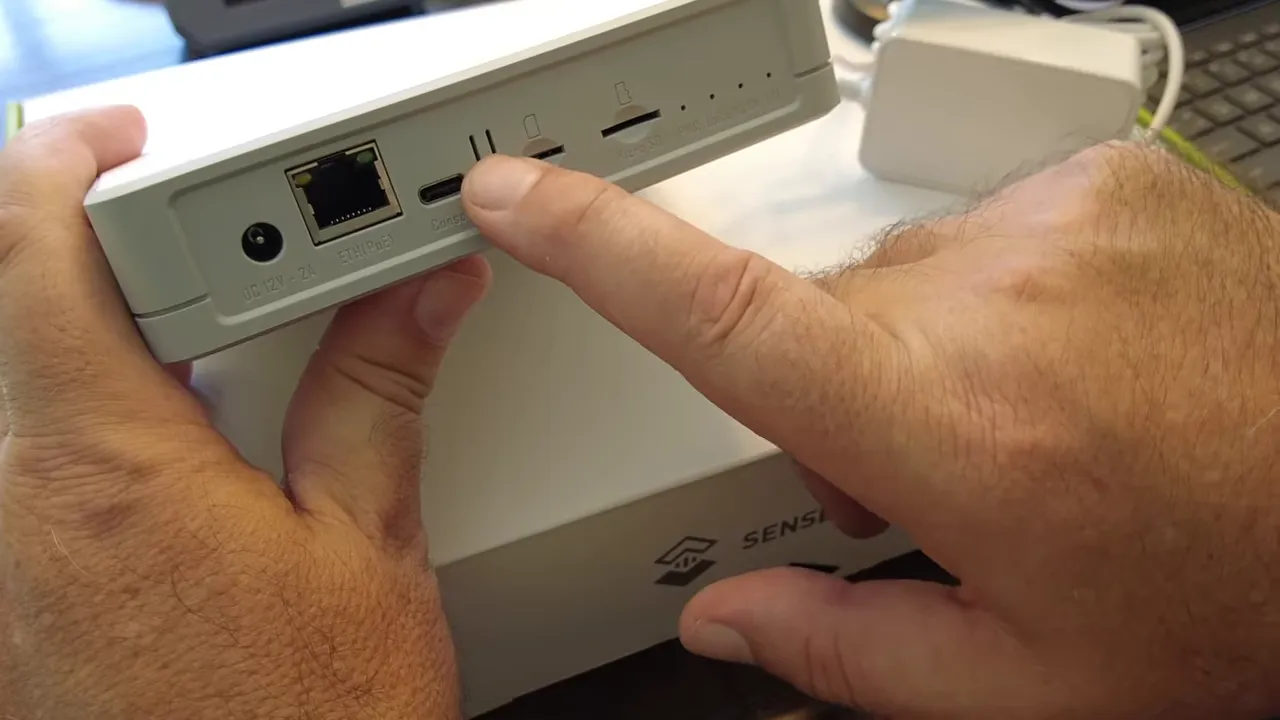
What to notice on the hardware:
- LoRa antenna connector (in this case a 915 MHz antenna)
- Power input
- Ethernet for wired LAN connections
- USB-C port
- Button used for mode changes and startup behavior
- nano SIM slot for 4G LTE connectivity (depending on your gateway version)
- microSD slot
- Status LEDs that help indicate mode (hotspot vs normal operation)
Different versions exist depending on which connectivity methods you want (Ethernet, Wi-Fi, 4G/LTE, or combinations). You also choose the correct regional frequency plan. The unit discussed uses US915.
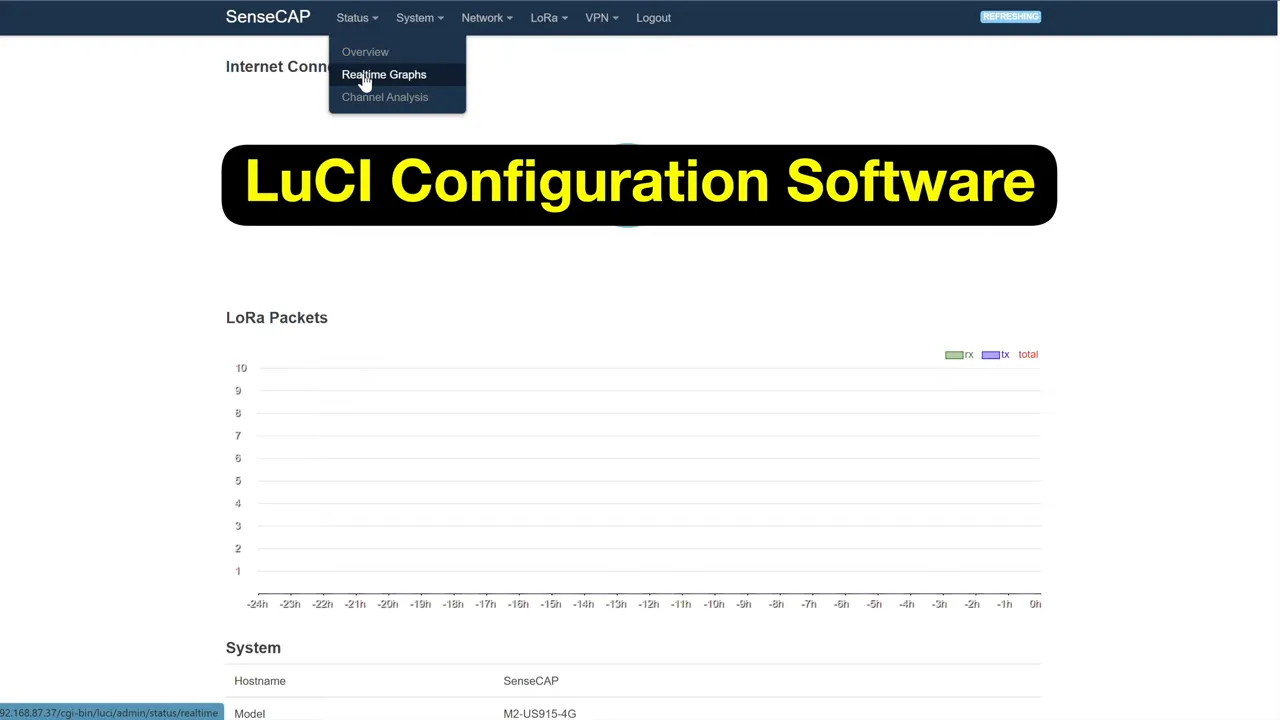
The two key pieces of software: Lucy and local ChirpStack
This is the part that makes the SenseCAP M2, Lorawan workflow particularly friendly if you want “local first”. The gateway runs two separate software components:
- Lucy (configuration interface): configure the gateway settings and network connection.
- ChirpStack (local network server): receive LoRaWAN packets and manage devices, APIs, logs, and data display.
Why you should care: with the built-in local ChirpStack, you can start building and testing a working LoRaWAN network without immediately sending everything to an external cloud service.
Step 1: Power on safely and enter hotspot mode
Start by connecting the LoRa antenna. The gateway can be sensitive to startup conditions, so it is a good habit not to power it before the antenna is attached.
To enter hotspot mode:
- Plug in power.
- Hold the button for 5 seconds.
- Watch the LEDs change from green to blue and begin flashing slowly.
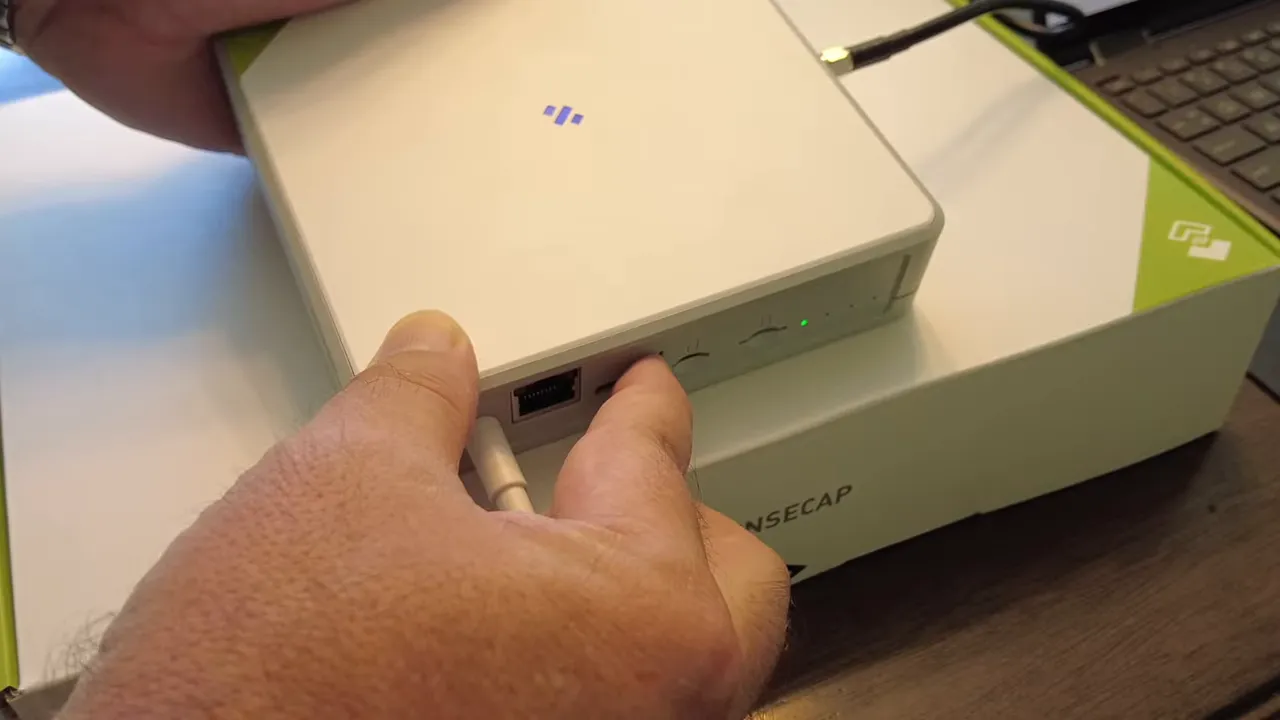
That blue flashing state indicates the gateway is now acting like a Wi-Fi hotspot so you can configure it right away.
Step 2: Connect to the gateway hotspot and open Lucy
On your computer, connect to the SenseCAP access point (SSID typically appears as SenseCAP Access Point or similar).
The default hotspot Wi-Fi password is shown in the quick start guide. In this setup it was:
12345678
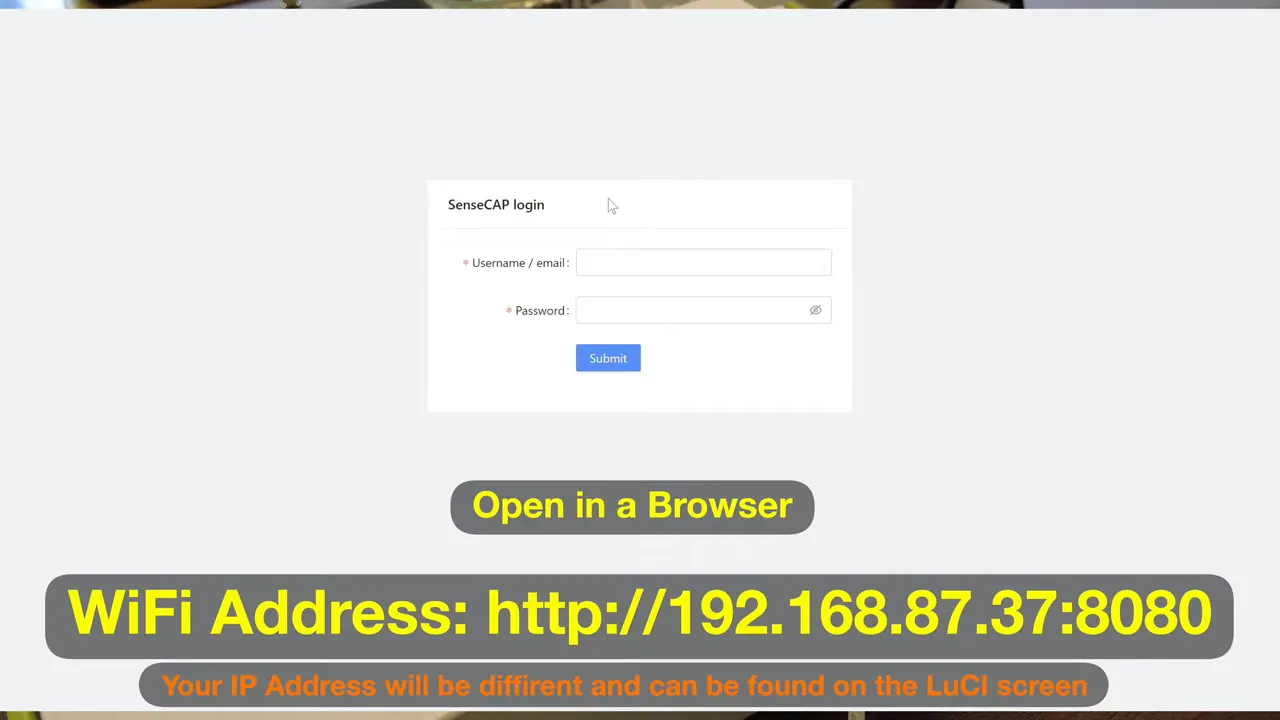
Next, open a browser and go to the gateway’s hotspot IP address:
http://192.168.168.1
Lucy login credentials are printed on a sticker on the bottom of the gateway, including the default username and password.
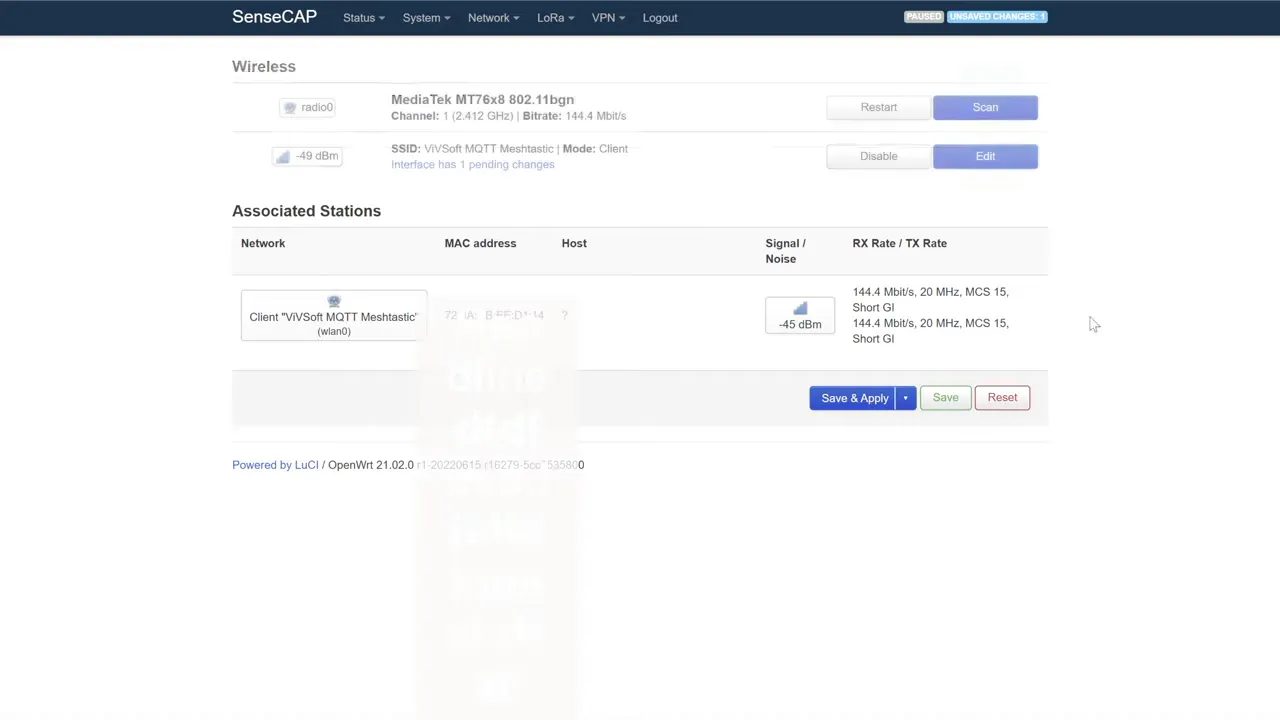
Step 3: Connect the gateway to your LAN/Wi-Fi (not just hotspot)
Hotspot mode is only meant to get you through initial setup. The next goal is to connect the gateway to your home or lab network so you can reach it consistently and so it can forward LoRaWAN packets upstream.
Inside Lucy:
- Go to Interfaces and select the appropriate path for network access (LAN, LTE, WWAN, etc.).
- Use the scan button on Wi-Fi networks.
- Select your Wi-Fi network (in the example, a private network).
- Enter the Wi-Fi password and submit.
- Save and Apply properly.
Important gotcha: if you only “save” and forget “save and apply,” rebooting can leave the gateway stuck in the old configuration and it may not reconnect to Wi-Fi.
After applying changes, wait for the gateway to come back online, then find its new IP address on your network (it may change once it joins Wi-Fi).
Step 4: Set system time and timezone
In the system settings, sync time and set your timezone. Timezone matters for timestamps in logs and for consistent behavior across components.
In the setup described, the timezone was set to America/New_York.
Step 5: Update firmware
Check the firmware version and update if a newer build is available. The gateway includes an in-place update mechanism.
While updating:
- Do not power off the device while it is flashing or updating.
- Plan for a few minutes of update time and watch for LED activity changes.
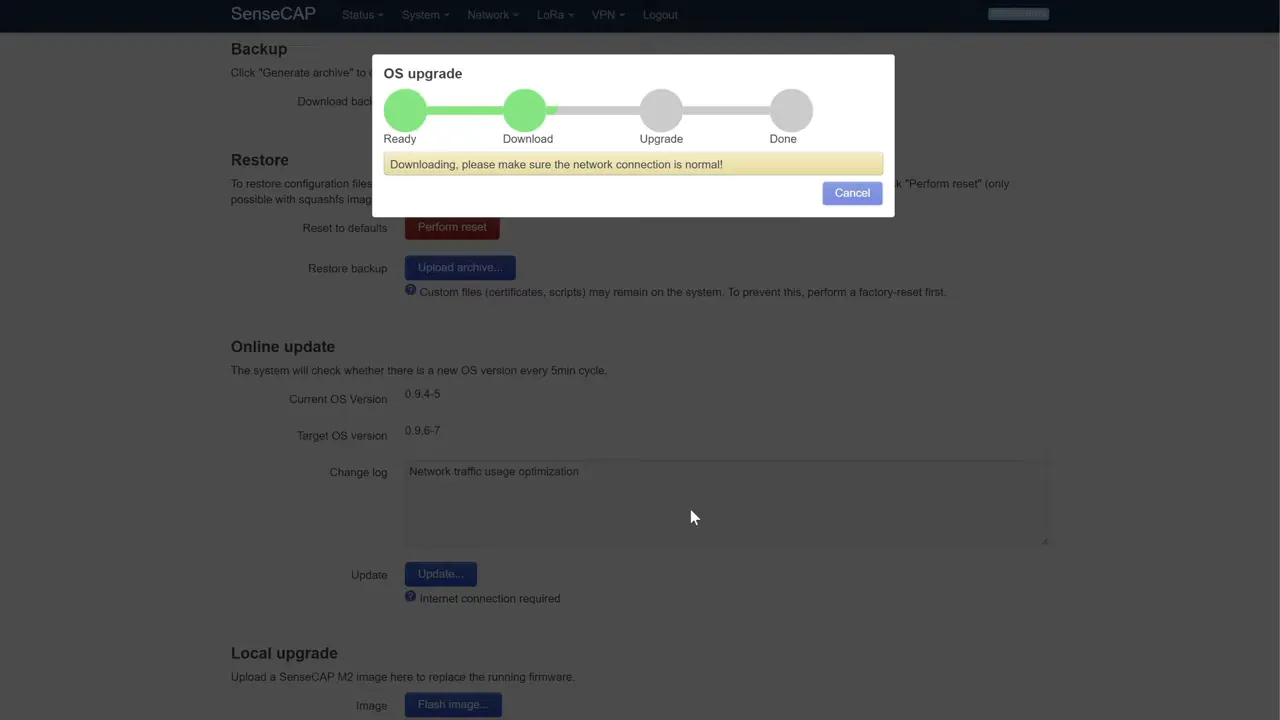
After completion, re-open Lucy and confirm the version is now current.
Step 6: Configure the LoRa network server to use local ChirpStack
In the LoRa network settings, the gateway can forward packets to different destinations depending on your architecture.
The useful option here is to choose the local network server running on the gateway itself.
Once enabled, Lucy shows the IP address of the built-in ChirpStack instance. Open that server in a browser.
ChirpStack login is also provided by the gateway defaults (commonly admin/admin in this setup). After logging in, you should be able to access sections like:
- Devices (where you will add sensors later)
- API endpoints and integrations
- Logs and raw event views
Where this leaves you (and what comes next)
At this stage, the gateway is:
- Powered on with the correct LoRa antenna connected
- Configured via Lucy
- Joined to your Wi-Fi network
- Time-synced and firmware-updated
- Set to use the built-in local ChirpStack server for LoRaWAN processing
The next step is what makes it “real” for sensors: connecting devices, creating device profiles, and verifying that uplink messages show up in ChirpStack as expected.
FAQ
Do I have to use the hotspot method to configure the SenseCAP M2, Lorawan gateway?
No. You can also connect via Ethernet using your LAN. Hotspot mode is simply convenient for initial setup when you do not yet know the gateway’s network IP address.
Why is local ChirpStack useful?
It lets you keep packet processing and sensor data on your local network instead of relying on an external cloud platform. This can simplify early testing and improve privacy and control.
What connectivity options do SenseCAP M2 versions usually offer?
Common options include Ethernet, Wi-Fi, and some versions also include 4G LTE via a nano SIM. The exact mix depends on the specific model you purchased.
Which regional frequency plan should I choose?
Choose the version that matches your region (for example, US915 for many parts of the United States). Using the wrong region will prevent proper LoRaWAN operation.
What is the most common setup mistake people make?
In this workflow, forgetting to use “Save and Apply” after changing Wi-Fi settings. Without applying changes, the gateway may not reconnect as expected after reboot.
Links
- Seeed SenseCAP M2 (US) - https://www.seeedstudio.com/SenseCAP-Multi-Platform-LoRaWAN-Indoor-Gateway-SX1302-US915-p-5472.html?sensecap_affiliate=agiE1S0&referring_service=link
- Seeed Solar Node - https://www.seeedstudio.com/SenseCAP-Solar-Node-P1-for-Meshtastic-LoRa-p-6425.html?sensecap_affiliate=agiE1S0&referring_service=link