
Getting Started with Meshtastic on Raspberry Pi HATs
Published by Vivian van Zyl in Meshtastic the 01/12/2025 at 07:07 pm

Welcome to the world of Meshtastic and Raspberry Pi HATs! If you're interested in building your own mesh networking devices, this guide will walk you through everything you need to know about using Raspberry Pi with LoRa HATs. Whether you’re a beginner or a seasoned enthusiast, you'll find valuable insights here.
Table of Contents
- Understanding Raspberry Pi and HATs
- Getting the Right Hardware
- Installing the Operating System
- Setting Up Meshtastic
- Configuring Your HAT
- Sending Messages with Meshtastic
- Using the Meshtastic CLI
- Integrating Sensors
- Use Cases for Meshtastic
- FAQ
- Conclusion
Understanding Raspberry Pi and HATs
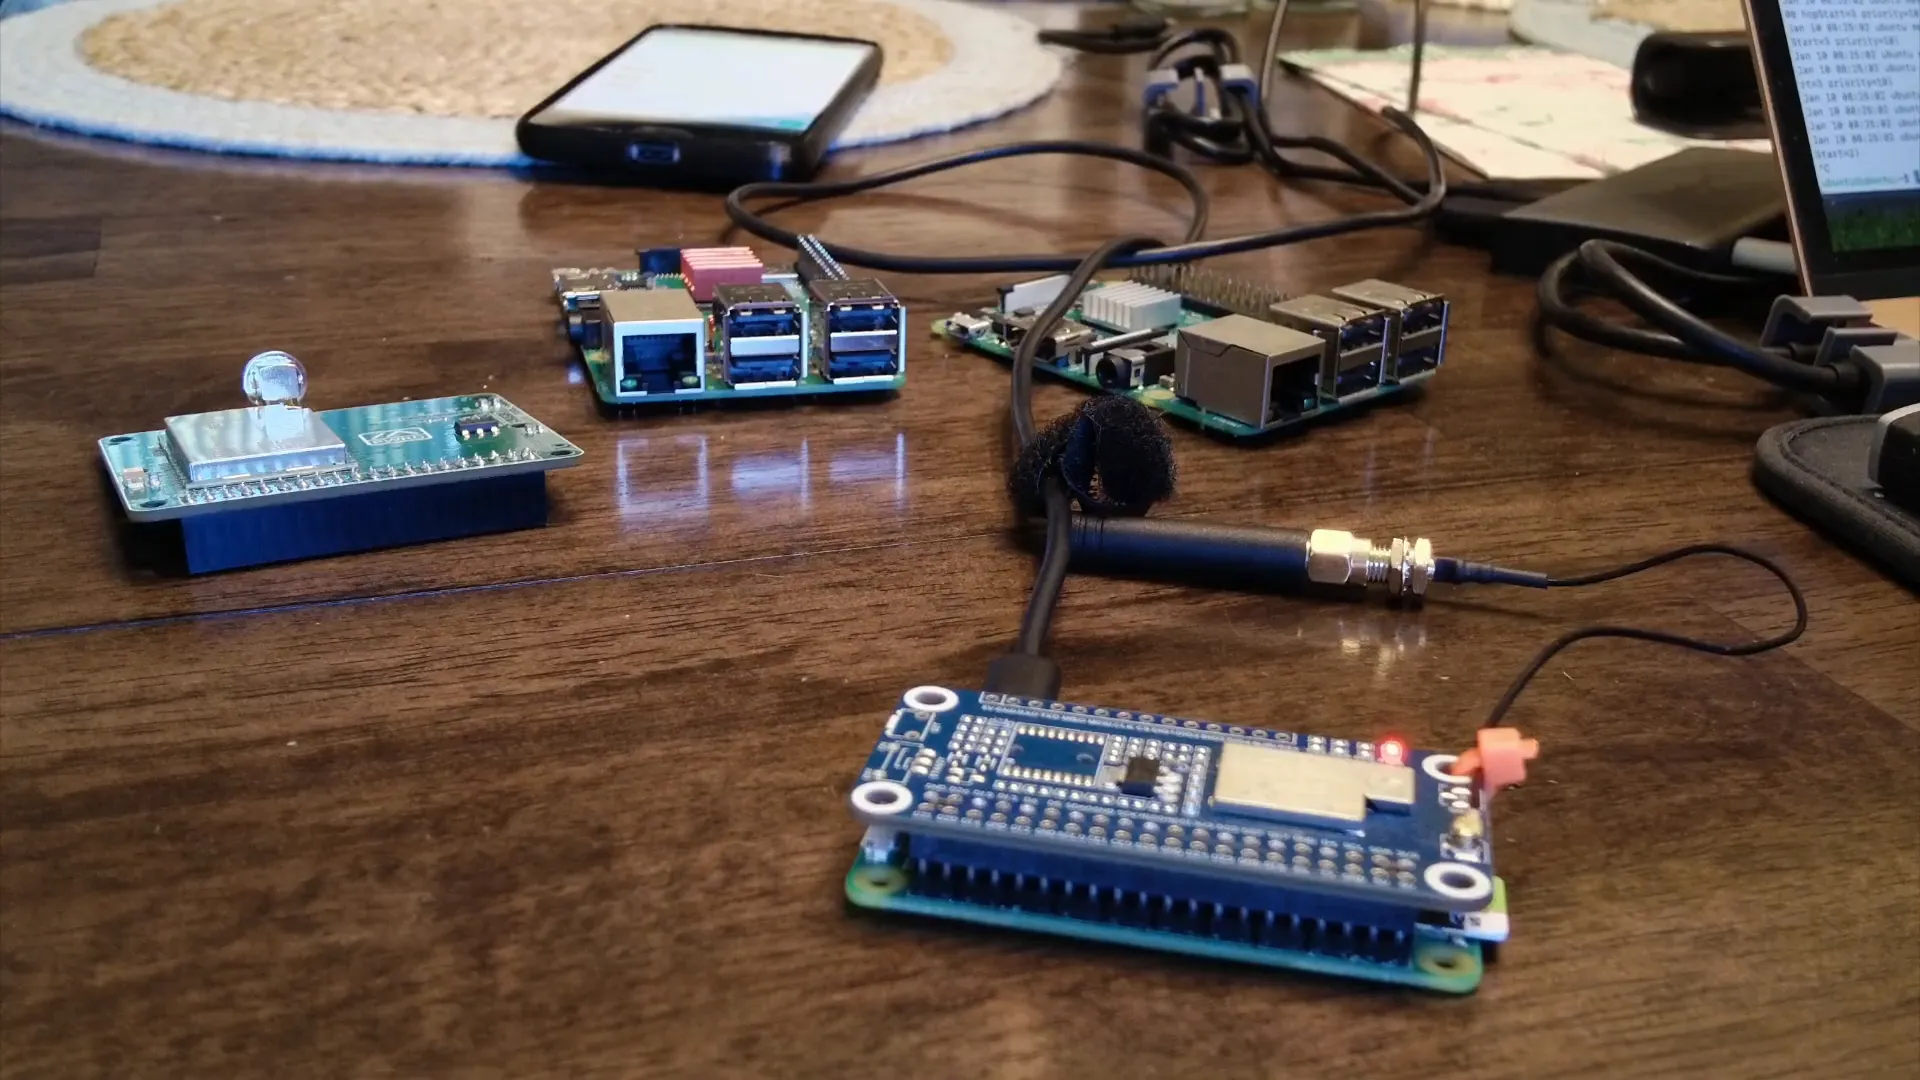
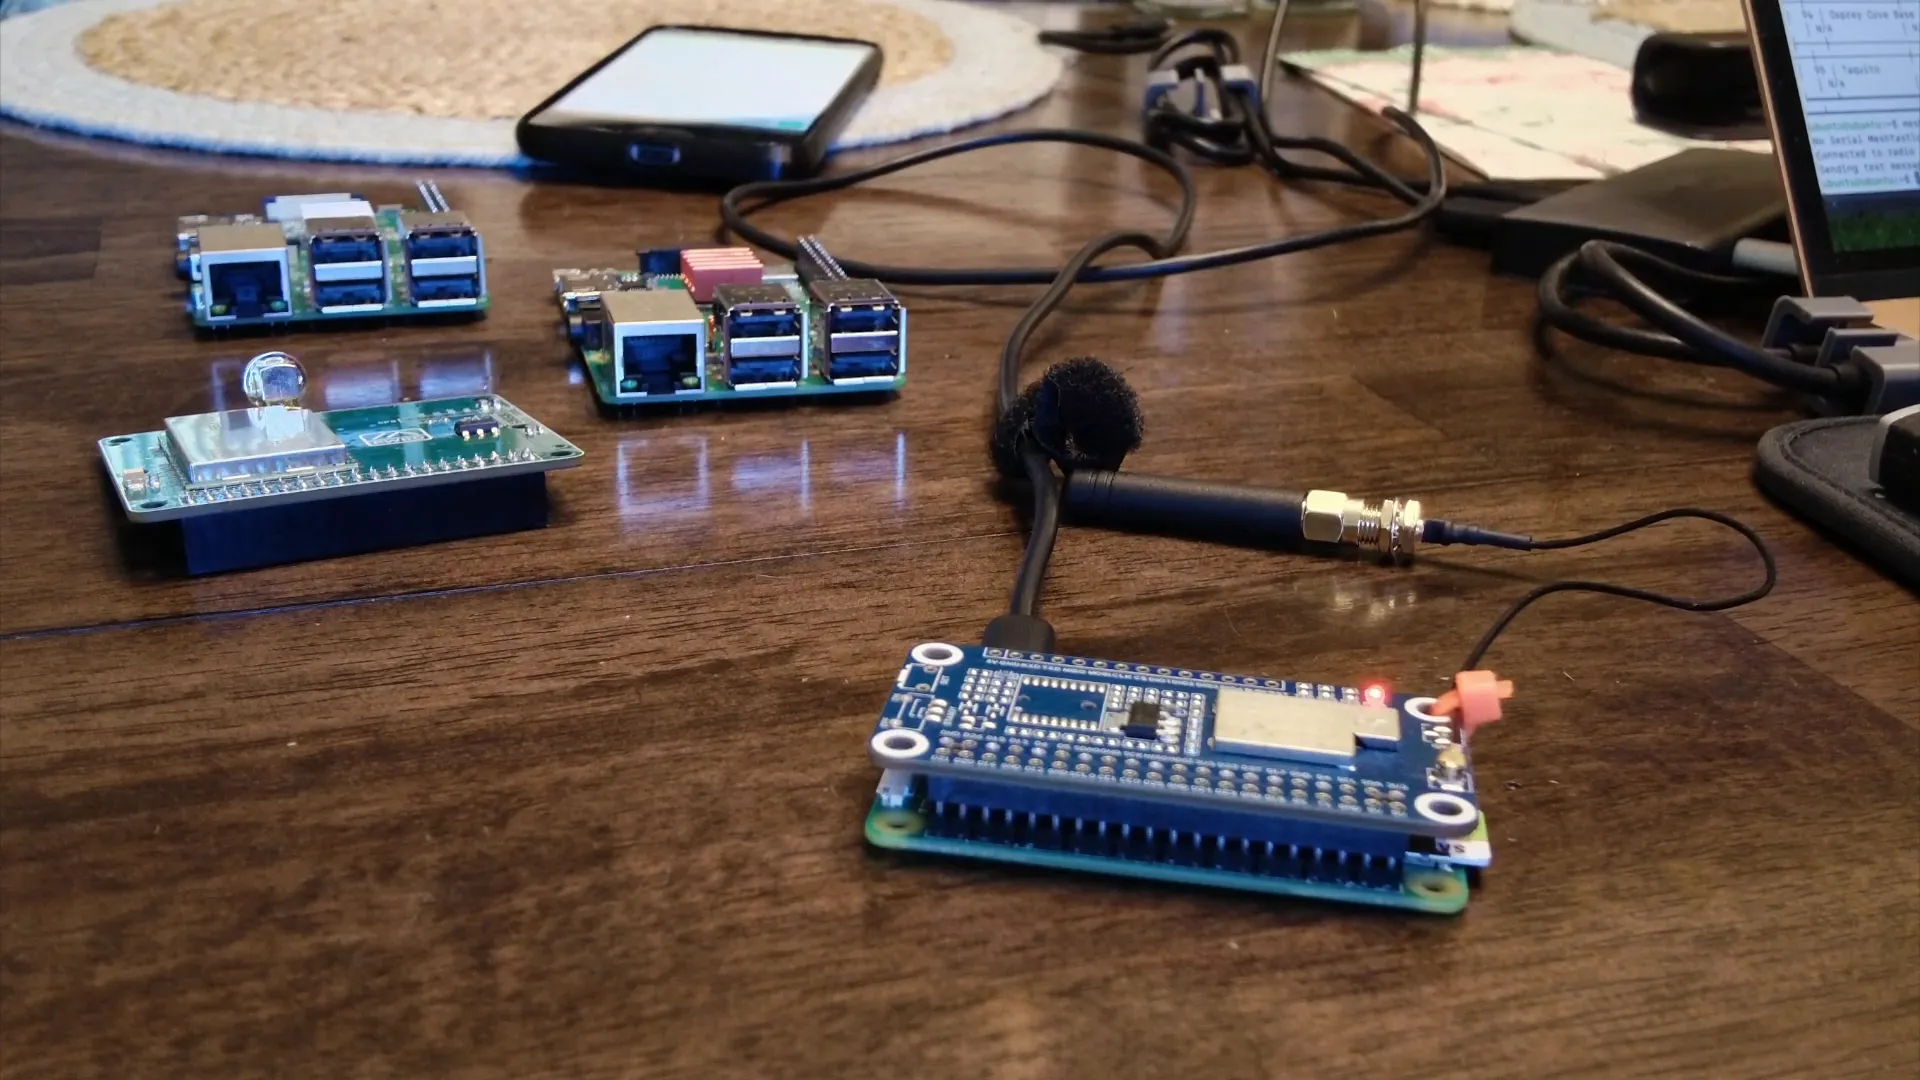
Raspberry Pi is a versatile single-board computer that comes with a 40-pin GPIO header. This allows users to connect various hardware components known as HATs, or Hardware Attached on Top. HATs can enhance the functionality of your Raspberry Pi, enabling projects ranging from simple sensor monitoring to complex communication systems.
In this guide, we will focus on two types of LoRa HATs:
- Waveshare LoRa HAT - A popular choice for its ease of use and reliable performance.
- Open Source LoRa HAT - Developed by the community, offering flexibility and customization.

Getting the Right Hardware
Before diving into software installations, you need to gather the necessary hardware. Here’s a list of what you’ll need:
- Raspberry Pi (any model with a 40-pin header)
- LoRa HAT (either Waveshare or open source)
- Antennas (ensure you have them for your HAT)
- USB power supply
- Ethernet cable (optional, for wired connections)
For example, the Pi Zero 2 WH is an excellent choice for compact projects.
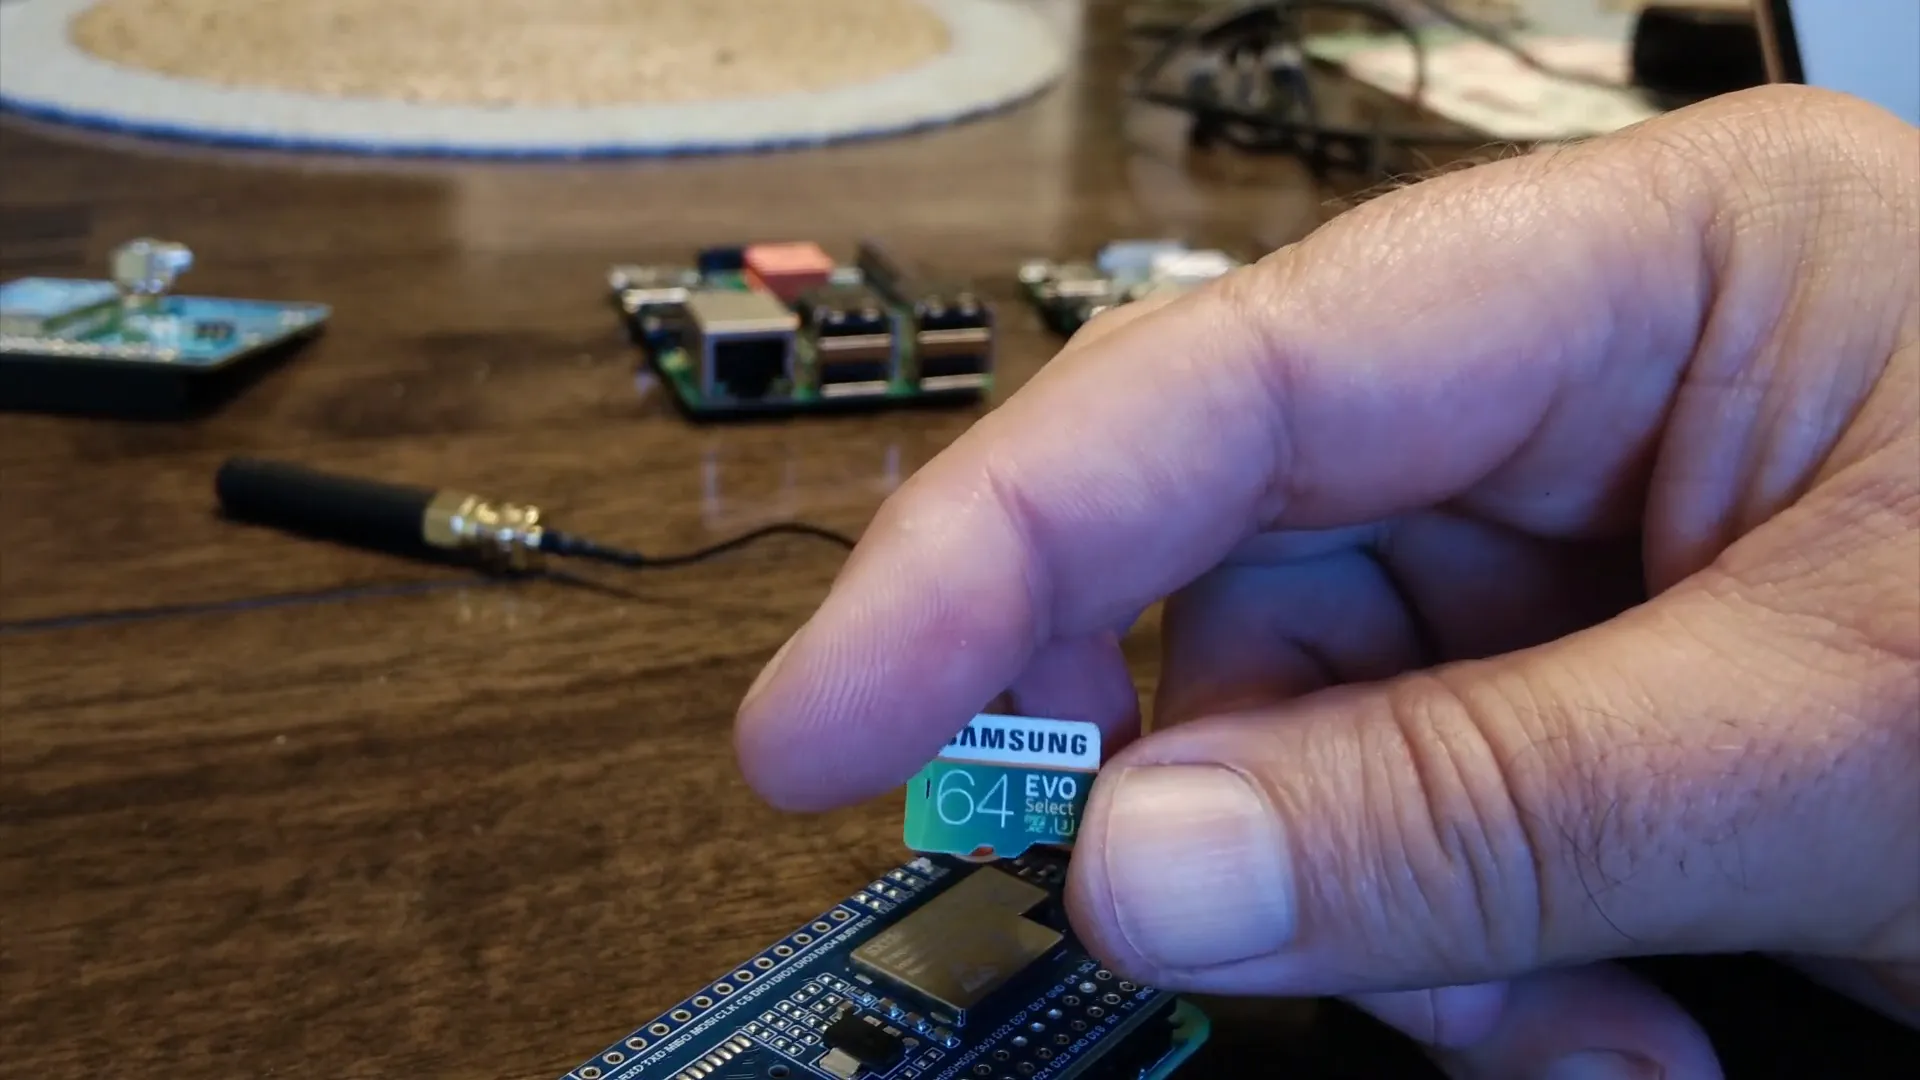
Installing the Operating System
Once you have your hardware ready, the next step is to install an operating system on your Raspberry Pi. Ubuntu is a great choice for ease of use and compatibility with Meshtastic software.
Follow these steps for installation:
- Download the latest version of Ubuntu for Raspberry Pi.
- Use a tool like Balena Etcher to write the image to your microSD card.
- Insert the microSD card into your Raspberry Pi and power it up.
Setting Up Meshtastic
After the operating system is installed, you can proceed with setting up Meshtastic. This involves installing the meshtasticd daemon and configuring your HAT.
See this Blog to do the Meshtastic Install: HERE
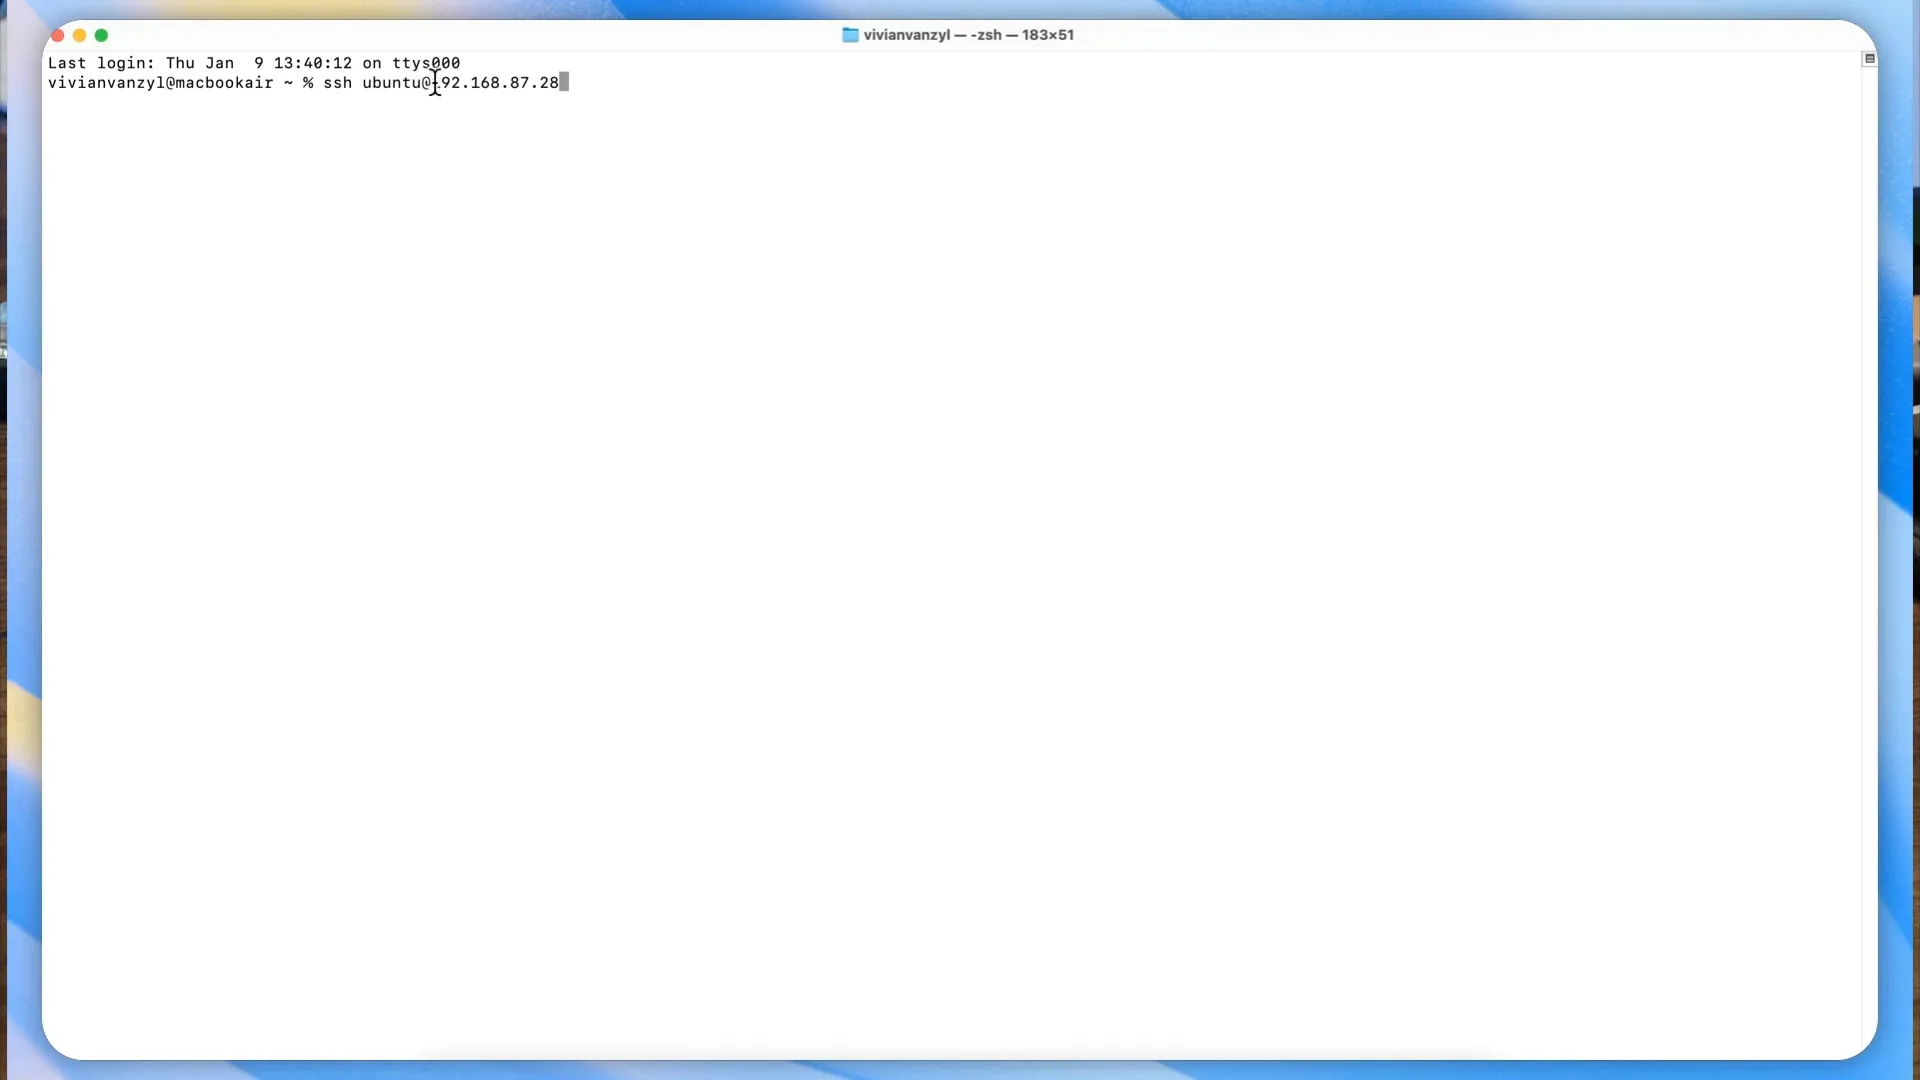
Make sure to enable SSH on your Raspberry Pi for remote access. Once done, you can SSH into your Raspberry Pi using the command:
ssh pi@192.168.87.28
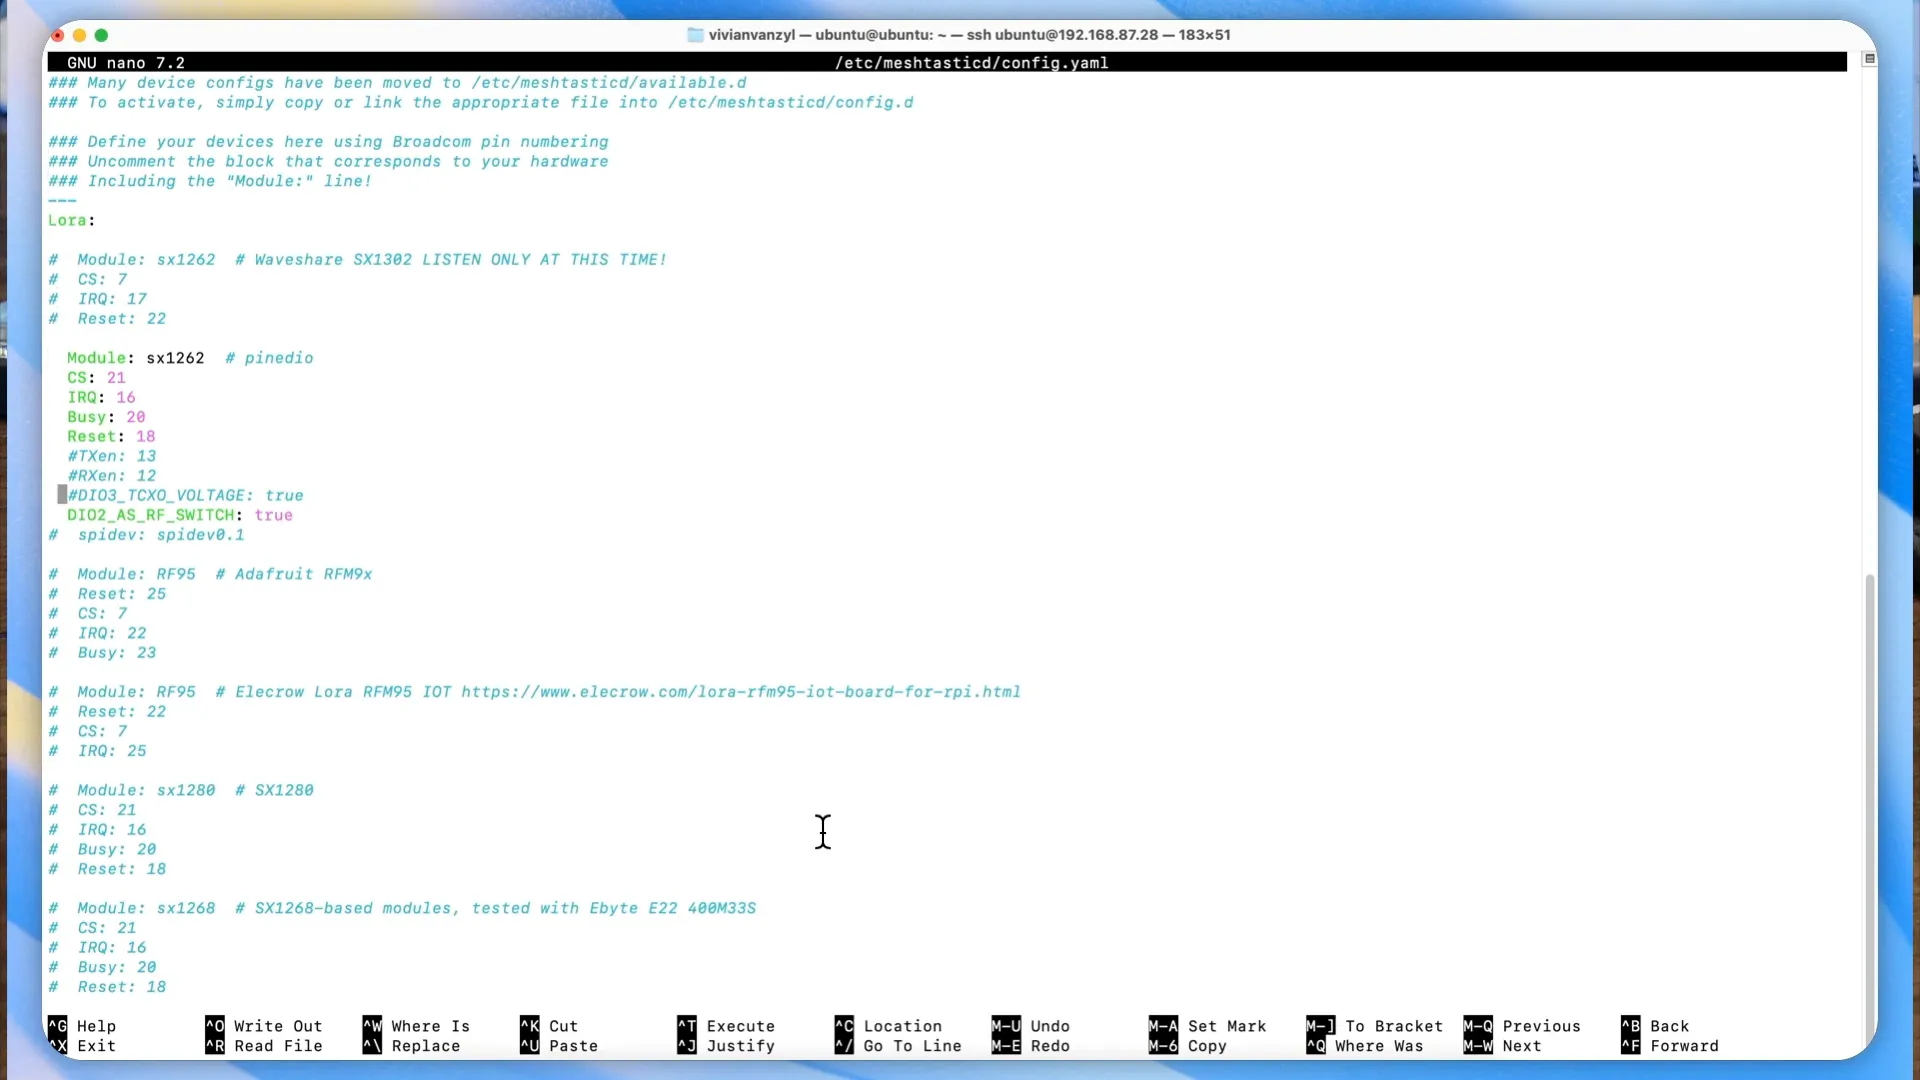
Configuring Your HAT
Configuring your HAT is crucial for it to work properly with Meshtastic. You will need to edit the configuration file located at:
/etc/meshtasticd/config.json
Depending on your HAT model, you may need to adjust certain parameters. For the Waveshare version, ensure the line "DIO2 as RF" is included. For the open-source version, uncomment the TXEN and RXEN lines.
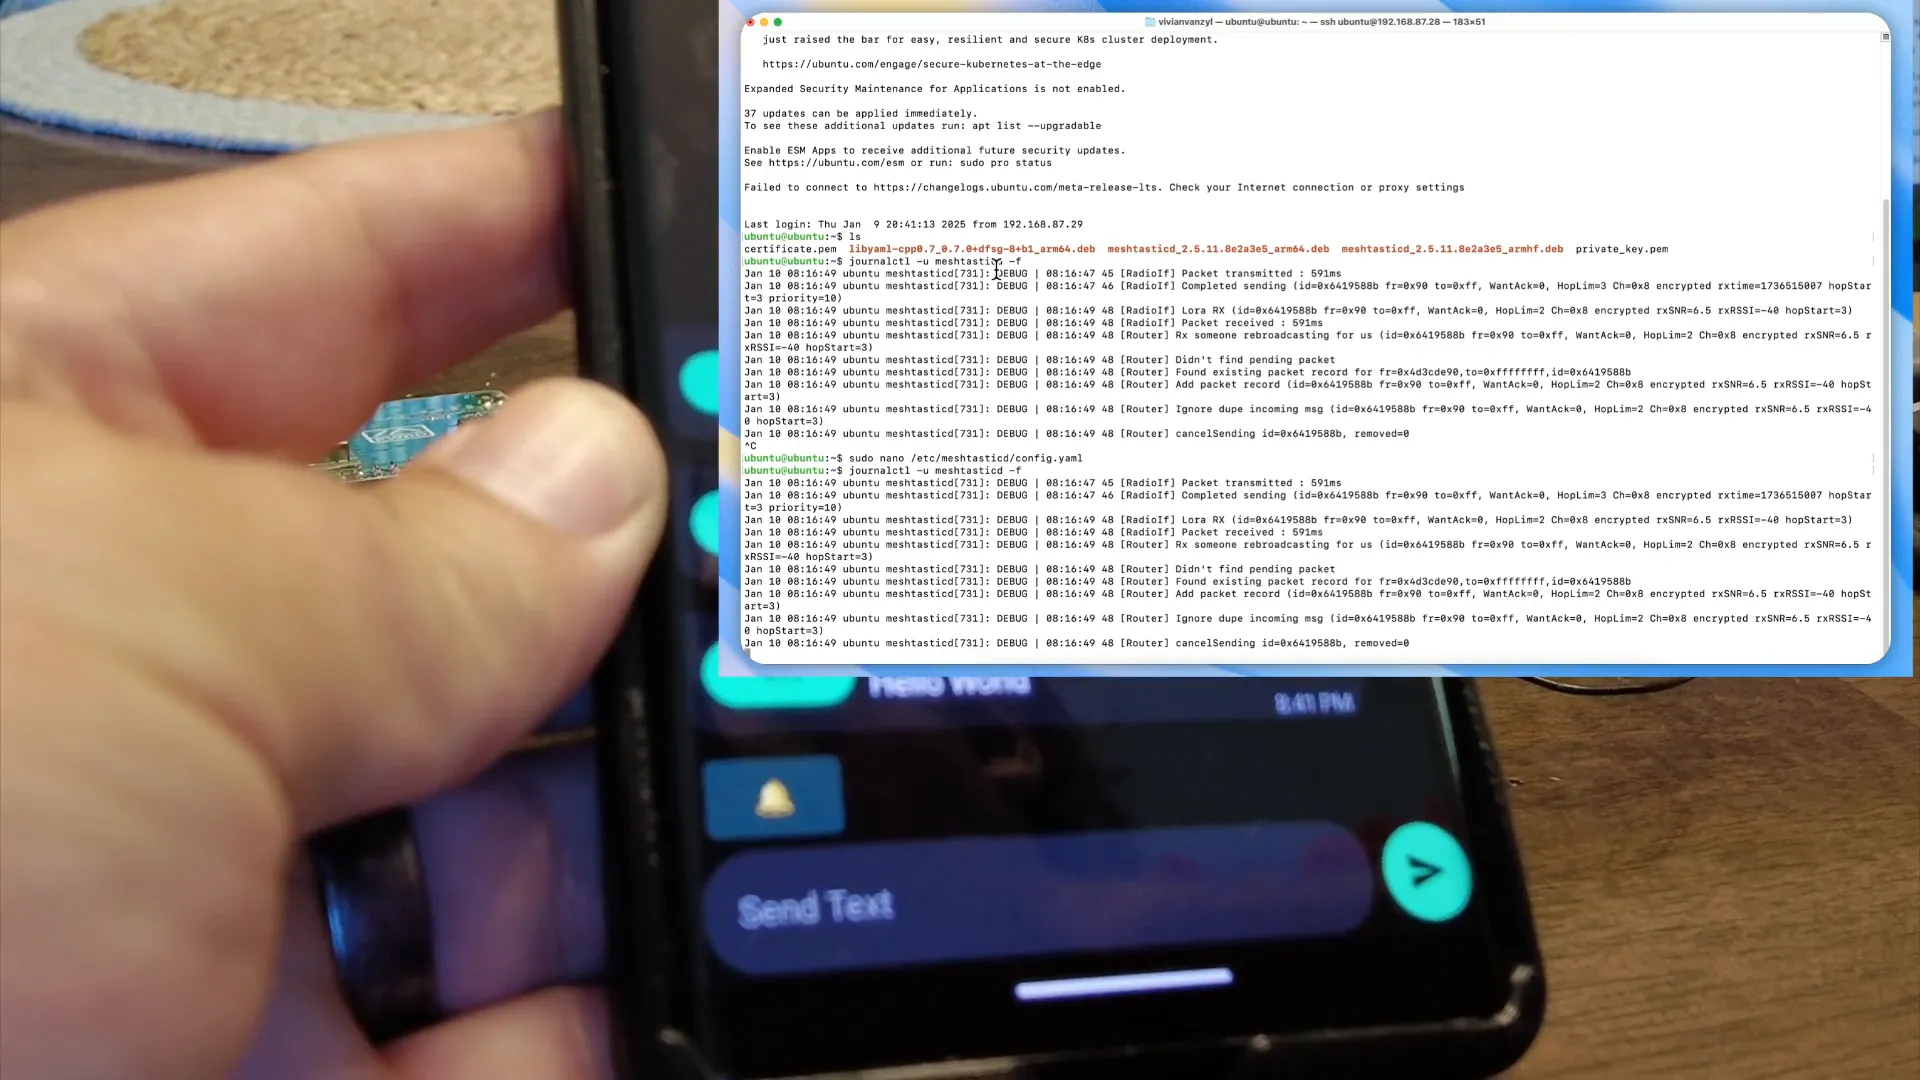
Sending Messages with Meshtastic
You'll be able to see the message logs to confirm successful transmission. This is how you can communicate between different nodes in your network.
Using the Meshtastic CLI
The Meshtastic Command Line Interface (CLI) allows you to interact with your nodes programmatically.
After installation, you can run commands like meshtastic --info to get the configuration details of your nodes.
Integrating Sensors
The real power of using Meshtastic with Raspberry Pi comes when you start integrating sensors. With a full Linux operating system, you can write scripts that trigger messages based on sensor data.
For instance, you could set up a motion sensor that sends an alert when movement is detected. This opens up endless possibilities for DIY projects!
Use Cases for Meshtastic
Here are some practical use cases for Meshtastic:
- Remote Weather Stations: Monitor weather conditions and send data back to your base station.
- Home Security: Set up sensors to detect unauthorized access and alert you instantly.
- Outdoor Adventures: Communicate with friends in remote areas without cell service.
FAQ
1. What is Meshtastic?
Meshtastic is an open-source project that enables long-range, low-power mesh networking using LoRa technology. It allows devices to communicate without the need for cellular or Wi-Fi networks.
2. Can I use any Raspberry Pi model?
Yes, you can use any Raspberry Pi model that has a 40-pin GPIO header. However, newer models like the Raspberry Pi Zero 2 W offer better performance and efficiency.
3. Do I need an internet connection?
No, Meshtastic operates independently of the internet, using radio frequencies for communication.
4. Where can I find more information on Meshtastic?
You can visit the Meshtastic documentation for more detailed instructions.
5. Are there any community resources available?
Yes, joining the Meshtastic Discord server can connect you with a vibrant community of enthusiasts who share tips, projects, and support.
Conclusion
With the right setup, using Meshtastic with Raspberry Pi HATs can be an exciting journey into the world of DIY mesh networking. Whether you're building a simple communication device or a complex sensor network, the possibilities are endless. So, gather your materials, roll up your sleeves, and start experimenting!
For further reading and resources, don’t forget to check out the links provided throughout this guide.