
Meshtastic Telegram Bridge with WireClaw AI on an ESP32-S3
Published by Vivian van Zyl in Meshtastic the 05/28/2026 at 03:52 pm

If you want to bridge Meshtastic to Telegram, the obvious route is a Raspberry Pi, a PC, or some scripts running somewhere in the background. That works, but it is not very elegant. A much more interesting approach is to do it with a tiny standalone box that runs its own AI agent on an ESP32 and handles the job itself.
That is exactly what this setup does. A Heltec V4 runs normal Meshtastic firmware, an ESP32-S3 runs WireClaw AI, and together they form a low-cost hardware bridge that can forward mesh messages to Telegram. The same little AI agent can also read sensors, remember custom names for devices, and create automation rules in plain language.
This is part one of the project and focuses on getting WireClaw running on the ESP32-S3, connecting it to Wi-Fi, linking it to an AI model, and controlling the hardware through Telegram. The Meshtastic wiring and takeover side comes in the second part, but this first stage already shows why the idea is so useful.
Table of Contents
- The idea: a standalone Meshtastic-to-Telegram box
- What WireClaw actually is
- The hardware used in this build
- Flashing WireClaw to the ESP32-S3
- First boot: connecting to the WireClaw setup access point
- Configuring Wi-Fi and the AI model
- Setting up Telegram with BotFather and IDBot
- After reboot: local dashboard and device status
- Controlling the ESP32 hardware from Telegram
- Reading sensor values through natural language
- Creating automation rules with plain English
- Reboots, persistence, and why this is practical
- How this fits into a larger Meshtastic setup
- What part one proves
- FAQ
The idea: a standalone Meshtastic-to-Telegram box
The end goal is simple. You send a message into the Meshtastic network and a Telegram message appears on your phone. No full computer. No always-on Raspberry Pi. Just a small hardware box doing the work.
Inside that box are two controllers:
- Heltec V4 running standard Meshtastic firmware
- ESP32-S3 running WireClaw AI
The ESP32 is not a LoRa radio in this setup. It is the smart controller. Its job is to connect to Wi-Fi, talk to Telegram, and use AI logic to interact with the connected hardware. The Heltec handles the Meshtastic side. Together, they make a neat little bridge.

What WireClaw actually is
WireClaw is an AI agent designed to live directly on a microcontroller. The basic pitch is that it is AI that lives on a wire. In practical terms, it means you can flash an ESP32, connect it to an AI backend, and then chat with it over Telegram to control pins, sensors, rules, and devices.
That makes it a very nice fit for hardware projects around Meshtastic, ESP32 development, and small automation jobs. If you enjoy this kind of ESP32 experimentation, you may also like this hands-on guide to using AI with microcontrollers.
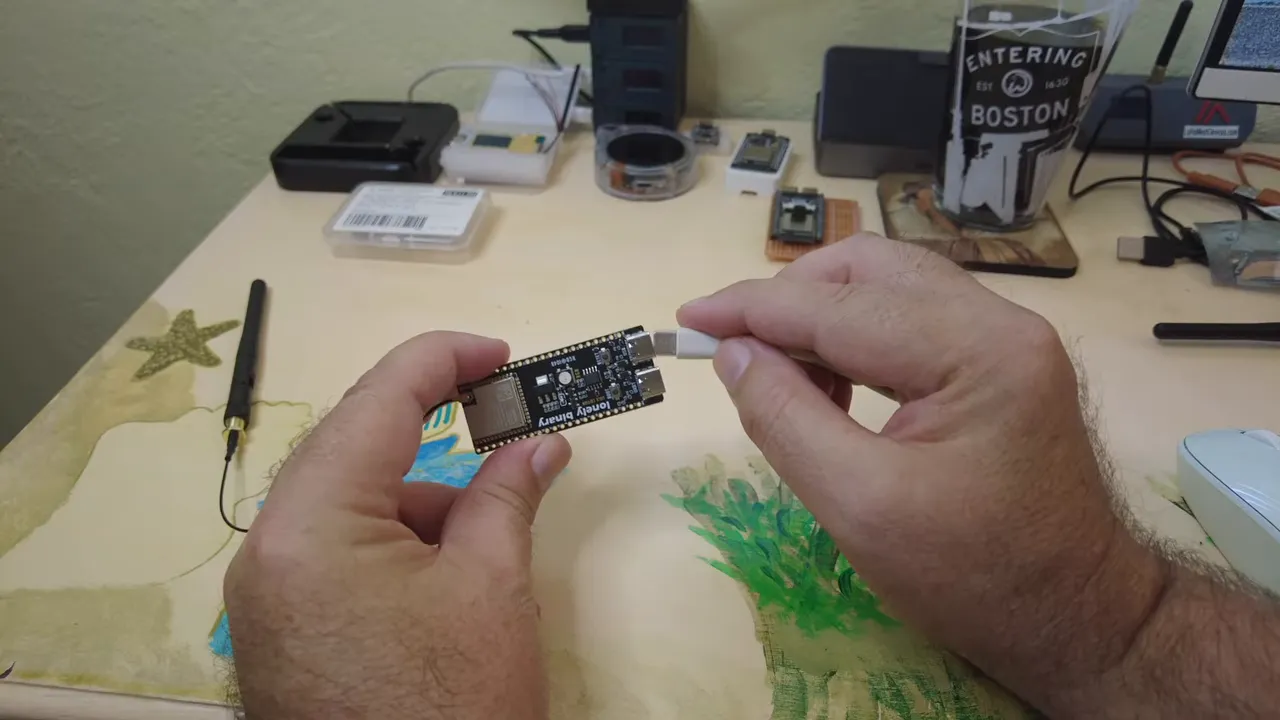
One of the really fun parts here is that WireClaw is not limited to one exact board. It can run on several ESP32 variants, including very small ones. For this build, though, the ESP32-S3 from Lonely Binary is a good choice because it is basically a reference platform. A lot of ESP32 work tends to be tested first on boards like this, so it is a safe place to start.

The hardware used in this build
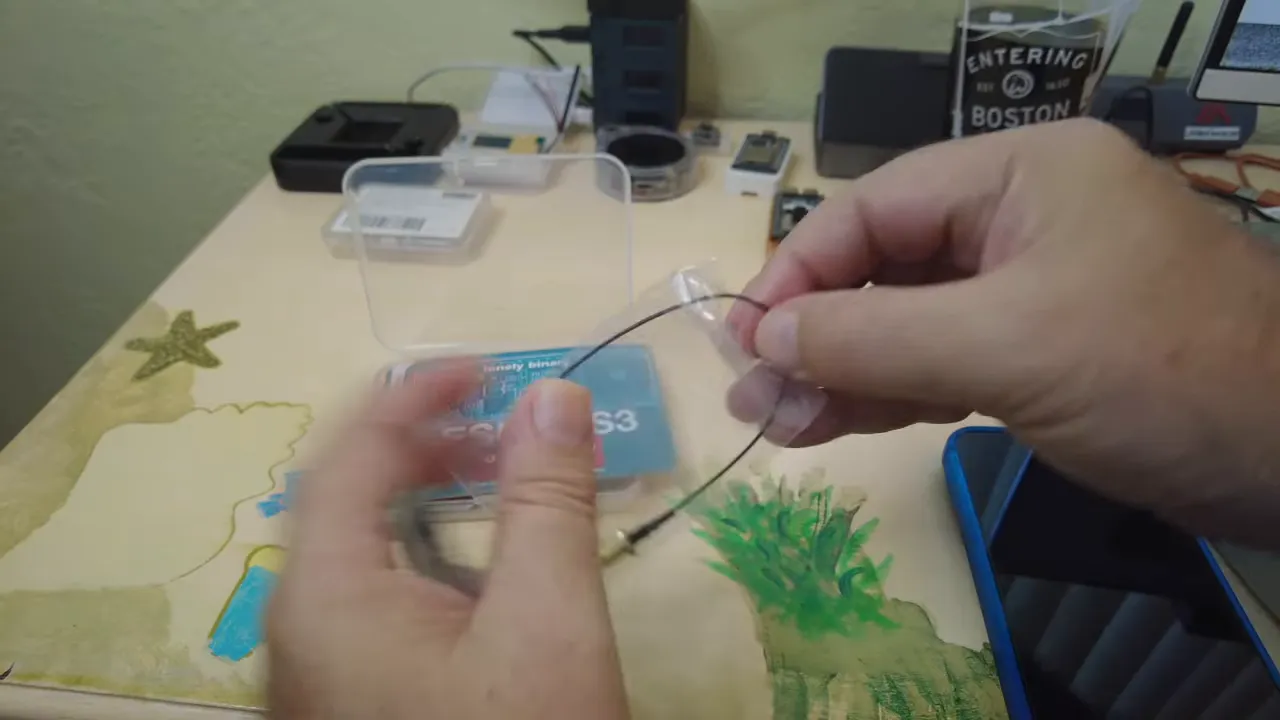
The ESP32-S3 board is just a microcontroller board with Wi-Fi, GPIO pins, and a built-in RGB LED. It is not a LoRa board. That matters, because the attached antenna is for Wi-Fi, not for Meshtastic radio.
The core hardware pieces are:
- ESP32-S3 board for running WireClaw AI
- Wi-Fi antenna connected to the board’s IPX connector
- Heltec V4 for the Meshtastic side of the bridge
- A good USB cable for flashing and power
The ESP32-S3 used here is the Lonely Binary ESP32-S3, and the Meshtastic radio on the other side of the box is the Heltec V4.
Once the antenna is connected, you are ready to flash the board and turn it into a tiny network-connected AI appliance.
Flashing WireClaw to the ESP32-S3
The flashing process starts at WireClaw’s website. The installer runs in the browser and expects a supported ESP32 board, Chrome, and a USB connection.
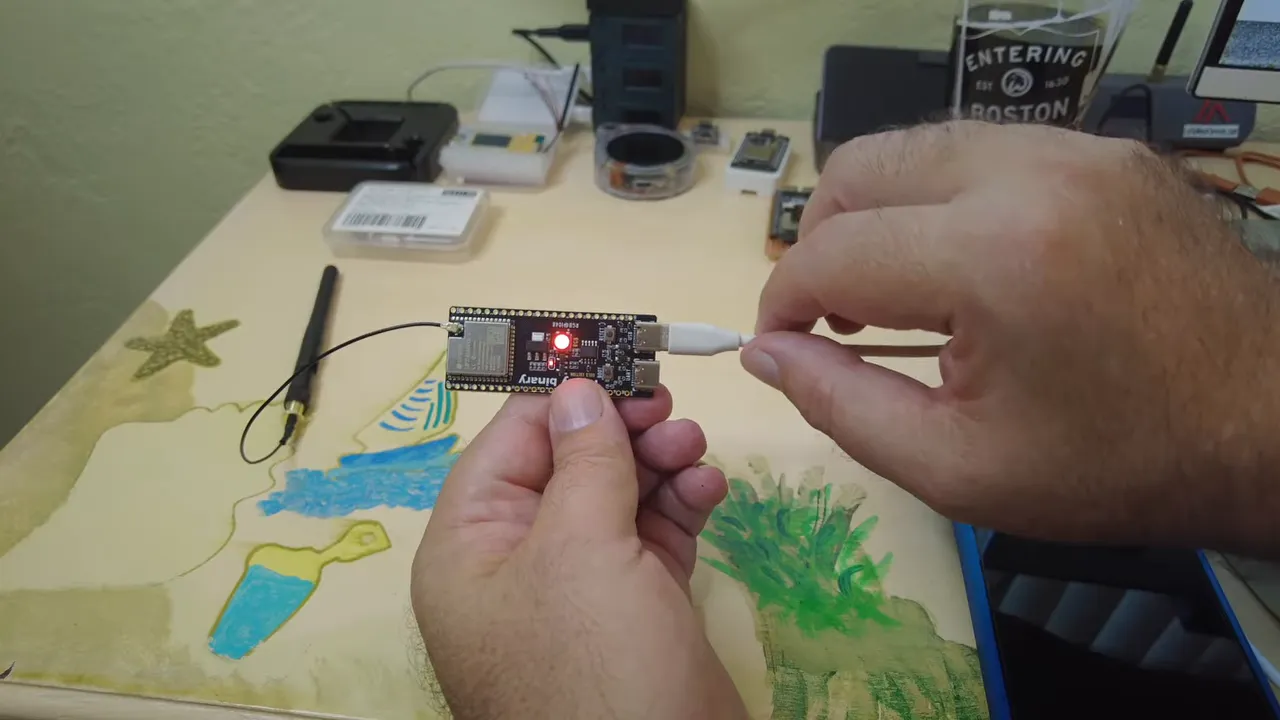
The first gotcha is an easy one to miss: on this specific ESP32-S3 board there are two USB-C ports. One is for UART and the other is the normal USB port. If the board does not appear in the flasher, check the port first.
That was the exact issue here. Plugging into the UART port did not expose the board the right way. After moving the cable to the USB port, the device appeared as a JTAG USB device and flashing could continue.
- Connect the ESP32-S3 with a known good USB cable.
- Open the WireClaw flasher page.
- Select the detected board.
- Install WireClaw and allow the tool to erase the device.
- Wait for the flash process to complete.
If needed, you can also manually place the board into boot mode by holding boot, pressing reset, releasing reset, and then releasing boot.
First boot: connecting to the WireClaw setup access point
After flashing, the board boots with no configuration. WireClaw solves that by creating its own temporary Wi-Fi access point called something like WireClaw Setup.
Connect to that access point and open the setup page. On some systems this opens automatically. Otherwise, you browse to the local setup address shown by the device. That brings up the configuration form where you tell WireClaw how to reach Wi-Fi, Telegram, and your AI provider.
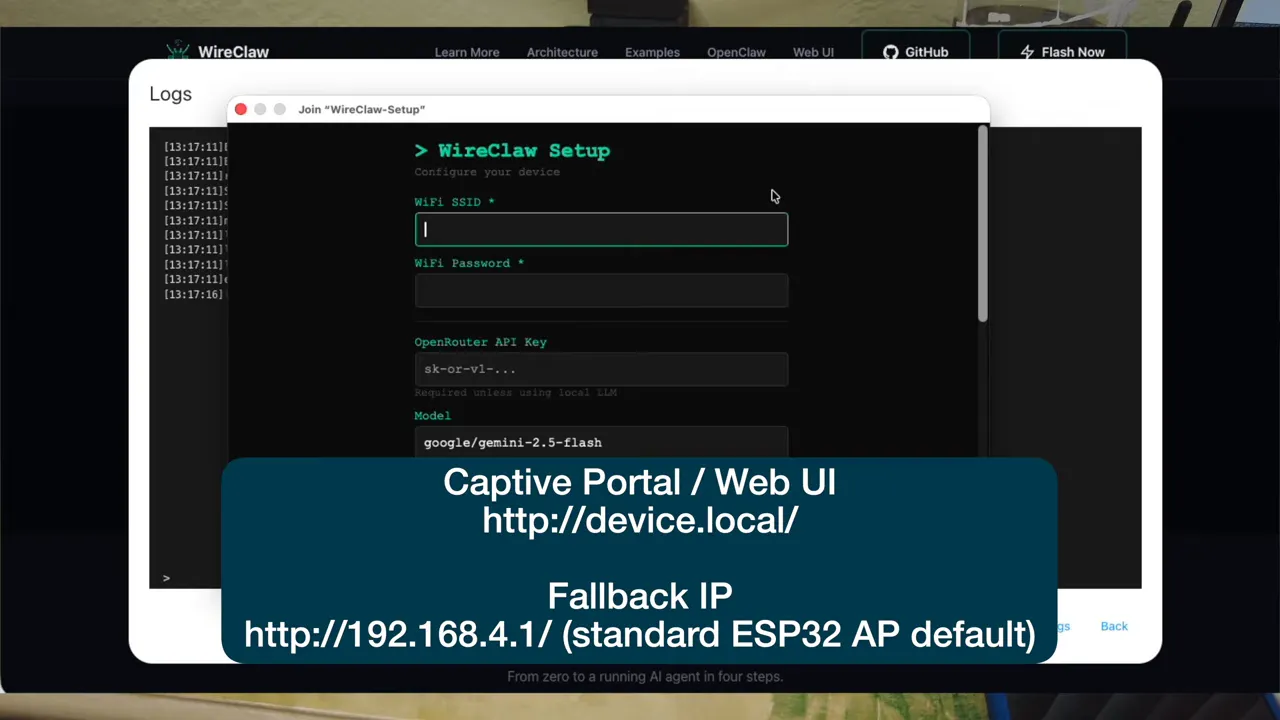
Configuring Wi-Fi and the AI model
The configuration page is where the project becomes useful. At minimum, WireClaw needs:
- Your Wi-Fi SSID
- Your Wi-Fi password
- An API key for your AI provider
- The model name
- The API URL
- A device name
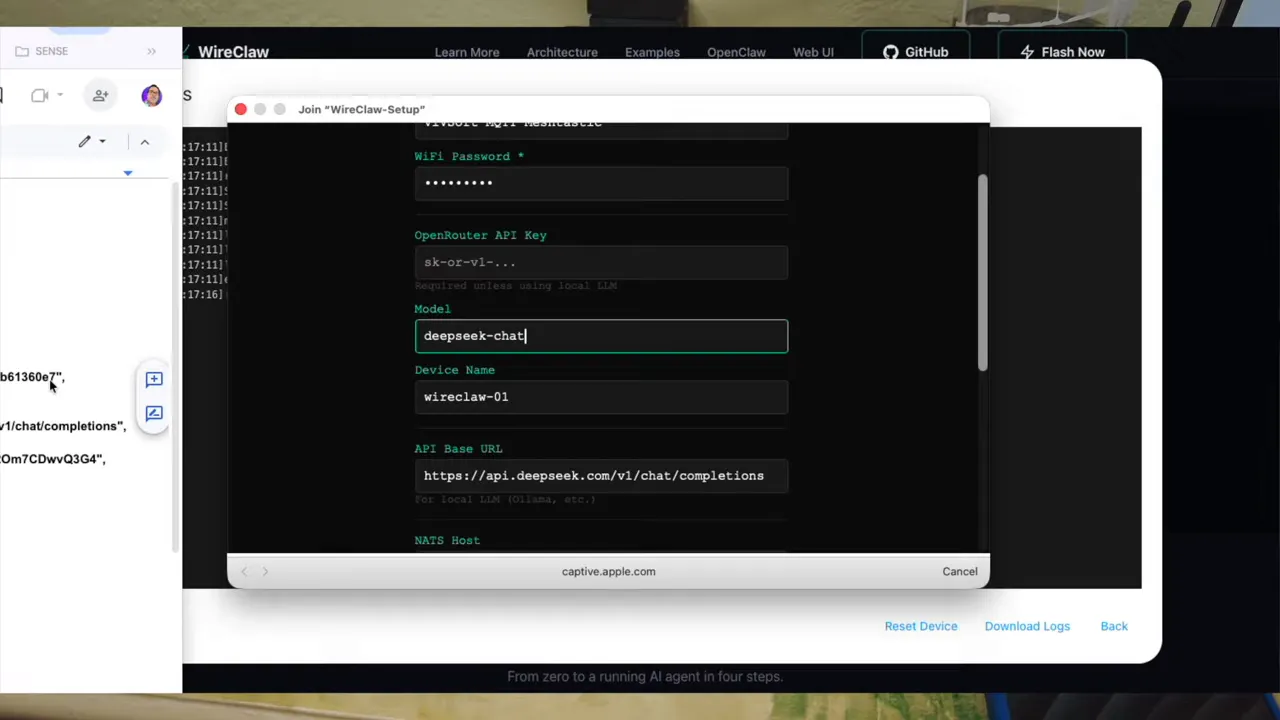
In this setup, the AI backend used was DeepSeek. The API URL entered was the DeepSeek chat completions endpoint, and the chosen model was DeepSeekChat.
If you are already using internet services alongside Meshtastic, this type of cloud link will feel familiar. It is a different mechanism to MQTT, but the idea of extending your network beyond pure radio range is very much in the same spirit as using Meshtastic MQTT to communicate globally.
The device also gets a name. In the example here, it was named something like WireClaw VZH, which then shows up in status and local network access later.
Setting up Telegram with BotFather and IDBot
Telegram integration is one of the nicest parts of WireClaw because it gives you a simple chat interface to your hardware. To make that work, you need two values:
- Telegram bot token
- Telegram chat ID
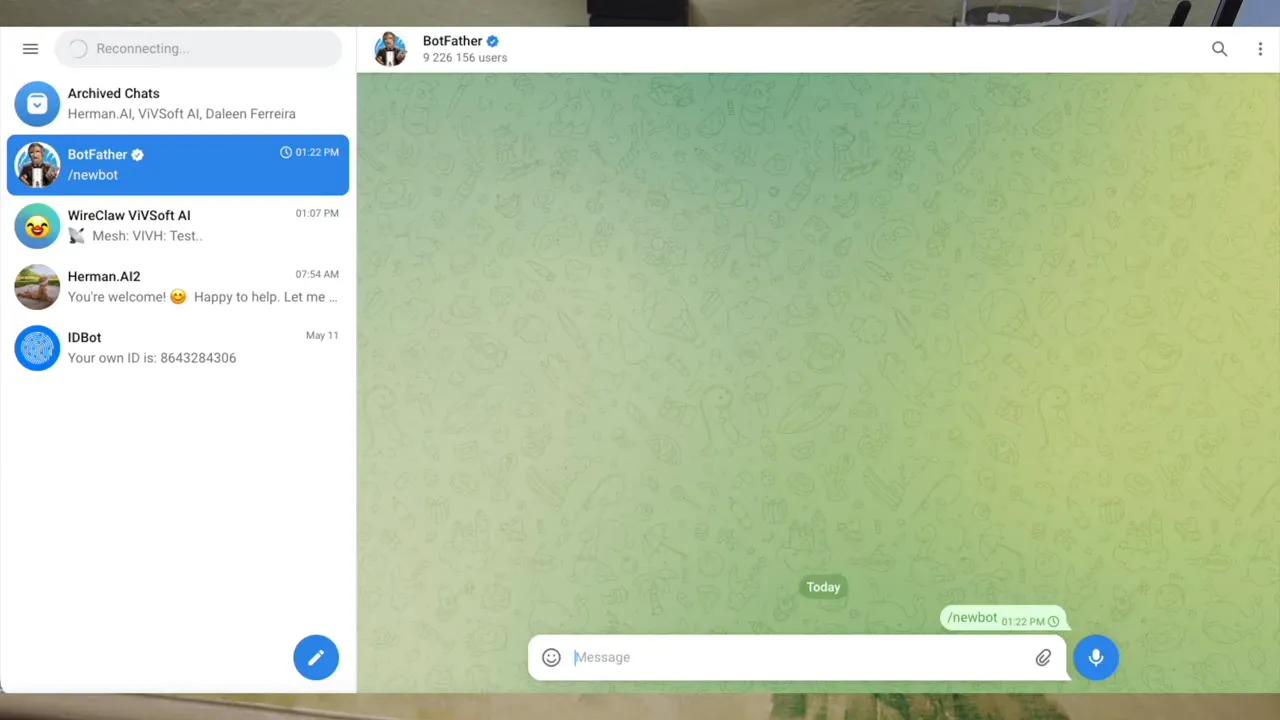
The bot token comes from BotFather. You create a new bot using the /newbot command, give it a name, and Telegram returns the token.
The chat ID comes from IDBot. That gives you either your personal ID or the channel ID you want to use for notifications.
Those values get entered into the WireClaw configuration page along with a timezone. Once everything is filled in, save the configuration and reboot the device.
After reboot: local dashboard and device status
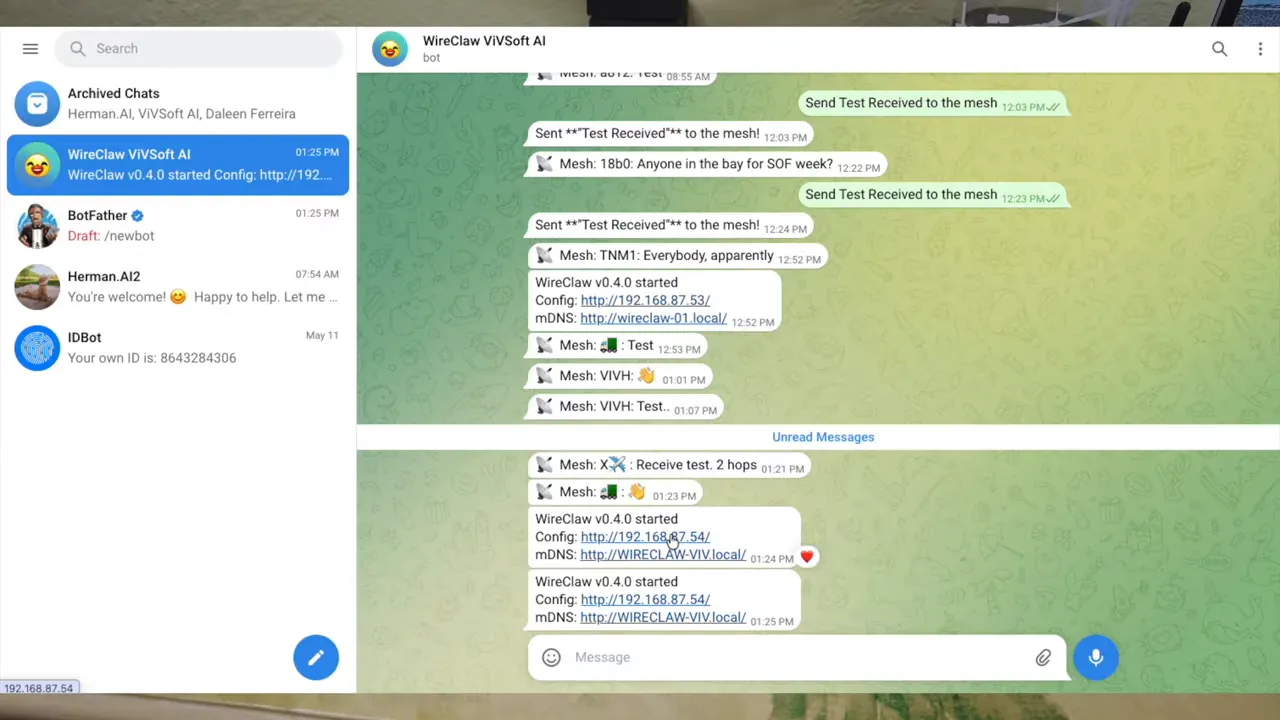
Once the configuration is saved, reconnect to your normal Wi-Fi network and reset the device. At that point, WireClaw comes up on your LAN and reports back through Telegram that it has started.
It also exposes a local dashboard via IP address or local DNS name. Inside that dashboard you can inspect:
- Configuration
- Prompt
- Memory
- Devices
- Rules
- Status
On the ESP32-S3 used here, WireClaw detected built-in devices including:
- An internal temperature sensor
- A clock
- An RGB LED
Controlling the ESP32 hardware from Telegram
This is where the whole thing starts to feel a bit magical. You can simply send a plain-language command in Telegram and the AI maps that to the actual hardware device names.
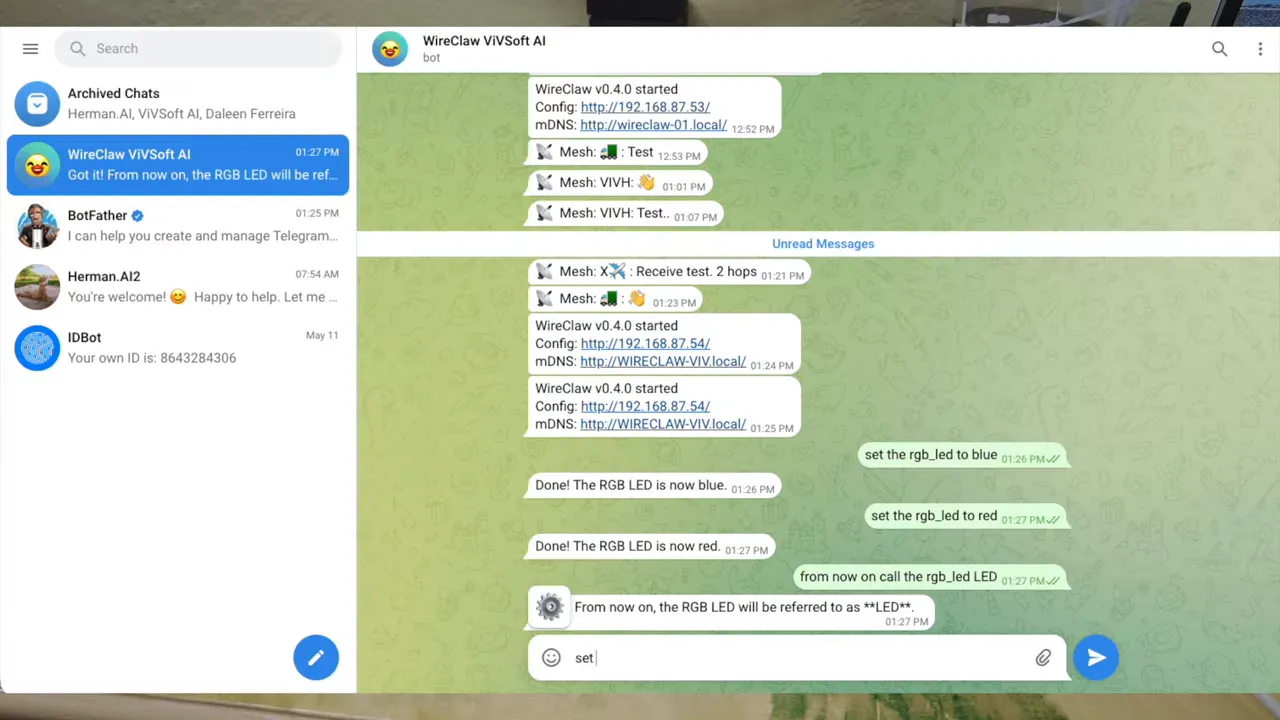
For example, the board exposes an LED called RGB_LED. Sending a command such as set the RGB_LED to blue changes the on-board LED immediately. The AI then responds in Telegram confirming that it made the change.
The same works for red, green, and so on. That alone is a nice proof that WireClaw is reading the device list correctly and can trigger real actions from a normal chat.
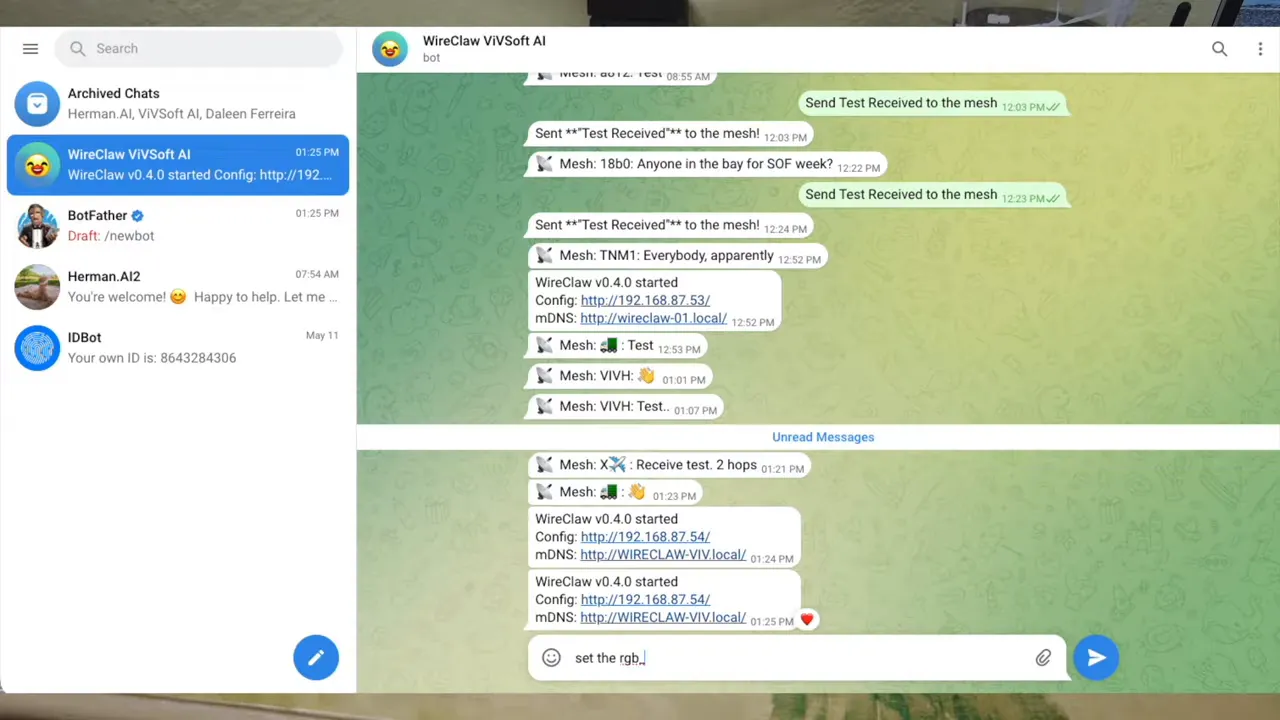
Teaching the AI simpler names
WireClaw is not just executing commands. It is also building memory. So instead of always using the exact hardware label, you can tell it:
From now on call the RGB_LED LED
After that, the AI remembers the alias. Then you can simply say:
Set the LED to green
and it knows what you mean. That memory shows up in the dashboard as well, so you can actually see that the alias was stored.
Reading sensor values through natural language
The same idea works with sensor data. The board has an internal temperature reading exposed as something like internal_temp. Ask the AI what the internal temperature is, and it returns the current value, around 36°C in the example shown.
Then, just as with the LED, you can rename it:
From now on call the internal temp temp
After that, asking What is the temp? works exactly as expected. Again, the alias is stored in memory.
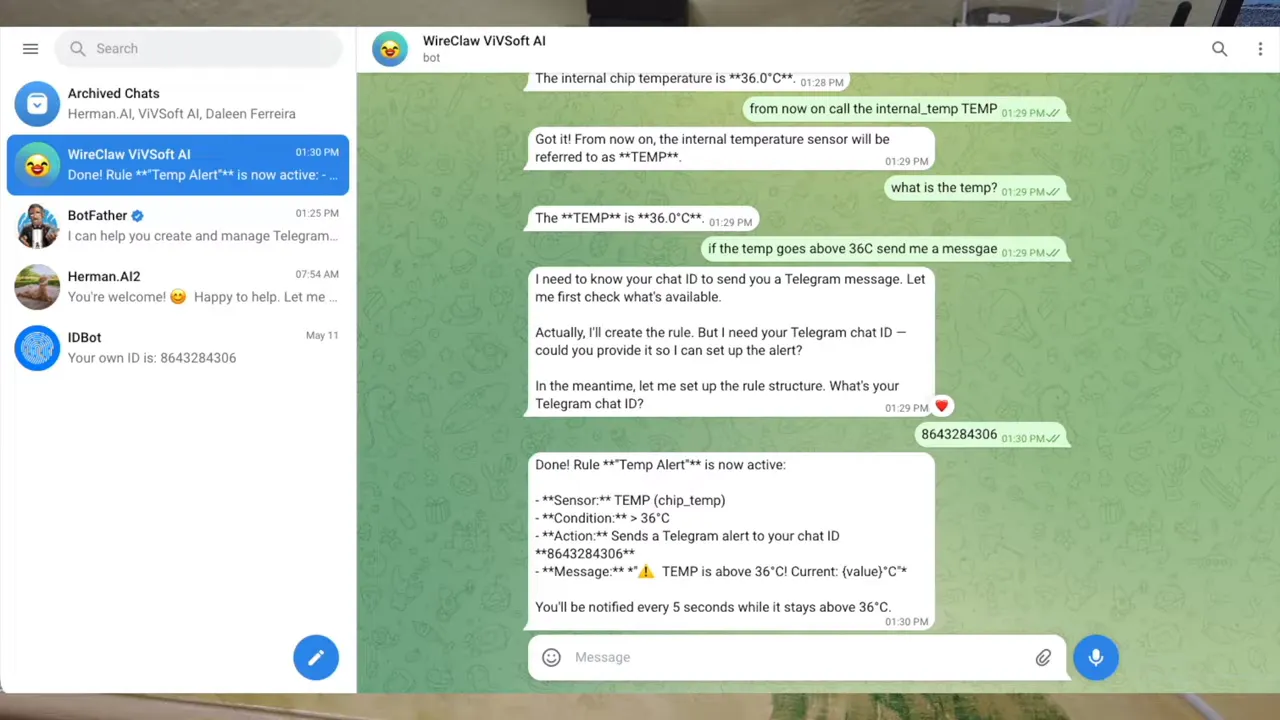
Creating automation rules with plain English
One of the most useful features in WireClaw is that it can create rules from natural language. Instead of writing logic manually, you describe what you want.
A simple example used here was:
If the temp goes above 36C, send me a message
WireClaw interpreted that as a monitoring rule. It wanted the Telegram chat ID for the notification target, even though the ID had already been configured. That is one of those moments where you can see the AI is useful, but not infallible. Supplying the chat ID manually solved it immediately.
Once accepted, the AI created a rule to check the chip temperature every five seconds and send a Telegram alert if the value exceeded 36°C.
The generated rule then appeared in the dashboard under the Rules section.
Why this matters beyond a demo
This is not limited to onboard devices like LEDs and temperature sensors. The same approach can be used for GPIO pins and external hardware. The basic pattern is:
- Read a condition on one pin or sensor
- Trigger an action on another pin or service
- Notify you through Telegram
So you could define logic such as:
- If input 5 goes high, set output 7 high
- If a threshold is crossed, send an alert
- If a device state changes, report it remotely
That makes the ESP32 a very capable automation companion for Meshtastic gear, especially when you want a self-contained system instead of another Linux box to maintain.
Reboots, persistence, and why this is practical
A project like this only becomes genuinely useful if it survives a power cycle. WireClaw does. After unplugging and reconnecting the board, it boots back up, rejoins Wi-Fi, reconnects to Telegram, and keeps its stored memory and rules.
Asking it something like What are your rules? after a reboot confirms that the configuration is still there. That persistence is a big deal, because it turns the board from a fun experiment into something you can actually deploy.
How this fits into a larger Meshtastic setup
On its own, WireClaw gives you AI-assisted control and remote messaging on a cheap microcontroller. Combined with a Heltec V4, it becomes something more interesting for Meshtastic: a dedicated bridge between local mesh traffic and internet-based messaging.
That is especially attractive if you want to expand what your Meshtastic network can do without dragging in a full computer. It is also a nice complement to other techniques such as MQTT for Meshtastic, where cloud connectivity can extend the usefulness of the mesh far beyond direct radio range.
If you are building out your own hardware stack, you can also browse more Meshtastic devices here.
What part one proves
By the end of this setup, the ESP32-S3 is doing all of the following:
- Running WireClaw AI locally on the microcontroller
- Connecting to Wi-Fi
- Talking to a cloud AI model through API calls
- Receiving commands in Telegram
- Controlling onboard hardware like the RGB LED
- Reading onboard sensor values like temperature
- Remembering aliases and conversational context
- Creating and storing automation rules
- Persisting that configuration across reboots
That is already a powerful little platform before even getting into the full Meshtastic bridge wiring. The second half of the project is where the ESP32 starts taking control of the attached Meshtastic node and forwarding network messages, but the foundation is all here.
FAQ
Do I need a Raspberry Pi to bridge Meshtastic to Telegram in this setup?
No. That is the whole point of this build. The bridge logic is moved onto a small ESP32-S3 running WireClaw AI, paired with a Meshtastic device such as a Heltec V4.
What board was used to run WireClaw?
An ESP32-S3 board from Lonely Binary was used. It is a good reference-style board for ESP32 projects and includes Wi-Fi, GPIO, and an onboard RGB LED.
Does the ESP32-S3 in this project provide the LoRa radio for Meshtastic?
No. In this build, the ESP32-S3 is the AI and Wi-Fi side of the system. The Meshtastic radio side is handled by a separate Heltec V4 board.
What do I need to configure WireClaw after flashing?
You need your Wi-Fi SSID and password, an AI provider API key, model name, API URL, a Telegram bot token, and a Telegram chat ID.
How do I get the Telegram bot token and chat ID?
Create the bot with BotFather using the /newbot command to get the token. Use IDBot to retrieve the chat ID you want WireClaw to message.
Can WireClaw control hardware using normal language?
Yes. In the example setup, Telegram commands were used to change the onboard RGB LED color, read internal temperature, rename device labels, and create alert rules without manual scripting.
Do rules and memory survive a reboot?
Yes. After power cycling the board, WireClaw came back online with its saved configuration, stored memory, and automation rules intact.
Where can I learn more about WireClaw itself?
There is a fuller WireClaw walkthrough available here: full WireClaw video.